It’s a frustrating moment for any property owner: you’re getting ready to repaint a room and discover a patch of mold. The desire to take a shortcut is completely understandable. You might be asking yourself, can you paint over mold and still get a good result? While it seems like a quick fix, our professional experience shows this approach always leads to more work down the road. The moisture trapped by the paint allows the mold to thrive, and before you know it, the problem will reappear through your new finish. This article provides a clear game plan to avoid that frustrating cycle and get a flawless, long-lasting result.
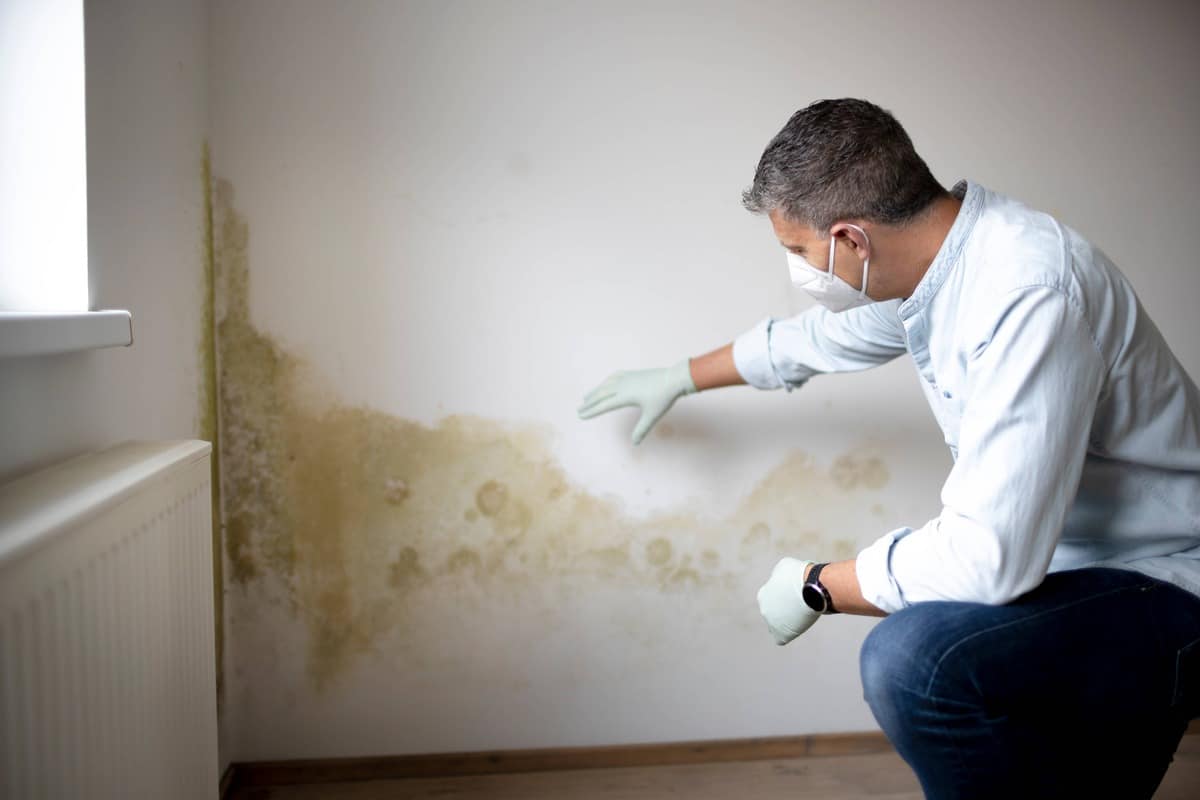
Mold is a common problem in homes and commercial buildings. If there’s moisture and oxygen present in the area, it’s just a matter of time before mold starts growing. When you notice dark spots from mold or mildew gradually appearing on your walls or ceiling, your first instinct may be to just paint over them. But will painting over the mold solve your problem? Let’s find out. In this blog, we will discuss the best course of action to deal with mold and whether or not you should paint over it.
So, What Exactly Is Mold?
Mold refers to the growth of fungi on surfaces inside a building due to excess moisture. It commonly appears black or green and thrives in damp environments. Mold is not only damaging to your building materials and belongings, but it also poses significant health risks, such as allergies, skin irritations, and breathing problems. Mold spreads by releasing spores in the air, which also deteriorates your air quality.
Can You Just Paint Over Mold?
Painting over mold might restore the look of your living space, but it doesn’t solve the underlying problem of mold growth, since the mold will still be present. The paint will simply cover the visual presence of mold, such as dark spots and spores. However, the mold will not be eliminated. It will actually keep growing and, sooner or later, may reappear. Therefore, it’s best to get rid of the mold first before painting over the surface.
What Really Happens When You Paint Over Mold?
If you paint over mold, you won’t get rid of the mold. Instead, the paint will only hide the mold. Since the underlying cause of the mold was not addressed, over time, the mold will continue to grow and may become visible through the paint. The paint will start to bubble, crack, and peel due to moisture from the mold.
The Right Way to Paint a Wall with Mold
It’s clear that you cannot paint over mold if you want your painting job to last and maintain a healthy indoor environment. So what’s the right way to paint walls that have mold and permanently address the issue? Let’s find out.
First, Tackle the Mold at Its Source
The first step for dealing with moldy walls is to remove the mold. Your main focus should be on finding the root cause of the mold and eliminating it from its source. It’s best to call a mold remediation company. Once the mold is removed, you’ll need to take additional steps to prevent the mold from recurring.
Assess the Damage: Clean or Replace?
Once you’ve stopped the source of moisture, you need to decide how to handle the affected drywall. Is it a simple clean-up job, or does the material need to be replaced? While cleaning surface mold might seem sufficient, it’s important to remember that mold often grows deeper than what you can see. There’s a strong chance it has penetrated the drywall, growing inside the wall where you can’t reach it. For this reason, most experts recommend replacing the moldy drywall altogether. This is the most certain way to get rid of the mold for good and prevent it from returning. If you don’t replace it, the mold might come back, especially if any humidity lingers. A professional can help you assess the extent of the damage and determine the best course of action.
Safety First: Gear Up for Mold Removal
If you’re dealing with a very small area of surface mold and decide to handle it yourself, your safety should be your top priority. Mold releases spores that can be harmful if inhaled, so it’s crucial to protect yourself. Before you start, always put on the right protective gear, including gloves, goggles, and a respirator or N95 mask. This will help you avoid direct contact with the mold and prevent you from breathing in any spores. Also, make sure the room is well-ventilated by opening windows and using fans. This is especially important when you’re using strong cleaning solutions or primers. For anything more than a small patch, calling in professionals is the safest bet, as they have the right equipment and training to handle mold removal safely and effectively.
Next, Clean and Thoroughly Dry the Area
Once your space is free of mold, you can start cleaning and drying it. Remove and discard all the belongings affected by mold. If your walls aren’t dry and you paint over them, the moisture will be trapped, which will put your home at risk of mold again. Therefore, it’s best to wait till the walls are fully dry.
Effective Cleaning Solutions
After the source of the moisture is fixed and any major mold is removed, your next job is to deep clean the surface. You absolutely cannot skip this step. Any lingering mold spores must be eliminated before you even think about picking up a primer or paintbrush. You can find strong mold-killing products at most home improvement stores. Follow the product’s instructions carefully, which usually involve scrubbing the area well and then letting it dry completely. And I mean completely. Patience is key here; trapping any moisture under a new coat of paint will just bring you back to square one. If the job feels too big or you want to be certain it’s done right, our expert interior painting team can handle the prep work to ensure a flawless and lasting finish.
The Debate on Using Bleach
Many people reach for a bottle of bleach to clean mold, and it’s a hot topic in the home improvement world. While bleach can kill surface mold, many professionals warn against it. The reason? Mold can sometimes feed on the bleach, and the water in a diluted bleach solution can provide the very moisture the mold needs to grow back, sometimes even worse than before. A safer bet is often a commercial anti-mold spray designed specifically for this purpose. These products are formulated to kill mold spores at the root. You typically spray the solution on, wash the wall, and then apply a light final spray to sit overnight, ensuring all the microscopic culprits are gone for good.
Don’t Skip the Primer
Once your walls have dried, the next step is to apply primer to the walls. While paint cannot kill mold, applying a coat of primer on your walls before painting can result in better paint adhesion.
Use a Mold-Killing Primer
After the wall is clean and dry, it’s time to prime. But not just any primer will do. You’ll want to use a mold-killing or mold-resistant primer. It’s important to understand what these primers actually do. They don’t kill existing mold—that’s why the cleaning step is so critical. Instead, these primers contain special agents, called mildewcides, that prevent mold and mildew from growing on the surface of the primer film itself. Think of it as creating a protective, mold-resistant shield for your new paint. This step is essential for a lasting finish, especially in moisture-prone areas like bathrooms, basements, or kitchens. If the mold damage was severe, the drywall itself might need to be replaced before any priming or painting can begin.
Block Lingering Stains
Even after you’ve thoroughly cleaned the area, you might be left with faint, stubborn stains from the old mold. Just painting over them won’t work; these stains have a nasty habit of bleeding through fresh paint over time. To stop this, you need a stain-blocking primer. After the surface is completely dry, apply a coat of a high-quality stain blocker. This product creates a barrier that seals in the stain, ensuring it won’t reappear and ruin your new paint job. For the best and most durable results, follow the primer with two coats of a quality, mold-resistant paint. This two-part process of blocking the stain and then applying a protective topcoat is key to achieving a flawless, professional finish that lasts.
Choose the Right Paint for the Job
After applying primer to the walls, choose a suitable color and start the painting process. Choose your paint type carefully; use water-based or latex paints because they are mold-resistant, which makes them ideal for this particular task. We recommend not using oil-based paints because they contain ingredients that can feed mold growth if the paint is exposed to humidity or if mold spores are still present in the air.
Select Mold-Resistant Paint and Finishes
When you’re at the paint store, head straight for the water-based or latex paints. These formulas are your best friends in the fight against mold because they are breathable and don’t contain the organic compounds that mold loves to eat. On the other hand, you should steer clear of oil-based paints for this particular project. While they have their uses, in a moisture-prone area, the oils and solvents in the paint can actually become a food source for any lingering mold spores, completely undermining all your hard prep work. Choosing the right paint is a critical step in any expert interior painting project, especially when you’re dealing with the aftermath of mold.
Consider Anti-Mold Additives
For an extra layer of security, you can enhance your chosen paint with an anti-mold additive. These are special treatments, often sold in small bottles right next to the paint, that you can mix directly into your can of latex paint. These additives contain fungicides that make the dried paint film even more resistant to future mold and mildew growth. While mold-resistant paint is already a great start, an additive provides that extra peace of mind, especially for chronically damp areas like bathrooms, basements, or laundry rooms. Just be sure to follow the manufacturer’s instructions for the correct ratio of additive to paint to ensure it works effectively.
Proper Application for a Lasting Finish
You’ve done the hard work of cleaning the mold and selecting the perfect paint, but your technique is what will truly determine the success of the job. Don’t cut corners here. For the best results, you must apply at least two full coats of a high-quality, mold-resistant paint. The first coat acts as a final seal, while the second coat builds a durable, uniform finish that can stand up to moisture and cleaning. It’s also vital to let each coat dry completely according to the manufacturer’s instructions. Rushing this process can trap moisture between layers, creating the very problem you’re trying to solve. Investing in a premium paint brand will also pay off, as these products have better binders and pigments that create a less porous, more resilient surface.
Achieving a flawless, long-lasting finish requires attention to detail. You need to ensure the paint is applied evenly, without any thin spots, drips, or missed corners where mold could potentially find a new home. This is where professional experience makes a significant difference. A professional painter has the right tools and a steady hand to ensure every inch of the surface is properly coated and protected. When you hire a team that stands behind their work, you’re not just paying for paint on a wall; you’re investing in a healthy, beautiful home and the assurance that the job is done right. That’s why we back every project with our service guarantee, ensuring your satisfaction and a durable result.
Why Removing Mold First is Non-Negotiable
Proper mold removal is crucial before painting because painting over mold is a surface-level fix to a serious underlying problem. Mold growth will continue under the paint, eventually causing the paint to crack and leading to more extensive damage to your walls. It is necessary to thoroughly remove the mold, clean the walls, and address the underlying moisture issues before painting. Proper mold remediation ensures a lasting paint job and a healthier living environment.
Your Game Plan for a Mold-Free Finish
Before you consider painting over mold, it’s crucial to understand that painting alone is not a solution. The most important first step is proper mold removal. Thoroughly clean and remove all visible mold using appropriate gear and cleaning solutions designed for mold remediation. If needed, call for professional mold removal services. Once the mold is removed, address the underlying cause of the mold growth. Mold thrives in damp conditions, and common culprits include water leaks and high humidity. Investigate any signs of water damage, such as leaky pipes, roof leaks, or foundation cracks, and repair them promptly. When it comes to painting, select paints and primers specifically formulated to resist mold and mildew growth. You can call professional painters to make sure you get the best painting results.
Frequently Asked Questions
I only see a tiny spot of mold. Can I just paint over that? Even a small spot of mold is usually a sign of a bigger moisture problem hiding behind the wall. Painting over it is like putting a bandage on a wound that needs stitches. The paint will trap the moisture, allowing the mold to keep growing underneath. Before you know it, your new paint will start to bubble and peel, and the mold will reappear, leaving you right back where you started.
Is it okay to use bleach to clean the mold off my walls? Many people reach for bleach, but it’s not the best tool for this job. While bleach can kill surface mold, its water content can actually soak into porous surfaces like drywall and feed the mold spores that are deeper inside. A better approach is to use a commercial cleaning product specifically designed to kill mold at its root without adding extra moisture to the wall.
Do I really have to replace the drywall, or can I just clean it? While cleaning the surface is a necessary step, it often isn’t enough. Mold has roots that can grow deep into the drywall, far beyond what you can see. If you only clean the surface, those roots can remain and the mold will likely grow back. Replacing the affected drywall is the most reliable way to remove the problem completely and ensure it doesn’t return.
What does a mold-killing primer actually do? This is a great question because the name can be a little misleading. A mold-killing or mold-resistant primer doesn’t kill mold that’s already there; that’s what the cleaning step is for. Instead, it contains special agents that create a protective barrier, preventing new mold spores from growing on the surface of your paint job. Think of it as a shield for your fresh paint.
When should I stop and call a professional for help? If you’re dealing with a mold patch larger than a small dinner plate, or if you smell a persistent musty odor even after cleaning, it’s time to call in professionals. They have the right safety gear and equipment to handle widespread mold safely and can accurately identify and fix the source of the moisture, which is the most critical step in the entire process.
Key Takeaways
- Don’t Just Cover It Up: Painting directly over mold is a short-term solution that creates a long-term headache. The mold will continue to grow underneath, causing the new paint to peel and bubble, forcing you to redo the work later.
- Address the Root Cause First: A lasting fix requires you to find and repair the source of the moisture before you do anything else. After that, you must completely remove the mold, which often means replacing the affected drywall to get rid of any hidden spores.
- Use the Right Products for a Durable Finish: After cleaning, always apply a stain-blocking, mold-resistant primer to seal the surface. Follow this with two coats of a high-quality, water-based (latex) paint, which creates a breathable finish that helps prevent future growth.