Thinking about a bathroom refresh but dreading the thought of a full renovation? All that dust, disruption, and decision-making can be overwhelming. But what if you could get that fresh, updated feeling without tearing out a single tile? The secret is painting bathroom cabinets. It’s one of the most impactful, budget-friendly ways to completely transform your space. The right color can make a small bathroom feel larger and an outdated one feel modern and chic. This guide is packed with ideas to help you find the perfect shade and breathe new life into your room. If you would rather leave this project to the experts, our guide to finding a bathroom cabinet painter can help you compare your options.
Key Takeaways
- Preparation is non-negotiable for a durable finish: The secret to paint that won’t chip or peel is taking the time to properly clean, sand, and prime your cabinets. This creates the perfect surface for the paint to adhere to, ensuring your hard work lasts.
- Choose the right paint and finish for the job: Standard wall paint won’t survive a bathroom’s humidity. Opt for a durable cabinet or trim paint in a satin or semi-gloss finish, and always apply a clear top coat to protect your work from moisture and daily wear.
- Complete the look with color and hardware: Your cabinet color sets the mood for the entire bathroom, so choose a shade that reflects your personal style. Don’t forget to swap out the hardware; new knobs or pulls are the finishing touch that ties the whole project together.
What Color Should You Paint Your Bathroom Cabinets?
Choosing a new color for your bathroom cabinets is one of the most impactful ways to refresh your space without committing to a full renovation. The right paint color can completely change the room’s mood, making it feel brighter, cozier, more spacious, or more luxurious. While the endless paint swatches at the hardware store can feel a bit daunting, this is also where the fun begins. It’s your chance to put a personal stamp on a room you use every single day. Think of your cabinets as a canvas for expressing your style, not just a functional part of the room.
Whether you dream of a serene, spa-like retreat or a bold, dramatic powder room, there’s a color palette that’s perfect for you. We’ve gathered some inspiring ideas to help you find a shade you’ll love waking up to every morning. From timeless neutrals that create a clean slate to rich, moody hues that make a statement, these suggestions can guide your decision. A fresh coat of paint is a relatively small change that delivers a huge visual reward. And remember, our team of professional cabinet painters is always here to help you achieve a flawless, durable finish that brings your vision to life, ensuring your cabinets look beautiful for years to come.
Create a Timeless Look with Soft Neutrals
You can never go wrong with a classic neutral. Colors like crisp white and soft cream instantly make a bathroom feel clean, bright, and airy. This is an especially great choice for smaller bathrooms, as lighter colors reflect light and create an illusion of more space. For a warmer, more inviting atmosphere, consider shades like taupe or greige (a perfect blend of gray and beige). These sophisticated tones can transform your bathroom into a relaxing, spa-like sanctuary. Neutrals are incredibly versatile, providing a beautiful backdrop that complements nearly any hardware, countertop, or decor style you choose.
Make a Statement with Bold, Moody Hues
If you want your bathroom to make a statement, don’t be afraid to go bold. Deep, moody colors like navy blue, rich charcoal, or even a striking matte black can add a serious dose of drama and sophistication. These shades create a sense of luxury and depth, turning your cabinets into a stunning focal point. To complete the high-end look, pair these dark colors with metallic hardware in brass or gold for a beautiful contrast. A bold color choice on your cabinets can anchor the entire room’s design without feeling overwhelming, giving your space a custom, designer feel.
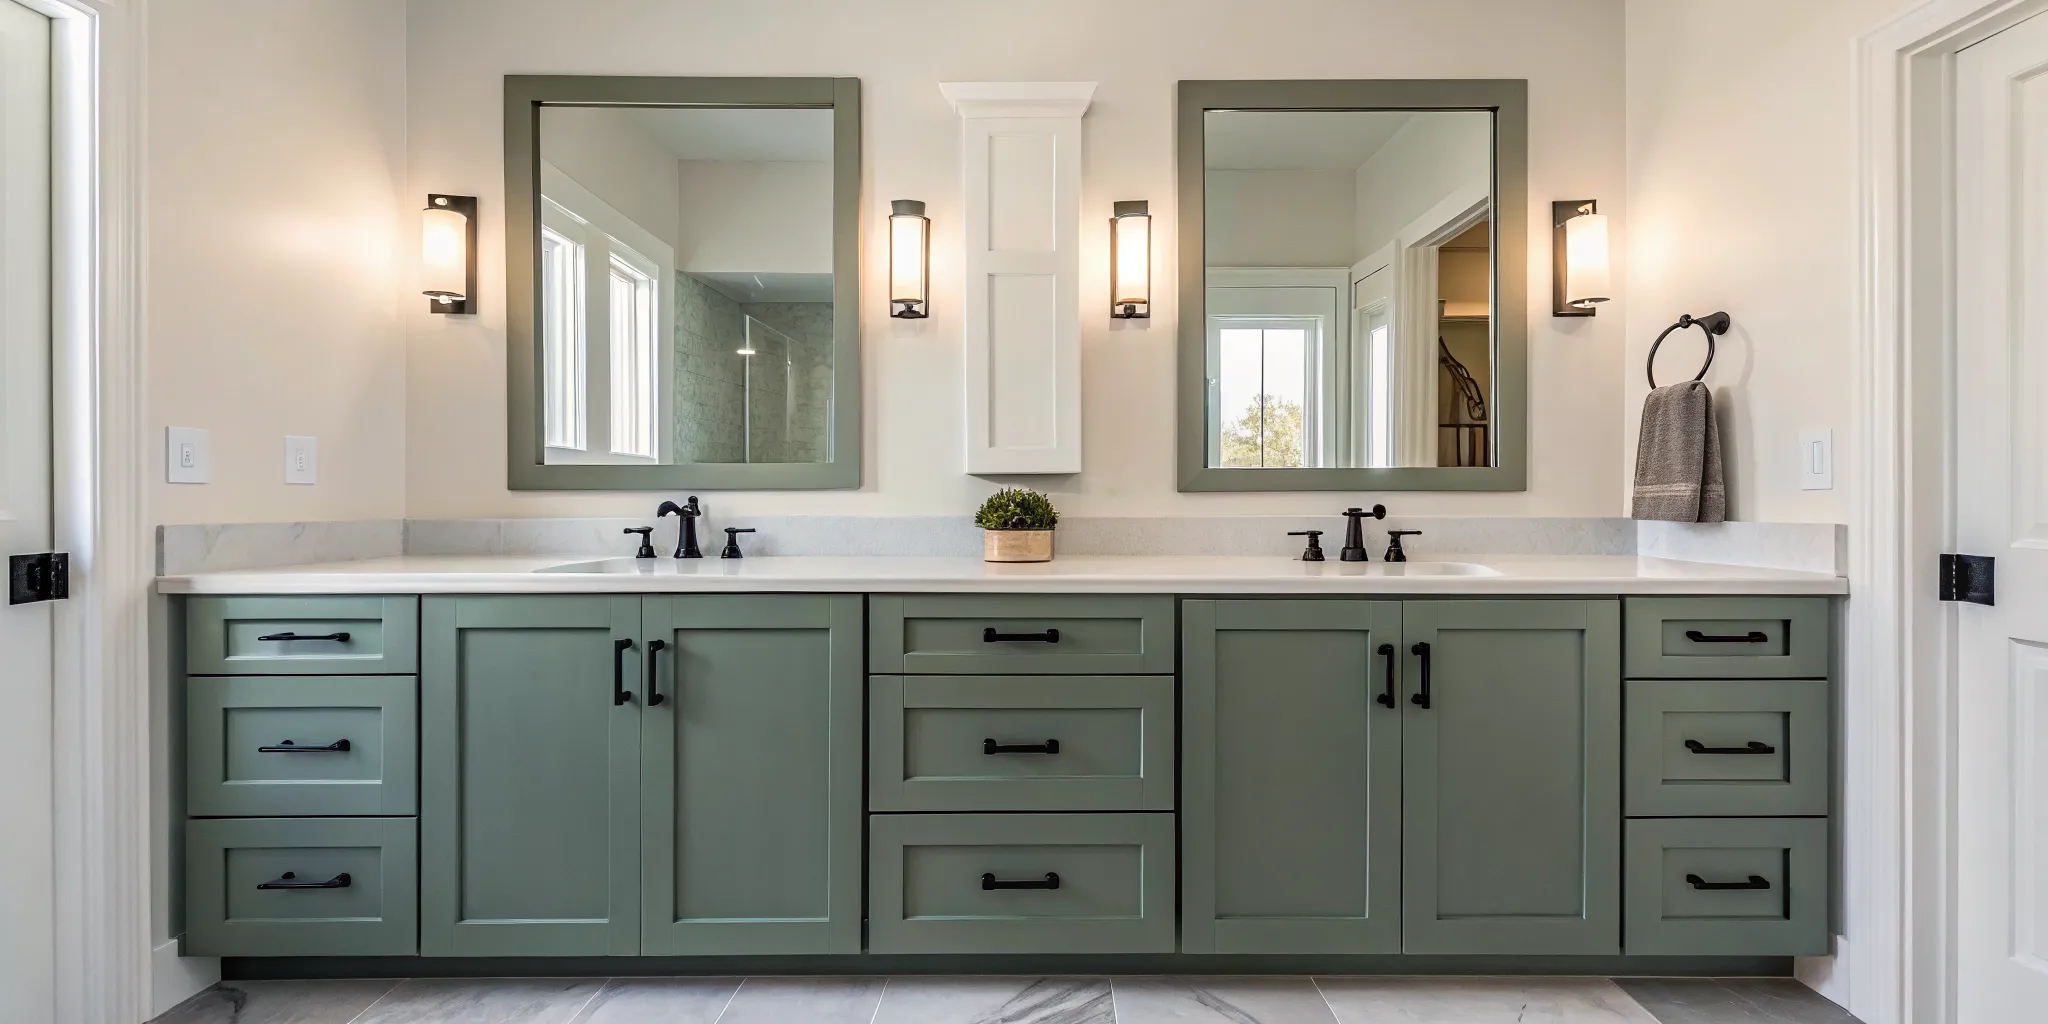
Design a Spa-Like Retreat with Serene Greens and Blues
Bring the calming essence of nature into your bathroom with fresh, serene colors. Soft, earthy hues like sage green, eucalyptus, or a gentle sea blue can create a tranquil environment perfect for unwinding. These colors are wonderful for turning your bathroom into a personal retreat where you can relax and recharge. They pair beautifully with natural materials like wood accents, stone countertops, and live plants. Our expert cabinet painters can help you select the perfect shade to create a peaceful oasis that feels both modern and timeless.
Add a Touch of Warmth with Earthy Tones
For a look that’s both unique and inviting, consider embracing warm tones. Rich, earthy browns can ground your space, adding an organic warmth that feels both cozy and sophisticated. Another surprisingly chic option is a soft blush pink. Far from being overly sweet, a muted blush can act as a “new neutral,” adding a touch of warmth and personality that brightens the room. These colors are perfect for anyone wanting to step away from traditional whites and grays while still maintaining a welcoming and stylish atmosphere in their bathroom.
Get Creative with a Two-Tone Look
Why settle for one color when you can have two? A two-tone design adds instant depth and visual interest to your bathroom cabinets. A popular approach is to paint the lower cabinets a darker, grounding color and the upper cabinets or open shelving a lighter, brighter shade. This technique draws the eye upward and can make the room feel larger. You could also paint a freestanding vanity a standout color while keeping the rest of the cabinetry neutral. This custom look requires precision, which is why our professional work is backed by a service guarantee you can trust.
How to Choose the Best Paint for Bathroom Cabinets
Once you’ve landed on the perfect color, the next step is choosing the right materials. The type of paint and finish you select is critical for a cabinet refresh that not only looks great but also holds up to the unique challenges of a bathroom environment. Think steam from hot showers, splashes from the sink, and the constant opening and closing of doors and drawers. The right products will protect your cabinets and keep them looking fresh for years, while the wrong ones can lead to peeling, chipping, and a finish that’s hard to clean.
This is where a little bit of product knowledge goes a long way in preventing a DIY project from turning into a redo in a year. You want a finish that can be wiped down easily and won’t break down after a few steamy showers. The first major decision is the paint itself. You need a formula specifically designed to handle high humidity. Next, you’ll choose a sheen, which impacts both the look and the cleanability of the surface. Finishes like satin or semi-gloss are popular for a reason. Finally, and most importantly, is the prep work. A quality primer is the unsung hero of a durable paint job, creating the perfect bond between the cabinet and the new color. Let’s walk through each of these key choices.
Recommended Paint Types and Brands
Walking into the paint aisle can feel like a pop quiz you didn’t study for. With so many cans, labels, and formulas, how do you know which one is right for your bathroom? The key is to look for paints specifically designed for high-traffic, high-moisture areas. Standard wall paint simply won’t cut it. You need a product that creates a hard, durable shell that can resist moisture and be wiped clean without losing its luster. Choosing the right type of paint is just as important as the color, as it’s the foundation of a finish that will look professionally done and stand the test of time.
Water-Based vs. Oil-Based Paints
The main choice you’ll face is between water-based and oil-based paints. Water-based paints, like acrylic enamel, are popular with DIYers because they have low fumes and clean up easily with just soap and water. They also tend to dry faster and are less likely to yellow over time, keeping your white cabinets looking crisp. On the other hand, oil-based paints, often called alkyd paints, are known for creating an incredibly strong and durable finish. This makes them an excellent choice for high-moisture bathrooms. The trade-off is that they have a stronger smell, require mineral spirits for cleanup, and take longer to cure.
Specific Product Recommendations
For a finish that rivals the pros, you’ll want to invest in a high-quality paint designed for cabinetry. Products like Benjamin Moore Advance Waterborne Alkyd, Behr Urethane Alkyd Enamel, and Sherwin Williams Emerald Urethane Enamel are all fantastic options. These paints are engineered to level out smoothly, cure to a hard, furniture-grade finish, and stand up to daily use. For specific product recommendations, see our guide to the best paint for bathroom vanity cabinets. Just as important as the paint is the primer. A shellac or oil-based primer is best, as it seals the wood, blocks stains, and creates a strong foundation for the paint to grip. Our team of expert cabinet painters relies on these types of high-performance products to deliver a flawless, long-lasting finish every time.
Why Moisture-Resistant Paint Is a Must
Your bathroom is a high-humidity zone, so your cabinet paint needs to be up for the challenge. It’s essential to use a durable, water-resistant paint specifically designed for cabinets or trim. Standard wall paint just won’t do the trick; it can absorb moisture from steamy showers, leading to bubbling, peeling, and a finish that fails long before its time. Choosing a moisture-resistant formula ensures your hard work pays off with a beautiful, long-lasting result. Our team of expert interior painting professionals always uses high-quality paints formulated to withstand moisture, protecting your investment and keeping your bathroom looking its best.
Satin or Semi-Gloss? How to Pick the Right Sheen
The paint’s sheen, or finish, affects both the look and durability of your cabinets. For bathrooms, a satin or semi-gloss finish is your best bet. Both options offer a durable, scrubbable surface that’s easy to wipe clean, which is a must for handling splashes and smudges. Satin provides a soft, subtle glow, while semi-gloss has a bit more shine and reflects more light. A higher-gloss finish is generally more durable and moisture-resistant. We typically advise against flat or matte sheens for bathroom cabinets, as their porous texture can trap moisture and stains, making them difficult to maintain. Our professional cabinet painters can help you choose the perfect sheen for your desired look and lifestyle.
Why You Shouldn’t Skip Primer
Prepping your cabinets properly is the secret to a flawless, professional-looking paint job, and primer is a step you absolutely cannot skip. Think of primer as the foundation for your paint. It ensures the paint adheres properly to the surface, preventing chips and peeling down the road. It also blocks old stains or wood tannins from bleeding through and discoloring your new paint color. Furthermore, primer creates a smooth, uniform base, which helps you achieve a richer, more even color with fewer coats of paint. Skipping this step is one of the biggest DIY mistakes we see. It’s a critical part of our process and is backed by our service guarantee for a reason.
Why a Separate Primer is Essential
Let’s be clear: primer isn’t just “paint before the paint.” It’s a completely different product with a crucial job. Using a “paint and primer in one” might sound like a convenient shortcut, but for a high-touch surface like cabinets, it’s a shortcut to chipping and peeling. A separate, dedicated primer creates a powerful bond between the cabinet surface and the topcoat of paint. It also acts as a sealer, blocking stubborn wood tannins or old dark colors from bleeding through and ruining your beautiful new shade. Think of it as the essential handshake between the old surface and the new finish; without it, the whole relationship is weak. This is a non-negotiable step for any professional cabinet painters and should be for any DIYer, too.
Primer Recommendations for Best Results
When it comes to bathroom cabinets, not all primers are created equal. You need a high-adhesion, stain-blocking formula that can handle wood, laminate, or previously painted surfaces. For most cabinet projects, especially those involving raw wood or covering stains, a shellac-based primer is an excellent choice. It offers superior adhesion and is one of the most effective products for blocking stains and wood tannins, ensuring your crisp white finish actually stays crisp white. While they can have a strong odor and require specific cleanup, the professional-grade results are worth it. An oil-based primer is another strong contender, known for its durability and smooth finish.
Priming Over Dark Colors
If you’re making a dramatic change from a dark, moody cabinet color to a light and airy one, your priming strategy needs to be adjusted. One coat of primer likely won’t be enough to completely hide a dark navy or charcoal gray. To avoid frustration and endless coats of your expensive topcoat paint, plan on applying two coats of a high-quality stain-blocking primer. This extra step ensures you have a perfectly neutral, white canvas to work from. It allows your new, light color to look true to the swatch and achieve full, even coverage in fewer coats, saving you time and paint in the long run. It’s this attention to detail that leads to the kind of results our customers rave about in their reviews.
How to Prep Bathroom Cabinets for Painting
Let’s talk about the most important part of any painting project: the prep work. I know, it’s not the most glamorous step, but getting your cabinets ready is the secret to a flawless, long-lasting finish. Rushing this stage is the number one reason DIY projects end up looking, well, like DIY projects. Taking the time to properly prepare the surface ensures your new paint will adhere correctly and stand up to the daily wear and tear of a busy bathroom. This meticulous preparation is a non-negotiable for professional cabinet painters because it’s what guarantees a beautiful result that lasts for years. Think of it as laying the perfect foundation; without it, everything you build on top is at risk. A professional finish isn’t just about the final coat of paint; it’s about the careful, systematic work that happens before the can is even opened. From cleaning and sanding to protecting your space, each step builds on the last to create a surface that’s ready to accept paint and hold it beautifully. It’s this attention to detail that separates an okay job from a stunning transformation that you’ll love for a long time.
First, Remove All Doors and Hardware
First things first, take off all the cabinet doors and hardware. This includes every hinge, handle, and knob. It might seem like a hassle, but painting around these items is a recipe for messy edges and accidental drips. To stay organized, use painter’s tape to label each door with its corresponding location (e.g., “top left,” “under sink right”). Place the hardware for each door in a separate labeled baggie. This little trick will save you a major headache when it’s time to put everything back together. A clean, clear surface is much easier to work with and is the first step toward achieving that smooth, professional look you’re after.
Next, Clean and Degrease for a Flawless Finish
Your bathroom cabinets have seen it all, from hairspray and steam to toothpaste splatters. Before you even think about picking up a sander or a paintbrush, you need to give every surface a thorough cleaning. Paint simply won’t stick to grease, grime, or dust. Use a good degreasing cleaner, like a trisodium phosphate (TSP) substitute, and a sponge or cloth to wipe down the cabinet boxes, doors, and drawer fronts. Pay extra attention to the areas around the knobs and handles, as they tend to collect the most oil and residue from hands. Once clean, wipe everything down with a damp cloth and let it dry completely.
Repair Dings and Scratches
With your cabinets clean and degreased, it’s time to inspect them for any surface damage. Even small dings, scratches, or old screw holes can become glaringly obvious under a fresh coat of paint, detracting from the smooth finish you’re working so hard to achieve. To fix these, grab some high-quality wood filler or putty and a putty knife. Apply a small amount to each imperfection, pressing it firmly into the dent or hole. You want to slightly overfill it, as the putty will shrink a bit as it dries. This meticulous repair work is a cornerstone of what professional cabinet painters do to ensure a flawless outcome. Let the filler cure completely according to the product’s instructions—don’t rush this part, as it’s crucial for creating a perfectly smooth canvas for your primer and paint.
Sand for a Smooth, Lasting Finish
Sanding is a critical step that creates a slightly rough surface, or “tooth,” for the primer and paint to grip onto. Even if your cabinets don’t have a glossy finish, a light sanding will help the new paint adhere better and prevent it from chipping or peeling down the road. Use a 120- to 220-grit sandpaper and gently scuff up all the surfaces you plan to paint. Your goal isn’t to remove the old finish entirely, but just to dull it. After sanding, it’s crucial to remove all the dust. Use a vacuum with a brush attachment, followed by a tack cloth or a slightly damp microfiber cloth to ensure the surface is perfectly clean and ready for primer.
Sanding Techniques for a Professional Look
When you’re sanding, the goal is to be gentle but thorough. Always sand with the grain of the wood to avoid creating visible scratches that could show through your final coat of paint. For the large, flat areas of your cabinet doors, you can use a sanding block or an orbital sander on a low setting to make the work go faster. For detailed trim or curved edges, you’ll want to sand by hand to get into all the nooks and crannies. Remember, you’re just trying to create a slightly gritty texture for the primer to grab onto, not strip the cabinet down to bare wood. A light, even scuffing is all you need.
Using a Deglosser as a No-Dust Alternative
If the thought of sanding dust filling your home makes you want to abandon the project altogether, there’s another option: a liquid deglosser. Often called “liquid sandpaper,” this chemical solution works by lightly etching the existing finish to create a surface that primer can adhere to, all without creating a speck of dust. You simply wipe it on with a lint-free cloth, following the product’s instructions carefully. It’s a fantastic alternative for cutting down on mess, but because you’re working with chemicals, make sure your bathroom is well-ventilated by opening a window and turning on the fan.
Special Considerations for Laminate Cabinets
If your bathroom cabinets are laminate, the prep work is even more critical. Laminate is essentially a plastic coating over particleboard, creating a slick, non-porous surface that paint loves to peel away from. For these cabinets, you must use a special adhesion-promoting primer designed to stick to glossy surfaces. Even with the right primer, you should still lightly sand the laminate first to give that primer the best possible chance of bonding. Because getting a durable finish on laminate can be tricky, this is one area where calling in professional cabinet painters can save you a lot of frustration and ensure the job is done right the first time.
Finally, Protect Your Space with Tape and Drop Cloths
Now that your cabinets are prepped, it’s time to protect the rest of your bathroom. Just like with any expert interior painting project, protecting your surroundings is key. Use painter’s tape to create clean lines along the walls, floor, and any edges of the vanity that meet the cabinet boxes. Cover your countertops, sink, mirror, and floors with drop cloths or plastic sheeting. A clean workspace is essential, as dust and debris can easily get into your wet paint and ruin the smooth finish you’ve worked so hard to achieve. Taking a few extra minutes to tape and cover everything will make cleanup a breeze and ensure a crisp, professional result.
A Pro Tip for Perfect Paint Lines
Achieving those razor-sharp paint lines is what separates a good paint job from a great one, and the secret is all in how you use the tape. After applying painter’s tape along the edges where your cabinets meet the walls or countertops, take an extra second to run a putty knife or even a credit card along the edge. This simple action presses the tape down firmly, creating a tight seal that paint can’t seep under. It’s a small detail that our professional cabinet painters never skip. Then, once you’ve applied your final coat, don’t wait for it to cure completely. Carefully pull the tape off while the paint is still slightly tacky, pulling it away from the painted surface at a 45-degree angle. This breaks the paint film cleanly, leaving you with a flawless, crisp line.
Ready for a Custom Look? Try These Painting Techniques
A fresh coat of paint is a fantastic start, but if you want to give your bathroom cabinets a truly unique personality, a few creative techniques can make all the difference. These methods add character, depth, and a custom-designed feel that goes beyond a simple color change. Whether you’re aiming for a vintage vibe, a sophisticated finish, or just a bit more visual interest, these professional touches can transform your cabinets from standard to stunning. Exploring these options can help you achieve a look that feels perfectly tailored to your style and makes your bathroom feel brand new.
A Step-by-Step Painting Workflow
With all the prep work behind you, it’s time for the most rewarding part: the painting. This is where your vision starts to come to life. The workflow is simple but requires patience. Start by applying a quality primer, which you already know is the secret to a durable finish. Once the primer is completely dry, apply your first thin coat of moisture-resistant paint using a high-quality brush or roller. Don’t rush this; thin coats are key to avoiding drips and achieving a smooth surface. Let it dry completely—and I mean completely—before applying a second coat for full, even coverage. After the final coat has cured, you can reattach your doors and hardware. This methodical process is exactly how our professional cabinet painters ensure a flawless result that stands the test of time.
Create Depth with a Two-Tone Design
A two-tone design is a simple yet effective way to create a dynamic and stylish look. Instead of sticking to one color, you can play with contrasts to add dimension. For example, consider painting the vanity base a dark, grounding color like navy or charcoal, while leaving open shelves or upper cabinets in a lighter, complementary shade. This technique draws the eye and can make the space feel more thoughtfully designed. You could also paint the cabinet frames one color and the doors another for a modern, graphic effect. Our professional cabinet painters can help you map out a two-tone scheme that perfectly suits your bathroom’s layout and style.
Add Light Distressing for a Vintage Vibe
If you love the charm of farmhouse, rustic, or shabby-chic styles, light distressing can give your cabinets a beautiful, lived-in feel. This technique involves gently sanding the edges and raised details of the cabinets after painting to reveal a little of the wood or primer underneath. The key is to be subtle; you want the cabinets to look naturally aged over time, not heavily damaged. A lightly distressed finish adds character and warmth without overwhelming a small bathroom. It’s a wonderful way to add a touch of history and personality to your space, making your cabinets feel like a treasured vintage find.
Apply a Glaze for Subtle Texture
For a more refined and sophisticated finish, applying a glaze can add incredible depth and character. A glaze is a thin, semi-transparent color that you apply over your base paint. It settles into the grooves, corners, and details of your cabinet doors, creating subtle shadows and highlights. This technique enhances the architectural features of your cabinets and gives the color a richer, more complex appearance. Unlike distressing, which creates a rustic look, glazing often results in an elegant, antiqued finish that feels both timeless and custom. It’s a fantastic way to turn a simple paint job into something truly special.
Use a Foam Roller for a Flawless Finish
The secret to avoiding pesky brush strokes is choosing the right tools. While a brush is necessary for cutting in and painting detailed areas, using a small foam roller for the flat surfaces of your cabinet doors and frames is a game-changer. A high-density foam roller helps you achieve a smooth, even finish that mimics the look of a professional sprayer. It distributes the paint evenly without leaving lines or texture behind, which is crucial for a clean, modern appearance. This simple switch in your application method is a key step in achieving the flawless results you see in our expert interior painting projects.
Apply a Top Coat for Lasting Durability
In a high-moisture, high-traffic area like a bathroom, a protective top coat is not optional, it’s essential. After your final coat of paint has fully cured, apply a clear, water-based polyurethane or polycrylic sealer. This final layer acts as a shield, protecting your beautiful paint job from steam, splashes, scuffs, and stains. It also makes the cabinets much easier to clean. Skipping this step can lead to peeling, chipping, and water damage down the road, forcing you to repaint sooner than you’d like. A quality top coat ensures your hard work lasts, which is a core part of our service guarantee.
Durability and Timelines: What to Expect
You’ve picked the perfect color and are excited about the transformation, but you’re probably wondering: how long will this beautiful new finish actually last? Understanding the durability of painted cabinets and the timeline for the paint to fully harden helps set realistic expectations for your project. A professional paint job is an investment in your home, and knowing what to expect in terms of longevity and care will help you protect that investment. It’s not just about how the cabinets look the day the project is finished, but how they hold up to daily life for years to come. Let’s break down the lifespan of a quality paint job and the important difference between drying and curing.
How Long Will a Good Paint Job Last?
When done correctly with the right materials, a professional paint job on your bathroom cabinets can easily last for 5 to 10 years, and sometimes even longer. The key to this longevity lies in meticulous preparation and the use of high-quality products. Factors like thorough cleaning, proper sanding, and using a durable, cabinet-grade paint are what make the difference between a finish that chips in a year and one that stands the test of time. Applying a clear top coat is another crucial step that significantly enhances durability. This is why our team of professional cabinet painters is so focused on the prep work; it’s the foundation for a finish that looks beautiful and performs well for years.
Understanding Paint Drying vs. Curing Times
It’s important to know that “dry” and “cured” are two very different things. While your newly painted cabinets might feel dry to the touch within an hour or two, the paint is not yet fully hardened. This hardening process is called curing, and it can take up to 7 days or even longer, depending on the paint and humidity levels. During this curing period, the paint is still vulnerable to scratches, scuffs, and dings. That’s why it’s so important to be gentle with your cabinets and wait to reattach the hardware or place items back inside. This patience ensures a durable, long-lasting finish and is a key part of the professional process we follow, which you can learn more about on our About Us page.
Managing Normal Wear and Tear
Even with the most durable paint job, normal wear and tear is inevitable, especially in a high-traffic area like a bathroom. You’ll likely notice the first signs of wear on high-touch spots, like the areas directly around the knobs and handles. This is completely normal. The best way to protect against this is by ensuring a protective top coat was applied, as it acts as a sacrificial layer that shields the paint color underneath. To keep your cabinets looking their best, clean them gently with a soft cloth and mild soap and water, avoiding harsh chemicals or abrasive scrubbers. A little bit of mindful care can go a long way in extending the life of your beautiful new finish.
Painting Bathroom Cabinets? Avoid These Common Mistakes
Painting your bathroom cabinets can completely transform the space, but a few common missteps can turn a dream project into a frustrating ordeal. Even with the best intentions, it’s easy to make small errors that affect the final look and longevity of your finish. Knowing what to watch out for is half the battle. Whether you’re tackling this project yourself or just want to understand what goes into a quality job, avoiding these mistakes is key to achieving a smooth, durable, and professional-looking result that you’ll love for years to come. A successful cabinet painting project is all in the details, from the initial prep work to the final hardware choices. When done right, your freshly painted cabinets will look amazing and stand up to daily use.
Mistake 1: Skipping the Prep Work
It’s tempting to jump right into painting, but skipping preparation is the fastest way to a finish that peels, chips, and fails. Proper prep is the foundation of a lasting paint job. As many DIYers have learned the hard way, it’s crucial to clean, degrease, and sand the cabinets thoroughly before a single drop of paint is applied. This process removes grime, grease, and glossy finishes that prevent the new paint from sticking. Taking the time to create a clean, slightly rough surface ensures the primer and paint can form a strong bond. This is a non-negotiable step for our team of professional cabinet painters because we know it’s what makes the difference between a short-term fix and a long-lasting transformation.
Mistake 2: Applying Coats That Are Too Thick
When it comes to painting, more is not always better. A common mistake is to apply the paint too thickly, hoping to get the job done in a single coat. Unfortunately, this often leads to unsightly drips, an uneven texture, and a longer, more complicated drying process. Instead, focus on applying multiple thin coats. This technique helps the paint level out smoothly and creates a much more durable finish that is less prone to chipping. It might feel like it takes more time, but the smooth, factory-like finish you get in the end is well worth the extra effort and patience.
Mistake 3: Not Allowing Enough Dry Time
Patience is a virtue, especially when painting cabinets. Rushing the drying process is a recipe for disaster. You must let the paint dry completely between coats and before you even think about putting the doors and hardware back on. Touching the surface too soon can leave you with smudges, fingerprints, and tacky spots that ruin your hard work. Keep in mind that “dry to the touch” is different from fully cured. A cured finish is hard and durable, ready for daily use. Following the paint manufacturer’s instructions for dry and cure times will ensure your beautiful new finish stays that way.
When to Remove Painter’s Tape
Timing is everything when it comes to removing painter’s tape. If you pull it off too soon, you risk smudging your work. If you wait too long, the paint can dry and bond to the tape, causing it to peel away from the cabinet and ruin your crisp lines. The sweet spot is when the paint is still slightly tacky to the touch, but not wet. To remove it, pull the tape back on itself at a 45-degree angle. This technique helps shear the paint cleanly, giving you that sharp edge you’re looking for. It’s a good idea to have a small artist’s brush handy for any minor touch-ups that might be needed. This final detail is just as important as learning how to properly prep bathroom cabinets for painting, ensuring a truly professional result.
Mistake 4: Choosing the Wrong Paint Type
The bathroom is a high-humidity environment, and your paint choice needs to reflect that. Using standard flat wall paint on your cabinets is a mistake because it simply won’t hold up to the moisture and frequent cleaning. You should always choose a high-quality paint specifically designed for cabinets or trim, such as a satin or semi-gloss acrylic latex enamel. These paints are formulated for durability and moisture resistance, which helps prevent peeling and makes them easy to wipe down. Selecting the right product is a key part of any expert interior painting project and is essential for a finish that lasts in a challenging space like a bathroom.
Mistake 5: Forgetting to Update the Hardware
After all the work of painting, don’t let your old, dated hardware bring down the final look. Forgetting to update the knobs and handles is a missed opportunity to complete the transformation. Changing out the hardware is a simple and often inexpensive step that can make a huge impact on the overall style of your cabinets. Whether you choose sleek modern pulls or classic vintage knobs, new hardware acts as the finishing touch that ties the whole look together. It’s a small detail that takes your freshly painted cabinets from just “updated” to truly redesigned.
A Budget-Friendly Hardware Refresh
One of the simplest yet most impactful ways to complete the look of your freshly painted bathroom cabinets is by updating the hardware. After investing time and effort into painting, don’t let outdated knobs and handles detract from your beautiful transformation. Forgetting to update the hardware is a missed opportunity to complete the new look, keeping your cabinets from feeling truly redesigned rather than just refreshed. New hardware serves as the finishing touch that ties the entire project together.
When selecting new hardware, consider styles that complement your chosen cabinet color. Whether you opt for sleek modern pulls or classic vintage knobs, the right hardware can pull the whole aesthetic of your bathroom together. This small detail can significantly impact the room’s style, creating a cohesive and polished appearance. It’s a budget-friendly option that allows you to personalize your space and express your style without the need for a full renovation.
As you choose your new knobs and handles, think of them as an opportunity to add character and charm to your bathroom, ensuring that your cabinets not only look great but also reflect your unique taste. If you want a flawless finish but aren’t sure where to start, our team of professional cabinet painters can guide you through the process, from prep work to the final hardware installation.
DIY vs. Hiring a Pro: What’s Right for You?
Deciding whether to paint your bathroom cabinets yourself or hire a professional is a big part of the planning process. On one hand, there’s a certain satisfaction that comes from a successful DIY project. It can be a great way to refresh your space on a budget, and you get to take all the credit for the beautiful transformation. Many homeowners find that tackling a smaller project, like bathroom cabinets, is a manageable and rewarding experience. You have complete control over the pace, the color choices, and the process from start to finish.
On the other hand, a professional paint job offers peace of mind and a guaranteed high-quality finish without you having to lift a finger (or a paintbrush). Let’s be honest, painting cabinets correctly is a multi-step process that requires patience and precision. It involves more than just slapping on a coat of paint; there’s cleaning, sanding, priming, and careful application to think about. If the idea of dedicating a weekend (or more) to this task feels overwhelming, or if you’re worried about making mistakes that could be costly to fix, then calling in a pro is a smart move. Our team of expert cabinet painters has the tools and experience to deliver a flawless, durable finish every time. The choice really comes down to balancing your budget, your timeline, and how much hands-on work you’re ready for.
When It Makes Sense to DIY
Taking the DIY route can be a fantastic option if you’re working with a tight budget or simply love a good hands-on project. Painting your bathroom cabinets is a popular way to update the room without the cost of a full renovation. The key to a job that looks professional and lasts for years is all in the preparation. Before you even think about paint, make sure the cabinets are thoroughly cleaned and dry. A good primer is non-negotiable; it helps the paint adhere properly and ensures a durable finish. With careful work, many DIYers find their painted cabinets hold up beautifully for years without chipping or scratching.
When You Should Call a Professional
Sometimes, calling in a professional is the best decision you can make for your project and your sanity. If your cabinets are warped, significantly damaged, or have a tricky laminate surface that won’t hold paint well, an expert can assess the situation and provide the best solution. Hiring a pro is also the right move if you simply want to avoid the time commitment and potential mistakes of a DIY job. A professional team handles everything from prep to cleanup, delivering a smooth, factory-like finish that’s hard to achieve on your own. Plus, you get the confidence that comes with a service guarantee, ensuring the job is done right.
Achieving a Flawless, Factory Finish
A professional’s secret weapon for that perfectly smooth, “factory finish” is often a paint sprayer. Unlike brushes or rollers, which can leave subtle texture behind, a sprayer applies the paint in a fine, even mist, resulting in a flawless surface with no brush strokes in sight. This process is best done in a controlled environment, which is why our team often takes cabinet doors off-site. By painting them away from the dust and humidity of your home, we ensure nothing mars the finish as it cures. This meticulous approach, combined with professional-grade primers and durable top coats, is how our cabinet painters create a finish that’s not only beautiful but also incredibly tough—able to withstand the daily demands of a busy bathroom for years to come.
For Boise homeowners considering a larger cabinet painting project, explore cabinet painting in Boise for local service options and planning guidance.
Related Articles
- Creative Wall Painting Ideas for Every Room
- Kitchen Cabinet Painting: A Step-by-Step Guide
- Wall Painting for Living Room: A Complete Guide
- Painting Ceiling and Walls Same Color: The Pro Guide
Frequently Asked Questions
How long does it really take to paint bathroom cabinets? This is definitely not a one-afternoon project. If you’re doing it yourself, you should set aside a full weekend or more. The process involves removing doors, cleaning, sanding, priming, and applying multiple coats of paint. The most important part is allowing for proper drying time between each coat and a final curing period before you reattach the hardware. Rushing these steps is the quickest way to a finish that smudges or chips.
What paint finish is truly the best for a humid bathroom? For bathroom cabinets, you’ll want to choose either a satin or a semi-gloss finish. Both are designed to be durable and easy to clean, which is essential for a room that deals with steam and splashes. A satin finish offers a soft, subtle sheen, while a semi-gloss is shinier and reflects more light. We generally advise against matte or flat finishes here, as their porous texture can trap moisture and make cleaning difficult.
Do I have to sand my cabinets before painting, even if they aren’t glossy? Yes, this is a step you should never skip. Sanding isn’t about stripping the old finish off completely; it’s about creating a slightly rough surface that the new primer and paint can grip onto. This “tooth” is what ensures a strong bond and prevents your new paint from peeling or chipping over time. A light scuffing with fine-grit sandpaper is all you need to prepare the surface for a long-lasting finish.
My bathroom is small and has no windows. What colors will make it feel bigger and brighter? In a small or dark bathroom, light colors are your best friend. Shades like crisp white, soft cream, or even a very light greige (a mix of gray and beige) work wonders. These colors reflect light, which creates an illusion of more space and makes the room feel airy and open. Pairing these light cabinet colors with a good lighting fixture can completely transform a cramped space.
What is the main advantage of hiring a professional for this project? The biggest advantage is the quality and durability of the final finish. A professional team has the right tools, like paint sprayers, to create a perfectly smooth, factory-like surface that’s very difficult to achieve with a brush and roller. They also have a deep understanding of the meticulous prep work required for a paint job that will withstand the humidity and wear of a bathroom. Ultimately, it saves you time and provides peace of mind with a guaranteed, beautiful result.