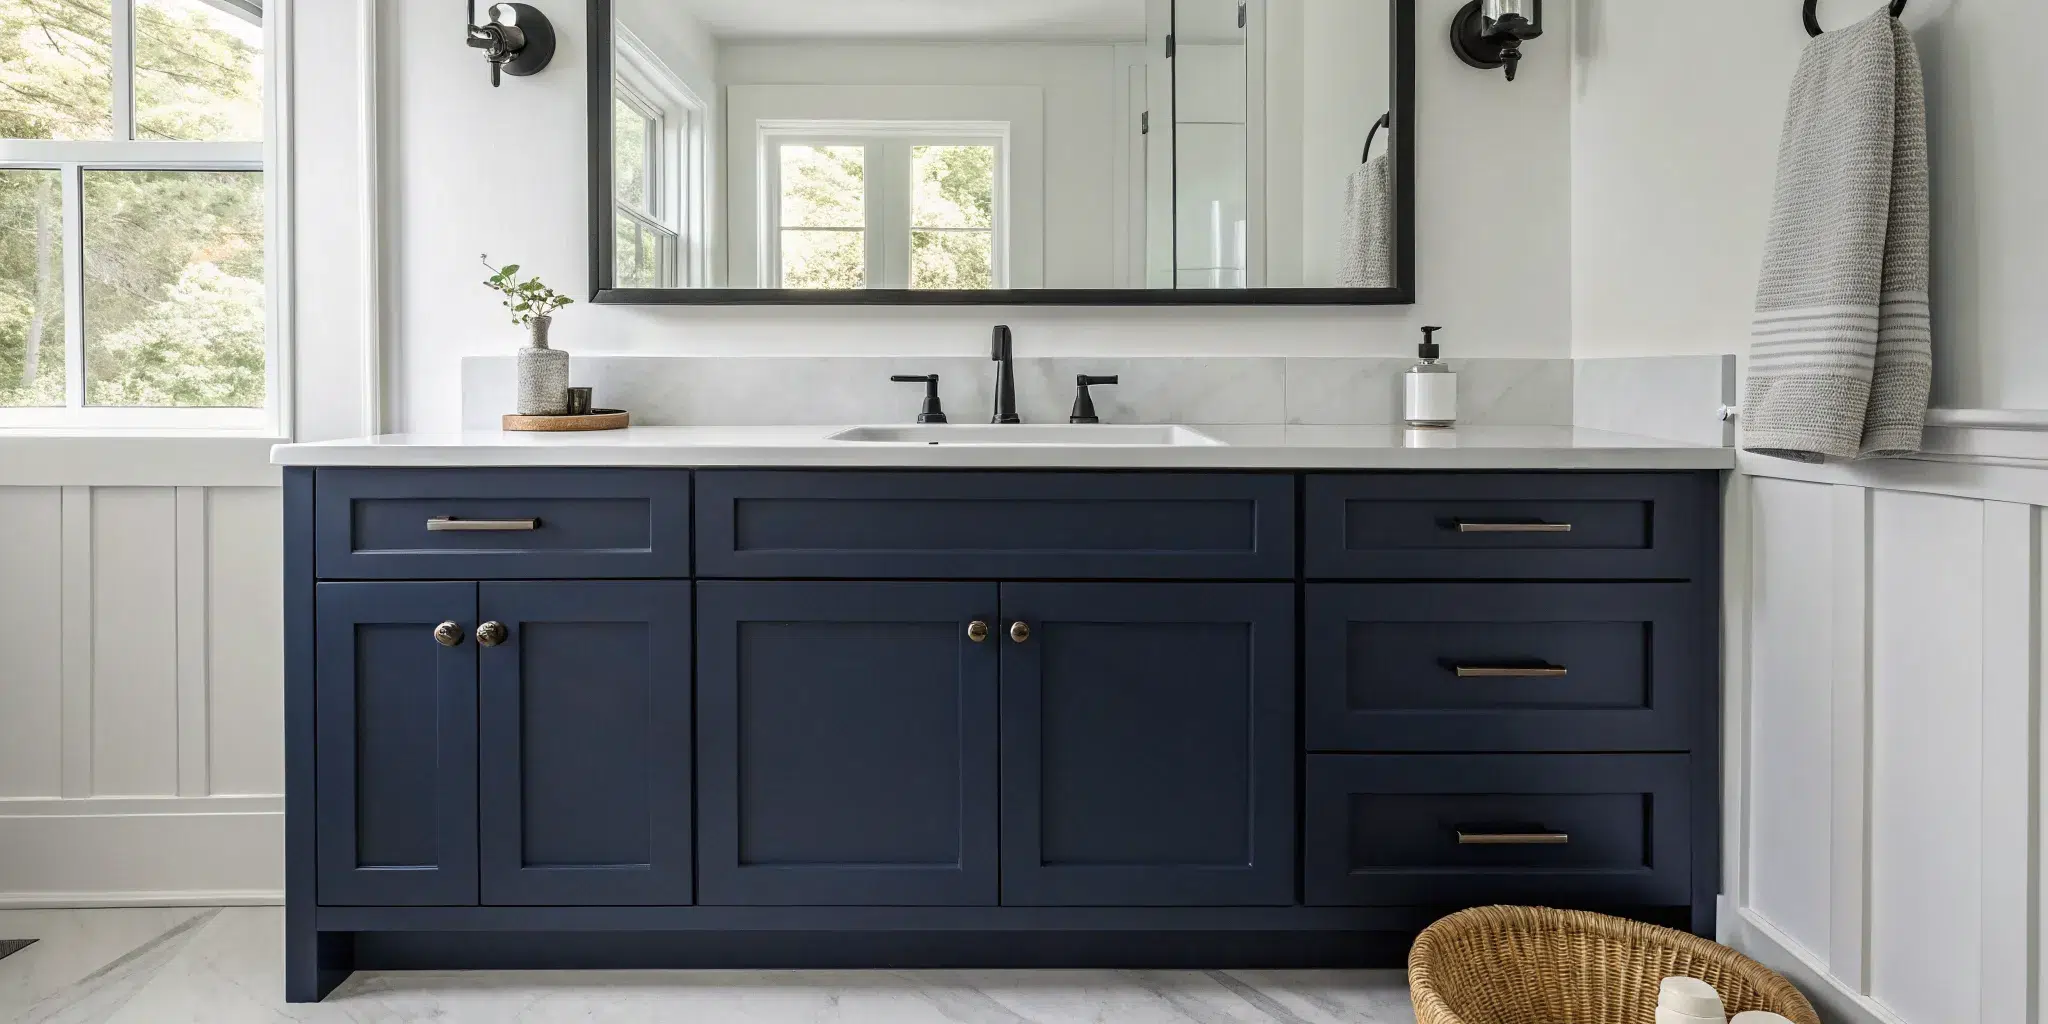
If you’ve ever wondered how professionals get that perfectly smooth, durable finish on cabinets, the answer is simpler than you think. It’s not a magic trick; it’s about using the right products for the right environment. A bathroom vanity faces a daily assault from moisture and use, and a standard wall paint just isn’t up to the task. To avoid the common pitfalls of chipping and peeling, you need a paint system—primer, paint, and sometimes a topcoat—that works together to create a tough, water-resistant shell. This guide will demystify the process and give you our top recommendations for the best paint for bathroom vanity cabinets, ensuring your project looks great for years.
Key Takeaways
- Prep is the most critical step: Your paint job’s longevity depends on a clean, scuffed, and primed surface. Always degrease, sand, and use a quality bonding primer before painting.
- Use paint made for cabinets: Standard wall paint will fail in a bathroom. Choose a durable enamel, like a waterborne alkyd or urethane, and consider a water-based topcoat to resist moisture and wear.
- Patience creates a professional finish: For a smooth result, apply thin coats, sand lightly between them, and wait for the paint to fully cure, not just dry, before reassembling your vanity.
What to Look for in Bathroom Vanity Paint
Choosing the right paint for your bathroom vanity is about more than just picking a color you love. Because vanities live in high-humidity, high-traffic spaces, the paint you select needs to be tough enough to handle daily life. Think about the constant steam from showers, water splashes from the sink, and frequent cleaning. The wrong paint will quickly peel, chip, or stain, undoing all your hard work in no time. To get a beautiful, long-lasting finish that looks professional, you need to focus on a few key qualities: moisture resistance, durability, adhesion, and the right sheen. Getting these details right is the secret to a vanity that looks great for years.
Moisture and Humidity Resistance
Your bathroom is the most humid room in your house, and that moisture can wreak havoc on painted surfaces. Bathroom cabinets need a special kind of paint because they are constantly exposed to steam and condensation. A standard wall paint just won’t hold up. Look for paints specifically formulated for use in bathrooms or kitchens, as they often contain mildew-resistant additives that prevent mold growth. The right paint creates a protective barrier that repels water, ensuring your vanity looks fresh and clean without bubbling or peeling. This is a core principle of any professional expert interior painting project.
Durability and Easy Cleaning
From toothpaste splatters to spilled makeup, bathroom vanities see a lot of action. You need a paint that can be wiped down easily without the color fading or the finish dulling. The key is to choose a durable, scrubbable formula. High-quality cabinet paints cure to a hard, resilient finish that resists scuffs, scratches, and daily wear. This is why we always recommend premium paints for our cabinet painting services. A durable finish means you can clean up messes with a damp cloth without worrying about damaging your beautiful paint job, which keeps your vanity looking brand new.
Strong Adhesion
Even the best paint in the world will fail if it doesn’t stick properly to the surface. Strong adhesion is critical for a lasting finish, and that process starts with the right prep work. Most bathroom vanities have existing finishes that can be slick or glossy, making it difficult for new paint to grab on. This is why using a high-quality bonding primer is a step you should never skip. A good primer creates the perfect foundation, ensuring the paint adheres tightly to the vanity surface, whether it’s raw wood, stained, or previously painted. This simple step is your best defense against chipping and peeling down the road.
Satin vs. Semi-Gloss: Choosing the Right Finish
The paint’s finish, or sheen, affects both its appearance and its durability. For bathroom vanities, the best choices are satin or semi-gloss. A satin finish offers a soft, subtle sheen that does a great job of hiding minor imperfections on the surface. It’s still durable and cleanable, making it a very popular choice. A semi-gloss finish has more shine, which reflects more light and provides an even tougher, easier-to-clean surface. While semi-gloss is incredibly durable, its higher sheen can highlight any dings or flaws. The choice often comes down to personal preference, but both are excellent options for a high-moisture environment.
Our Top Paint Picks for Bathroom Vanities
The paint you choose for your bathroom vanity is everything. It needs to handle steam, splashes, and daily use while looking flawless. After years of professional cabinet painting, we’ve found the products that consistently deliver a durable, beautiful finish. Here are our top picks that we trust for projects across Boise.
Benjamin Moore Advance Waterborne Alkyd
This paint is a true standout. Benjamin Moore Advance is a waterborne alkyd, giving you the hard finish of an oil-based paint with the easy, low-odor cleanup of a water-based one. It levels out beautifully, minimizing brush marks for a smooth, factory-like finish. This durability is perfect for a high-traffic bathroom vanity. We love the satin or semi-gloss sheens, as they provide a tough, wipeable surface that holds up to moisture and cleaning. It’s a fantastic choice for achieving that professional look you want without the hassle of traditional oil paints.
Sherwin-Williams Emerald Urethane Trim Enamel
If you’re looking for a paint that’s practically bulletproof, this is it. Sherwin-Williams Emerald Urethane is famous for its incredible durability. What makes it special for cabinets are its self-leveling properties, which smooth out brush marks for a seamless finish. In a humid space like a bathroom, you need a paint that won’t peel or chip easily. This enamel creates a hard, washable shell that’s perfect for withstanding the daily rigors of a busy bathroom. It’s one of the best paints for bathroom cabinets when longevity is your top priority.
Valspar Cabinet and Furniture Enamel
For a straightforward project, Valspar’s enamel is a fantastic option. Its biggest advantage is that it’s an all-in-one paint, so it doesn’t require a separate topcoat. This can save you a significant amount of time and effort. Despite its convenience, it doesn’t skimp on performance. This paint cures to a strong, durable finish designed specifically for furniture and cabinetry, so you can trust it to hold up in the bathroom. If you want a reliable paint that simplifies the process while still delivering a great result, this is an excellent product to consider for your vanity refresh.
Insl-X Cabinet Coat
This paint is a powerhouse for vanities. Insl-X Cabinet Coat, made by Benjamin Moore, is another top-tier choice for achieving that coveted super-smooth, factory-like finish. It has excellent adhesion, so it bonds tightly to prepped surfaces, which is key for a long-lasting job in a moist environment. The finish is tough and durable, designed to resist scuffs, chips, and stains from things like makeup or toothpaste. It levels out beautifully, whether you’re using a brush or a sprayer, making it a go-to for professionals who need a flawless result every time.
The Best Primers for a Flawless Foundation
Think of primer as the essential first step that guarantees the success of your final paint color. It’s the unsung hero of the painting world. For a bathroom vanity, which faces daily challenges from moisture, steam, and frequent use, the right primer isn’t just a suggestion; it’s a requirement. A quality bonding primer creates a uniform surface for your paint to adhere to, prevents old stains or wood tannins from bleeding through, and dramatically improves the durability of your finish. Skipping this step is like building a house on a shaky foundation. It might look fine at first, but it won’t be long before problems start to show. By choosing a high-adhesion primer specifically designed for tricky surfaces, you’re setting your project up for a beautiful, long-lasting result that looks professionally done.
Sherwin-Williams Extreme Bond Primer
When you’re dealing with slick, glossy, or otherwise hard-to-paint surfaces, you need a primer that can really grip. Sherwin-Williams Extreme Bond Primer is a fantastic choice for this exact reason. Its main job is to create a strong connection between the vanity surface and your topcoat of paint. This is especially helpful for vanities that have a factory finish or have been previously painted with a glossy enamel. Using a primer like this means you can often avoid heavy-duty sanding, which saves you time and a lot of mess. It provides a solid, reliable base that ensures your paint won’t chip or peel, even in the humid environment of a bathroom. It’s a go-to product for professional cabinet painters for its dependable performance.
Benjamin Moore Stix Waterborne Bonding Primer
Another powerhouse in the world of primers is Benjamin Moore’s Stix Waterborne Bonding Primer. As the name suggests, this primer is all about adhesion. It’s formulated to stick to the most challenging surfaces imaginable, including PVC, vinyl, plastic, glass, and glossy paints. If your bathroom vanity has a tricky surface and you’re worried about your paint sticking, Stix is one of the best solutions available. It creates an incredibly strong bond that allows your topcoat to go on smoothly and stay put. This primer is also excellent at blocking stains, ensuring that nothing from the old finish will ruin your fresh new color. It levels out nicely, giving you a smooth canvas to work on for that perfect, professional-looking finish.
Why You Should Never Skip Primer
I know it can be tempting to jump straight to the color, but please, don’t skip the primer. It’s the single most important step for a durable finish. Without primer, the paint can’t properly adhere to the vanity surface, leading to chipping, peeling, and bubbling down the road. Primer also acts as a barrier, preventing stains, wood tannins, or the old color from bleeding through and discoloring your new paint. It helps you achieve a richer, more even color with fewer coats of paint, which saves you time and money in the long run. This principle is central to any quality expert interior painting project. Taking the time to prime correctly is the difference between a paint job that lasts a year and one that looks beautiful for years to come.
How to Prep Your Vanity for a Lasting Finish
I know you’re excited to get to the painting part, but I have to be honest: the secret to a beautiful, long-lasting finish isn’t in the final coat of paint. It’s all in the prep work. This is the step that truly separates a professional-looking job from one that will chip and peel in a few months. Taking the time to properly prepare your vanity ensures the primer and paint have a perfect surface to stick to, giving you a smooth, durable result that can handle the daily wear and tear of a busy bathroom.
Think of it like this: you wouldn’t build a house on a shaky foundation. The same principle applies here. A clean, smooth, and properly prepared surface is the foundation for a flawless paint job. It might feel tedious, but I promise that every minute you spend on these prep steps will pay off tenfold. This is the part of the process our team of expert interior painters focuses on most, because we know it’s what guarantees a finish you’ll love for years.
Check for Lead Paint in Older Homes
First, a quick but important safety check. If your home was built before 1978, there’s a chance the existing paint on your vanity contains lead. Sanding or scraping lead-based paint can create hazardous dust that is dangerous to inhale, especially for children and pregnant women. Before you do anything else, it’s wise to use a lead test kit, which you can find at most hardware stores. If you do find lead, you’ll need to follow specific safety protocols. The EPA provides detailed guidelines for handling it safely. When in doubt, it’s always best to call in a professional who is certified in lead-safe practices.
Remove All Doors, Drawers, and Hardware
Your next step is to disassemble the vanity. Carefully remove all the doors, drawers, and any hardware like knobs, pulls, and hinges. If you can, unscrew the drawer fronts from the drawer boxes to paint them separately. This might seem like extra work, but it’s the only way to get clean, crisp lines and avoid painting over your hardware. A pro tip: grab some painter’s tape and a marker to label each door and its corresponding hardware. Place the screws and hinges for each door in a labeled plastic bag. This little bit of organization will save you a huge headache when it’s time to put everything back together.
Deep Clean with a Degreaser
Bathroom vanities are magnets for grime. Over time, they get coated with a fine film of hairspray, lotions, soap scum, and dust. Paint simply will not stick to a dirty or greasy surface. To get your vanity truly clean, you’ll need a good degreasing cleaner or a simple mixture of warm water and dish soap. Use a sponge or cloth to scrub every surface you plan to paint, including the cabinet box, doors, and drawer fronts. Don’t forget to rinse everything thoroughly with a clean, damp cloth to remove any soap residue, then let it all dry completely before moving on.
Lightly Sand Every Surface
Once the vanity is clean and dry, it’s time to sand. The goal here isn’t to strip the old finish completely, but to scuff up the surface just enough to give the primer something to grip onto. This process is called “deglossing.” Use a medium-grit sandpaper (120- to 220-grit is usually perfect) and lightly sand every surface you’ll be painting. If you notice any dings, scratches, or small holes, now is the time to fill them with a bit of wood filler. Once the filler is dry, sand it smooth so it’s flush with the surface. When you’re done, wipe away all the sanding dust with a tack cloth or a damp rag. This step is essential for the flawless results our professional cabinet painters deliver.
How to Get a Smooth, Professional Finish
You’ve done the hard work of prepping, and now it’s time for the magic to happen. This is where patience and technique really pay off. Getting that perfectly smooth, durable finish isn’t about a single secret trick; it’s about following a few key steps consistently. Rushing through the painting process is the quickest way to an uneven, bubbly, or easily chipped result. By focusing on your tools, application, and drying times, you can achieve a look that rivals a professional job. These are the same principles our teams use for every expert interior painting project, and they’ll serve you well here.
Pick Your Tools: Brush, Roller, or Sprayer?
The secret to that flawless, factory-like finish often comes down to the tools you choose. For flat, open surfaces like cabinet doors, a high-density foam roller is a fantastic choice. It minimizes texture and helps you apply thin, even layers. For corners and detailed trim, a high-quality angled brush is your best friend. If you’re aiming for the absolute smoothest surface possible, a High Volume Low Pressure (HVLP) sprayer is the gold standard. While it has a learning curve, a sprayer atomizes the paint, laying it down in a fine mist that dries to a perfect, brush-stroke-free finish.
Apply Thin, Even Coats
When it comes to painting, think “thin to win.” It’s always better to apply several thin coats rather than one or two thick ones. A thick coat of paint can sag, drip, and take forever to dry properly, leading to a tacky, uneven surface. Apply your first coat of paint and let it dry completely according to the manufacturer’s instructions. Don’t worry if the first coat looks a little streaky or doesn’t provide full coverage; that’s what the next coats are for. This patient approach builds a stronger, more level finish that looks and feels professional.
Sand Lightly Between Coats
This step might feel tedious, but it’s the key to an ultra-smooth surface. After a coat of paint is completely dry, take a fine-grit sandpaper (220-grit is perfect) and lightly scuff the entire surface. You’re not trying to remove the paint you just applied; you’re just knocking down any tiny dust nibs, bumps, or imperfections. This creates a perfectly smooth foundation for the next coat to adhere to. After sanding, be sure to wipe away all the dust with a tack cloth or a clean, damp rag before you start painting again.
Respect Drying and Curing Times
Patience is a virtue, especially when it comes to paint. It’s crucial to understand the difference between drying and curing. Paint might feel dry to the touch in a few hours, but it can take several weeks to cure, or harden, completely. Rushing this process is a common reason for paint failure. If you re-install doors or start using your vanity too soon, the soft paint can easily get nicked or scratched. Always check the paint can for recommended drying times between coats and the full curing time. This is where professional cabinet painters have a major advantage, as they have the process and patience down to a science.
Do You Need a Protective Topcoat?
So, you’ve applied that final, perfect coat of paint to your bathroom vanity. The color is exactly what you envisioned, and the finish is smooth. But are you actually done? The final step to consider is a protective topcoat. Think of it as insurance for all your hard work. In a high-traffic, high-moisture environment like a bathroom, a topcoat provides an essential barrier against water splashes, soap scum, cosmetic spills, and general wear and tear.
While many modern cabinet paints, like the enamel options we discussed earlier, are formulated for high durability, adding a separate sealer can extend the life of your finish even further. It creates a clear, hard shell that takes the brunt of the daily abuse, keeping the paint underneath looking pristine. For a project like this, where you want the results to last for years, taking the extra step to apply a topcoat is almost always a wise decision. It’s the difference between a paint job that looks good for a year and one that looks great for five years or more. If you want a finish that’s guaranteed to last without the guesswork, our professional cabinet painters always use the best combination of products for maximum durability.
When a Topcoat Is a Good Idea
A topcoat isn’t just a good idea; sometimes, it’s non-negotiable. If you’re using specialty paints like chalk or milk paint, you absolutely must apply a sealer. These paints have a porous, matte finish that will absorb moisture and stains without a protective layer, ruining your work in a matter of weeks. Even if you use a durable acrylic-alkyd enamel, a topcoat is highly recommended for vanities in kids’ bathrooms or powder rooms that see a lot of guest traffic. The extra layer of protection will make the surface easier to clean and more resistant to scratches and scuffs. It’s a simple step that ensures your beautifully painted vanity stays that way.
The Best Sealers for Bathrooms
When choosing a sealer, you want a product that dries crystal clear and won’t yellow over time, especially over light or white paint. For this reason, water-based polycrylic or polyurethane topcoats are your best bet. Look for high-quality options like Minwax Polycrylic Protective Finish or General Finishes High-Performance Water-Based Topcoat. These products are specifically designed to create a hard, durable finish that stands up to the humidity and frequent cleaning that bathroom cabinets endure. They seal the paint from moisture while providing a finish that’s easy to wipe down, keeping your vanity looking fresh and clean.
How to Apply a Sealer for Maximum Durability
Patience is key when applying your topcoat. First, make sure your final coat of paint is completely dry. It’s best to let it dry overnight to be safe. Apply the sealer in thin, even coats using a high-quality synthetic brush or a foam roller. If you’re using a roller, pass over the area a few times with progressively lighter pressure. This technique helps smooth out the finish and eliminate any tiny air bubbles that might have formed. Allow the first coat to dry completely, then lightly sand it with 220-grit sandpaper before applying a second coat for maximum durability. This meticulous process is what gives our expert interior painting projects that flawless, long-lasting look.
Common Vanity Painting Mistakes to Avoid
Painting your bathroom vanity is a fantastic project that can completely change the feel of your space. But even with the best intentions, a few common missteps can turn your dream finish into a frustrating mess of chips, peels, and drips. If you prefer a cabinet painting service to handle the job, that is always an option. Let’s walk through some of the most frequent mistakes so you can get a durable, professional-looking result you’ll love for years to come. Avoiding these pitfalls is just as important as picking the right color.
Using the Wrong Type of Paint
Your bathroom vanity puts up with a lot: steam from hot showers, splashes from the sink, and the daily opening and closing of doors and drawers. Regular wall paint simply isn’t designed for that kind of wear and tear. Using it is a recipe for failure. You need a paint that is specifically formulated for cabinets and trim. Look for products like Benjamin Moore Advance or Sherwin-Williams Emerald Urethane Trim Enamel. These paints are built to resist moisture and mildew while creating a hard, durable shell that can be wiped clean without losing its luster. Think of it as armor for your vanity.
Rushing the Curing Process
This is probably the single biggest mistake DIY painters make. There’s a huge difference between paint that is dry to the touch and paint that is fully cured. While a coat of paint might feel dry in a few hours, it can take two to three weeks to harden completely. If you start using your vanity before the paint has cured, you risk dents, scratches, and peeling. Patience is everything. Pay close attention to the manufacturer’s instructions for recoat times, which can be up to 16 hours for some formulas. Giving the paint the time it needs to cure is the secret to a long-lasting finish.
Painting Over Hardware
It might seem tempting to save a little time by taping over your hinges and knobs, but please don’t. Painting over hardware is a dead giveaway of a rushed, amateur job. Not only does it look messy, but the paint will inevitably chip and flake off the metal, creating a bigger problem down the line. It can also gum up the works, making it hard for doors and drawers to close properly. Take the extra 15 minutes to remove all doors, drawers, hinges, and pulls before you start. Keep all the screws and small parts together in a labeled bag so reassembly is a breeze.
Knowing When to Call a Professional
A DIY project can be incredibly rewarding, but it’s also important to know your limits. If your vanity has intricate details, a damaged surface, or if you suspect the existing paint contains lead (common in homes built before 1978), it’s often best to call in a professional. Sanding lead paint can release toxic dust that is dangerous for you and your family. Sometimes, the best decision is to hand the project over to an expert who has the right tools and experience to guarantee a flawless, safe, and durable finish. If you want a perfect result without the stress, our team of expert cabinet painters is always ready to help.
Related Articles
- Kitchen Cabinet Painting: A Step-by-Step Guide
- The Ultimate Guide to Kitchen Cabinet Doors Refinishing
- Creative Wall Painting Ideas for Every Room
Frequently Asked Questions
Do I really have to sand my vanity if I use a bonding primer? I know sanding feels like a chore, but it’s a step I never recommend skipping completely. Even with a fantastic bonding primer, a light scuff-sanding does wonders. It gives the primer a textured surface to grip, creating a much stronger bond for a finish that truly lasts. Think of it as a quick, five-minute step that adds years to the life of your paint job. You don’t need to sand down to bare wood; just a quick pass to remove the gloss is all it takes.
Realistically, how long will it take to paint my vanity from start to finish? This is a great question because patience is so important here. If you’re working on a weekend, you can likely get all the prep, priming, and painting done. However, the crucial part is the curing time. While the vanity might feel dry in a day, the paint needs weeks to fully harden. I always suggest waiting at least three to four days before re-installing doors and drawers, and even then, be gentle for the first couple of weeks. Rushing this final step is the fastest way to get nicks and scratches.
You listed a few great paints. How do I choose the best one for my project? It really comes down to your priorities. If you want the most durable, hard-as-nails finish possible and don’t mind a slightly longer drying time, Benjamin Moore Advance or Sherwin-Williams Emerald Urethane are top-tier choices. They level out beautifully for a professional look. If you’re looking for a more streamlined process, a product like Valspar’s Cabinet and Furniture Enamel is fantastic because it combines the paint and topcoat, saving you a step without sacrificing too much durability.
Can I get a smooth finish without using a paint sprayer? Absolutely. While a sprayer gives you that flawless, factory-like mist, you can get a beautiful finish with the right brush and roller combination. The key is to use a high-quality angled brush for details and a high-density foam roller for the flat surfaces like doors and side panels. When you apply thin, even coats and sand lightly between them, you can minimize brush strokes and achieve a result that looks incredibly smooth and professional.
What if my vanity isn’t real wood? Can I still paint it using these steps? Yes, you can. The process for painting laminate or MDF (medium-density fiberboard) is very similar, but the prep work is even more critical. For these slick, non-porous surfaces, you must not skip the cleaning and sanding steps. Using a high-adhesion bonding primer, like Sherwin-Williams Extreme Bond or Benjamin Moore Stix, is essential. These primers are specifically designed to grip onto tricky surfaces, creating a solid foundation for your paint to stick to permanently.