
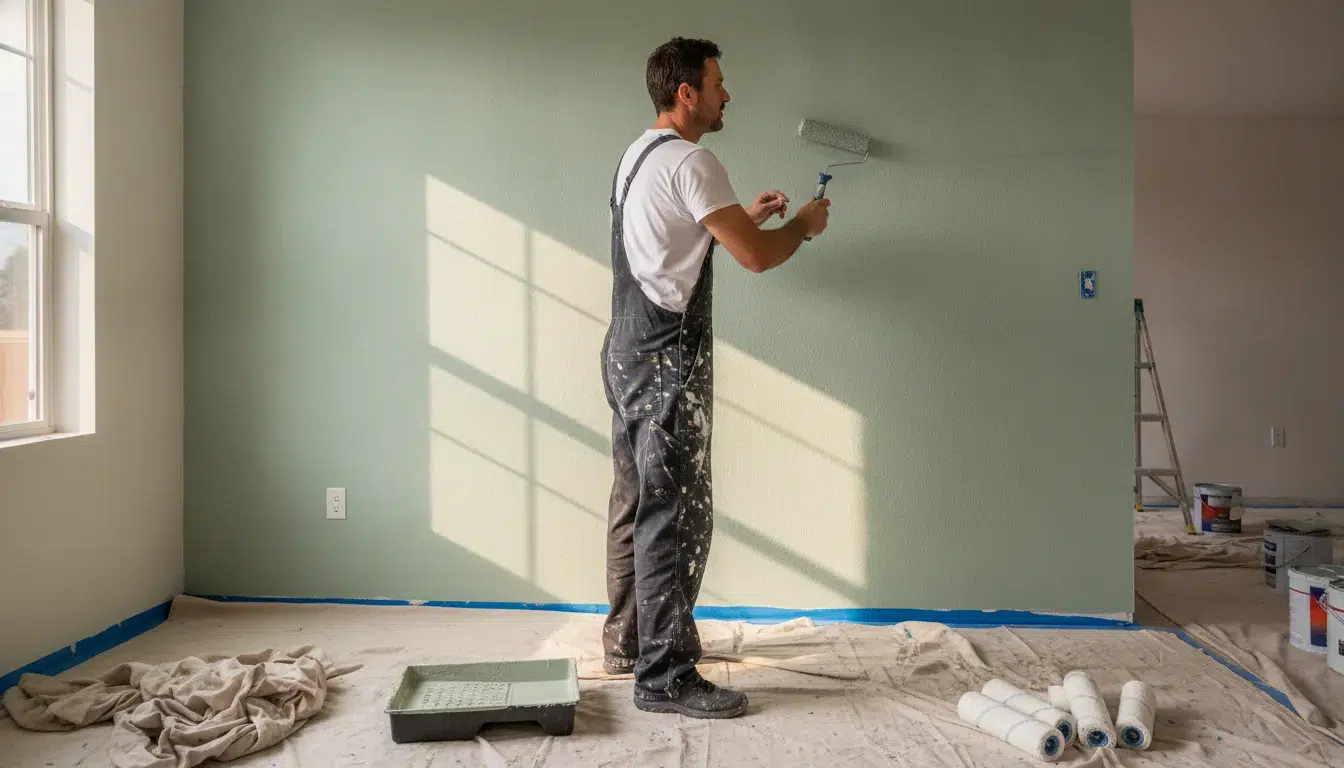
Texture can hide minor wall imperfections, but it also changes how paint moves, how much coverage you get, and how visible a finish looks in Boise’s varied light. A smooth wall is usually more predictable, while orange peel, knockdown, and popcorn textures each require different preparation and tools.
Painting textured walls can work well when the texture is sound, clean, and appropriate for the room. Use a compatible primer, a thick-nap roller that reaches the recesses, and two careful coats rather than forcing one heavy coat into the surface. Flat or matte paint generally disguises bumps better than high-gloss paint, which can emphasize every variation. If the texture is damaged, excessively heavy, or potentially asbestos-containing, repair or professional evaluation should come before painting.
The right choice depends less on whether texture is fashionable and more on its condition, the finish you want, and the amount of prep the surface needs. Comparing textured and smooth walls first makes those decisions much easier.
Get a free quote for your textured wall painting project
Painting Textured Walls vs Smooth Walls: What’s Really Different?
Smooth walls present a relatively consistent plane, so a roller can lay down an even film of paint with predictable coverage. Textured walls are different because every raised area, shallow valley, and irregular edge increases the amount of surface that must be coated. Texture can add character and help disguise minor drywall flaws, but it also creates more surface area and can trap paint in its crevices. That makes an even finish harder to achieve than it is on a smooth wall. The Spruce explains why textured surfaces require more care for uniform coverage.
Popcorn texture
Popcorn is a heavily raised, irregular texture made up of rounded bumps. Those bumps can leave small shadowed areas that a standard roller does not reach well. Painting usually requires a thicker roller cover, controlled pressure, and careful attention to missed spots without crushing the texture. Older popcorn texture deserves an additional safety check. If it was installed before the 1980s, have it tested for asbestos before sanding, scraping, or otherwise disturbing it.
Orange peel texture
Orange peel has a fine, speckled pattern that resembles the skin of an orange. It is less dramatic than popcorn, but the small dimples still hold paint and can produce uneven coverage if the roller nap is too short. Because the texture is relatively light, it may be easier to maintain than heavier patterns, but clean preparation and thorough priming still matter. A light texture can often be painted in place when the wall is properly prepared.
Knockdown texture
Knockdown texture combines raised material with flattened areas created when the surface is lightly smoothed. Its variation makes it especially important to match the application method to the existing pattern. A roller must reach the recessed areas while avoiding excessive pressure that could flatten the texture or leave visible ridges. Repairs can also stand out if the new pattern does not match the original.
In practical terms, painting textured walls generally means planning for more paint, a thicker-nap roller, and more working time than a smooth-wall project. The texture type determines how much preparation is needed and how the paint should be applied. Flat or matte finishes often work well because they minimize the appearance of bumps, while high-gloss finishes can emphasize every irregularity. Before choosing a color or sheen, identify the existing texture and inspect its condition. That first decision guides the rest of the job, from cleaning and priming to the final number of coats.
Which Paint Finish Looks Best on Textured Walls?
For most textured walls, flat or matte paint is the safest choice because its low sheen helps minimize the appearance of bumps, ridges, and uneven patches. Higher-sheen finishes reflect more light, which can draw attention to the texture rather than letting the wall recede visually. The best choice still depends on the room, how often the surface needs cleaning, and whether moisture is a concern.
| Sheen. | Look. | Texture-hiding ability. | Cleanability. | Best use. |
|---|---|---|---|---|
| Flat or matte. | Soft, non-reflective appearance. | Best at minimizing surface imperfections. | Lower; can be harder to wash without burnishing. | Living rooms, bedrooms, ceilings, and heavily textured walls. |
| Eggshell. | Subtle luster with less glare than satin. | Good, especially on light to moderate texture. | Moderate to good. | Family rooms, hallways, and walls that need occasional cleaning. |
| Satin. | Noticeably smoother and more reflective. | Moderate; may emphasize deeper ridges. | Good and easier to wipe. | Kitchens, bathrooms, trim, and lightly textured walls. |
| Semi-gloss or gloss. | Bright, highly reflective finish. | Low; highlights bumps and crevices. | Very good. | Trim, doors, and selected accents, not broad textured wall surfaces. |
When matte or eggshell is the better fit
Choose flat or matte when your priority is making an orange-peel, knockdown, or similarly uneven surface look calmer and more consistent. According to The Spruce’s guidance on textured walls, flat and matte finishes help hide imperfections. Eggshell offers a practical middle ground when you want some washability without the stronger glare of satin.
When a higher sheen makes sense
Satin can work in areas that receive frequent splashes, fingerprints, or routine cleaning, provided the texture is relatively light and the wall has been prepared well. In a bathroom, choose a moisture-resistant paint to help reduce the risk of peeling and mold growth. Semi-gloss and gloss are usually better reserved for trim or small accents, since high-gloss paint can accentuate every bump and crevice. A smooth, even finish begins with sound preparation, regardless of the sheen you choose.
How to Prep Textured Walls So the Paint Actually Holds
Good paint cannot compensate for a dusty, loose, or poorly repaired textured surface. Texture creates more surface area than a smooth wall, so it can hold dust and absorb paint unevenly. Before painting textured walls, plan on a careful preparation stage rather than treating the surface like a quick repaint.
1. Clean the wall thoroughly
Start by removing pictures, shelves, and wall hardware, then protect the floor and nearby furniture. Dust the wall from top to bottom with a soft brush or vacuum attachment that will not flatten the texture. Follow with a gentle cleaning solution appropriate for the existing paint. Previously painted textured walls still need to be cleaned because oils, dirt, and everyday residue can interfere with adhesion.
Do not saturate the wall. Excess moisture can soften some texture materials or seep into damaged areas. Work in manageable sections, then allow the surface to dry completely. Run your hand lightly over the wall when it is dry. If you feel grit or see loose material, the surface needs more attention before primer goes on. For a broader room setup checklist, review this guide to how to prepare a room for painting.
2. Remove loose particles and patch damage
Inspect the texture in strong, angled light. Gently sand loose particles or raised, unstable edges so they do not break away under the roller. Wear a mask while sanding to avoid inhaling dust, and use a light touch. The goal is to stabilize the surface, not to sand away a wall texture that is meant to remain.
Fill holes, dents, and cracks with spackle before painting. Let the patch dry, then sand only enough to remove ridges around the repair. A patch may look slightly different from the surrounding texture, so matching the pattern can require a small texturing tool or careful blending. If the damage is extensive, see our guide to proper wall preparation and repair before proceeding.
3. Prime for adhesion and even color
Once the wall is clean, dry, and stable, apply a high-quality primer designed for the existing surface. Primer helps paint adhere to textured areas and creates a more uniform base color, especially where repairs or porous patches are present. Work the primer into the recesses without flooding them, and follow the product’s drying instructions before painting.
Finally, inspect the primed wall from several angles. If you can still see dust, peeling material, or an unsealed patch, correct it now. Taking time with cleaning, repairs, and primer gives the finish a sound foundation and reduces premature peeling, uneven coverage, and visible patchwork.
The Right Tools and Technique for Painting Textured Walls
Textured surfaces need enough paint to reach their raised areas and recessed crevices, but they should not be flooded with product. The right combination of tools, pressure, and coverage makes the finish more even and reduces the chance of missed spots, runs, or visible lap marks.
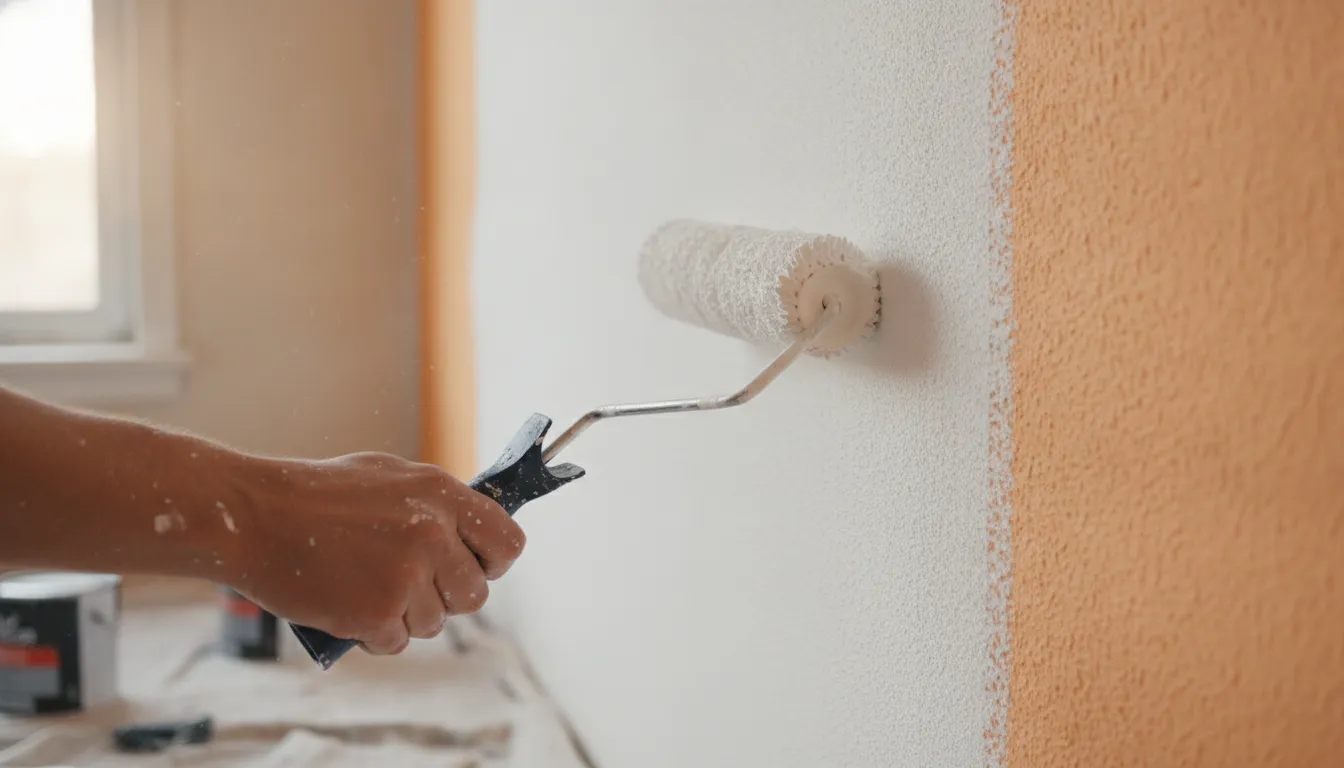
- Gather the right roller and edge tools. Choose a thick-nap roller cover, at least 1/2 inch, so the fibers can carry paint into the wall’s crevices. A quality angled brush is useful for corners and detailed areas. Keep an extension pole, paint tray, drop cloths, and a small container for touch-ups nearby. If the room has substantial textured surface area, an airless sprayer can also provide efficient, even coverage when used with careful masking and back-rolling.
- Protect the room and prepare your edges. Cover floors, furniture, outlets, and nearby fixtures before opening the paint. Work methodically around the perimeter with an angled brush, cutting in along the ceiling, corners, windows, doors, and baseboards first. For related guidance, see this painting trim and baseboards guide. Keeping the edge work clean gives the roller a defined area to cover and helps prevent rushed brushwork later.
- Load the roller evenly. Saturate the thick nap without soaking it to the point of dripping. Roll it across the tray’s ridges to distribute paint through the fibers. On textured walls, an overloaded roller can deposit too much paint on the high points while still missing deeper recesses. An evenly loaded cover gives you better control as you work across the surface.
- Use a zigzag motion, then cross-roll. Start with overlapping zigzag or rolling passes over a manageable section. Change direction with a cross-roll pass so paint is pushed into nooks from more than one angle. Keep a wet edge between sections, and avoid stopping in the middle of a wall whenever possible. This technique helps blend coverage across the irregular surface instead of leaving the texture’s peaks and valleys in separate bands.
- Use firm but gentle pressure. Press firmly enough for the roller fibers to contact the recesses, but do not crush the nap against the wall. Excessive pressure can remove paint from raised areas, flatten the texture temporarily, and create uneven sheen. Let the roller cover do the work while you maintain a steady pace and consistent overlap.
- Apply two thin coats. Allow the first coat to dry according to the paint manufacturer’s directions, then inspect the wall under normal room lighting. A second thin coat is generally more reliable than one thick coat because heavy application can cause runs, sagging, and slow drying. Use the same rolling pattern on the second pass, and reserve a small amount of paint for final touch-ups after the surface has fully cured.
Should You Keep Your Texture or Remove It?
There is no universal right answer for every textured wall. The best choice depends on the texture’s weight, condition, age, and the look you want, along with how much preparation you are willing to fund. For many Boise homeowners, painting textured walls is the more practical option. Others may prefer to remove an especially heavy or dated finish before applying a smooth coat of paint.
Reasons to keep the texture
Keeping the existing texture is usually the faster and less expensive route. You avoid the labor and materials required to resurface every wall, and the texture can help disguise minor dents, uneven drywall joints, and other flaws. A light texture can often be painted successfully when it is cleaned, repaired, and primed correctly. The paint still needs to reach the recesses, so preparation and application technique matter more than they would on a smooth wall. Valspar’s textured-wall guidance also emphasizes proper cleaning and priming before recoating.
Keeping texture can make sense when it is consistent, firmly attached, and compatible with the home’s style. It may also be the better choice when you want to control project cost, finish a room quickly, or preserve a surface that already hides small imperfections. A new color can make an older texture feel more intentional without the disruption of a full wall renovation.
When removal may be worth the cost
Removing texture creates a clean, contemporary surface and can make future painting, patching, and routine maintenance easier. This is particularly useful when the existing texture is unusually heavy, uneven, damaged, or visually distracting. Excessive texture can make repairs difficult to blend and can collect dust in its deeper recesses. Removing it may simplify those chores over the long term, although it is a larger project upfront.
Texture removal is not simply a matter of sanding the bumps away. The typical process involves applying joint compound across the entire wall in a skim coat. Allowing it to dry, sanding or smoothing the surface, and correcting remaining imperfections before priming. That whole-wall process is labor-intensive, and the result depends on achieving an even, paint-ready surface. The Spruce describes skim coating with joint compound as the standard approach for creating a smooth finish, rather than treating removal as a quick spot repair: see its texture-removal overview.
Check older popcorn texture before disturbing it
If the texture is popcorn and dates from before the 1980s, do not sand, scrape, or otherwise disturb it until it has been professionally tested for asbestos. Older materials may contain asbestos, and testing is the responsible first step before choosing a removal method. If the texture is safe and you decide to remove it. A painting professional can help compare the cost of skim coating with the benefits of a smoother surface.
In short, keep a sound light texture when speed, cost, and character matter most. Consider removal when heavy texture interferes with appearance or future maintenance. A careful evaluation before work begins can prevent paying for a full smoothing process when a well-prepared repaint would meet your goals.
Repairing Textured Walls Before You Repaint
Painting over a damaged textured wall without repairing it first usually makes the defect more noticeable. Fresh paint can improve color and coverage, but it will not hide a missing patch of orange peel. A flattened knockdown area, or a raised edge around a filled hole. Take time to restore the surface before you begin painting textured walls, especially where natural or overhead light will reveal changes in the pattern.
Start with the damage, not the paint
Small nail holes, shallow dents, and narrow cracks are usually straightforward. Remove loose material, apply spackle with a putty knife, and let it dry completely. A light sanding can smooth the repair before you prime and repaint. Filling holes and cracks with spackle helps create a uniform base, but avoid sanding more broadly than necessary. Aggressive sanding can flatten the surrounding texture and create a second repair problem.
For larger damage, cut away loose or crumbling material and make sure the area is clean and dry. If the damage reaches the drywall paper, exposes a fastener, or follows a recurring crack, the underlying issue may need attention before the surface is patched. Proper wall preparation and repair can prevent a cosmetic fix from failing after the new paint dries.
Matching the existing texture takes practice
The difficult part is often not filling the hole. It is recreating the texture around it. Orange-peel texture, knockdown texture, and other finishes each have a different pattern, depth, and application method. Repairing textured surfaces becomes especially challenging when the original texture formula or application technique is unknown. Even a close match can look like a visible circle or rectangle once light hits the wall from the side.
Texture repair products and patch kits can help with small areas, but the material still needs to be applied and blended to match the surrounding surface. A knockdown repair may need to be flattened at the right point in the drying process. Orange peel may require a controlled spray pattern. Practice on scrap cardboard or a hidden area first, then allow the patch to dry before judging the match.
If the repaired area remains obvious, a professional painter can reapply texture, feather the edges, or blend a larger section so the transition is less visible. That approach is often more reliable than repeatedly adding compound or texture to one small spot. Once the repair is dry, prime it before applying the finish coats. Primer helps seal the patch and reduces the chance that the repaired area will absorb paint differently from the rest of the wall.
For a repair that is extensive, repeatedly cracking, or difficult to match, have the wall assessed before scheduling the repaint. The right repair method protects the texture and gives the final color a consistent surface to cover.
When to Hire a Professional Painter for Textured Walls
Textured walls can turn a straightforward repaint into a detail-heavy project. Every ridge and recessed area affects how paint covers, how cleanly edges can be cut in, and whether touch-ups blend with the surrounding surface. If you are repainting one small, sound wall, a careful DIY approach may be reasonable. Larger rooms, multiple textures, or visible damage are usually better handled by an experienced painter.
Preparation is often the deciding factor. Removing an outdated texture requires skim-coating with joint compound, allowing it to dry, sanding it smooth, and correcting imperfections before primer and paint can be applied. That work is labor-intensive, and a rushed surface can leave waves, ridges, or flashing that remain visible after the final coat. A professional can also assess whether the texture is stable, identify areas that need patching, and recommend professional interior painting when the project extends beyond a simple color change.
Know when the room adds extra risk
Bathrooms, laundry rooms, and other moisture-prone areas need more than a fresh color. The surface must be clean and sound, and the paint and application technique should suit the room’s humidity. Textured surfaces can hold dust and moisture in their recesses, making thorough cleaning and drying especially important. If you see peeling, staining, soft drywall, or recurring mildew, address the underlying problem before painting rather than sealing it behind a new finish.
Repairs are difficult to make invisible
Matching repaired texture is one of the clearest lines between a quick patch and a professional result. Texture patterns vary in size, depth, and application, and the original material or technique may be unknown. Even when a repair kit produces a similar pattern, the new area can stand out through differences in density or direction. A painter who works with textured walls regularly can test the match, blend the repair into the surrounding area, and apply paint evenly across the complete section.
Professionals also arrive with tools suited to the surface. Including thick-nap rollers that reach into deeper texture and sprayers that can provide efficient, even coverage when the room and finish allow it. They know when to use firm, consistent roller pressure, when to cut in before rolling, and why two controlled coats are often preferable to one heavy coat. The result is cleaner coverage with less risk of missed recesses, lap marks, and visible touch-up patches.
For homeowners in Boise and the Treasure Valley, Paint Boise adds project support beyond the application itself. The company backs its work with a five-year warranty and a no-deposit, pay-when-satisfied guarantee. That gives you a clearer way to manage the risk when textured-wall preparation is more involved than expected.
Get a free quote for your textured wall painting project
Frequently Asked Questions
What is the best roller nap for painting textured walls?
Use a thick-nap roller so the cover can reach into the wall’s ridges and crevices. A 1/2-inch nap is a practical starting point for many interior textures, while deeper knockdown or heavily raised surfaces may need a longer nap. Test a small area first to confirm the roller is filling the pattern evenly. The Spruce recommends a thick-nap cover for textured surfaces.
How do you prep textured walls for painting?
Start with a clean, dry, dust-free surface. Fill small holes and cracks, remove loose material, and lightly address rough areas as needed. Protect yourself from dust during sanding, then apply primer where the surface is patched, porous, or difficult to coat evenly. Good preparation helps the new paint adhere instead of merely coating the texture.
Is a primer necessary before painting textured walls?
A dedicated primer is usually a wise choice, especially on new, porous, repaired, or unevenly colored texture. It helps create more consistent adhesion and reduces the chance that the topcoat will look patchy. A paint-and-primer product may work in some situations, but the wall’s condition and the existing coating should guide that decision. Valspar identifies quality primer as important for adhesion on textured surfaces.
Should I use a brush or roller on textured walls?
Use an angled brush to cut in around corners, trim, and other edges, then use a thick-nap roller for the broad wall areas. Work the roller in overlapping directions so paint reaches the low spots without leaving heavy buildup on the peaks. Two thin coats are generally more reliable than one thick coat.
Can I smooth out textured walls instead of painting them?
Yes. Smoothing usually involves applying joint compound across the wall in a skim coat, allowing it to dry, and then sanding and priming before painting. This can create a clean, modern surface, but it is labor-intensive and any remaining ridges will show through the final finish. If the texture is heavy, damaged, or difficult to match, professional evaluation can prevent wasted prep and repainting.
Ready to Choose the Right Wall Finish?
A fresh coat can highlight the character of existing texture or create a cleaner, smoother look after careful preparation. If you are weighing coverage, sheen, repairs, or texture removal, a project-specific recommendation can make the next step clearer.
Get a free quote for your textured or smooth wall painting project.