Walking into a freshly painted room is one of the most satisfying home improvements you can experience. But the secret to that flawless finish is not the paint itself; it is the preparation that happens before the first roller ever touches the wall. Knowing how to prepare a room for painting properly is the difference between a professional-grade result and a weekend project you wish you had hired out.
Whether you are refreshing a bedroom, updating a living room, or getting a home ready for sale. Proper prep work saves time, reduces mess, and ensures your new paint looks smooth and lasts for years. Below is the complete step-by-step guide to preparing any room for painting, exactly the way the pros do it.
How to Prepare a Room for Painting: Clear the Room and Protect Your Floors
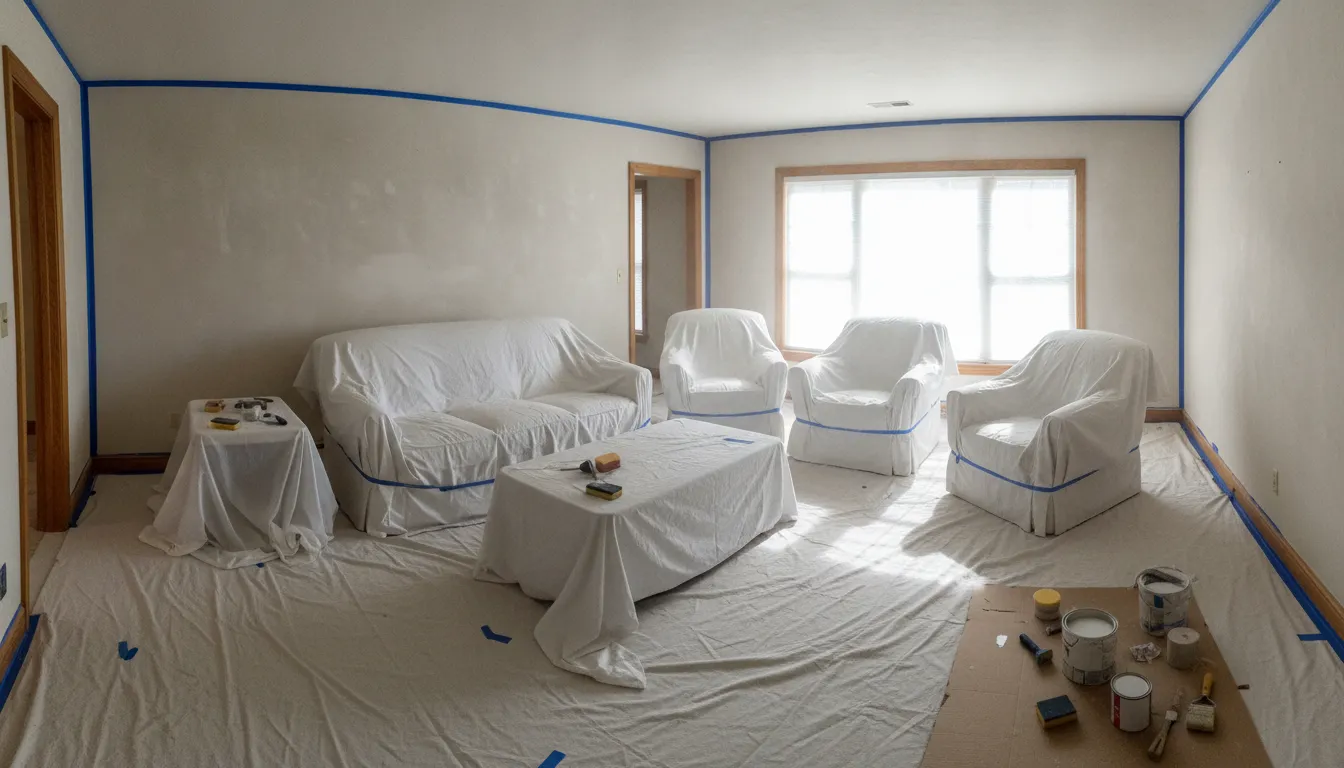
The first rule of room prep is simple: remove everything you can. Start by taking all furniture out of the room if possible. Staging everything in a nearby hallway or adjacent room gives you unobstructed access to every wall and eliminates the risk of paint drips landing on your belongings.
If you cannot fully empty the room, push all furniture to the center and group it together. Cover the pile with heavy-duty plastic drop cloths, making sure the plastic extends to the floor on all sides so no stray paint mist reaches the furniture underneath.
Follow these steps for floor protection:
- Choose canvas drop cloths over plastic for floors. Canvas grips the floor and does not slide when you walk on it. Plastic drop cloths are slippery and can be a tripping hazard. Use canvas on hardwood, laminate, tile, and carpet alike.
- Overlap drop cloths by at least 12 inches along the baseboards so no strip of flooring is exposed. Tape the seams together with blue painter’s tape so the cloth does not shift as you move around the room.
- Remove curtains, blinds, and curtain rods completely. Store curtain hardware in a labeled bag so you can find it when the paint dries. Removing window treatments also gives you full access to the window trim for taping and painting.
- Take down ceiling fans if possible or wrap the blades and motor housing in plastic and tape it shut. Paint splatter on a ceiling fan is extremely difficult to clean.
For homeowners who would rather skip the heavy lifting, professional interior painting services in Boise include full furniture moving and floor protection as part of the job.
Remove Hardware, Fixtures, and Wall Decor
Once the room is clear, go around every wall and remove anything attached to it. This step is tedious but essential, painting around outlet covers and switch plates leaves an amateur look no matter how careful you are with the brush.
Start with a screwdriver and remove every outlet cover, light switch plate, and thermostat cover. Put the screws back loosely into their respective wall plates or tape each screw to its cover plate so nothing gets lost. There is nothing more frustrating than hunting for a specific screw size when you are ready to reassemble the room.
Next, remove all nails, screws, picture hangers, and wall hooks. Use a hammer and a small pry bar or a set of pliers. If you plan to reuse the same hanging locations, leave the nails out and patch the holes, you can always install new ones after the paint dries.
Take down any wall-mounted shelves, mirrors, or decor pieces. Remove smoke detectors and CO detectors from their mounts (just twist and pull, they are usually on quick-release brackets). For ceiling light fixtures, remove the globes or shades and any pull-chain pendants. If the fixture itself needs to stay, wrap it in plastic and tape the plastic tightly around the base.
Pro tip: take a photo of the room before you disassemble everything. Having a visual reference makes reassembly faster and reduces the chance that you forget to reinstall a cover plate.
Patch Holes and Repair Wall Damage
Walls accumulate surprising amounts of damage between paint jobs. Nail holes, dents, dings, and hairline cracks all show through fresh paint if you do not address them first. A smooth wall starts with proper patching. Professional house painters in Boise budget significant time for this step because it is the foundation of a smooth finish.
The approach depends on the size of the damage. Refer to the table below for the right patching method by hole size.
. . . . . . . . . . . . . . . .
| Damage Type | Size | Material | Tool |
|---|---|---|---|
| Nail holes, pinpricks | Under 1/8 inch | Lightweight spackle | Putty knife |
| Dents, small dings | 1/8 to 1/4 inch | Spackle (built up) | Putty knife, sanding block |
| Moderate holes | Over 1/4 inch | Joint compound + mesh tape | 6-inch drywall knife |
| Gouges, deep scrapes | Any depth | Joint compound (thin coats) | Drywall knife, sanding sponge |
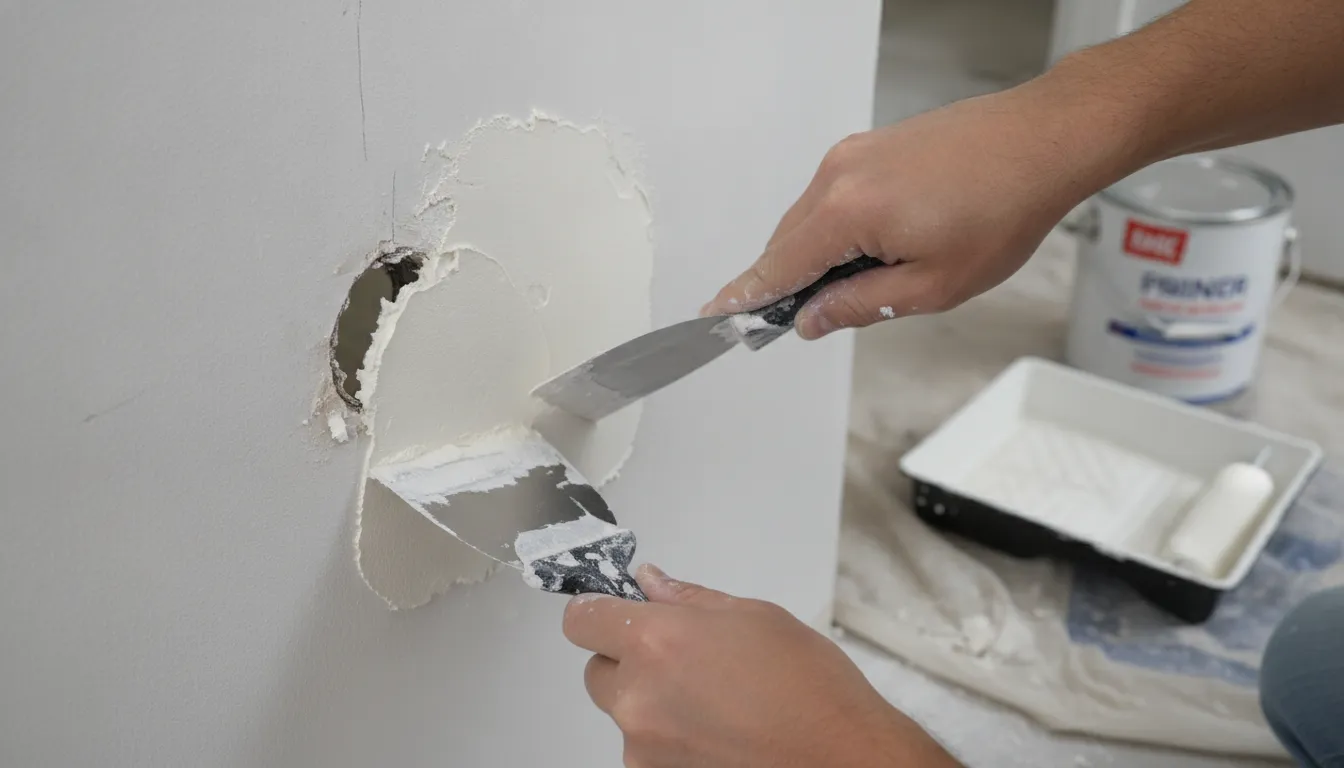
Small nail holes and pinpricks. Use lightweight spackle. Apply a small dab with a putty knife, press it into the hole, and scrape off the excess in one smooth pass. Let it dry per the manufacturer’s instructions (usually 30 to 60 minutes), then sand lightly with fine-grit sandpaper until flush with the surrounding wall.
Dents and small dings. Fill with spackle just as you would a nail hole, but build the spackle up slightly above the surface to account for sanding. Feather the edges so the patch blends into the wall.
Holes larger than a quarter-inch. Use a patch kit or apply joint compound over self-adhesive mesh tape. Cut the mesh tape slightly larger than the hole, stick it in place, and spread joint compound over it with a 6-inch drywall knife. Let dry, sand, apply a second thin coat, let dry, and sand again until smooth.
Gouges and deep scrapes. Lay down a base coat of joint compound, let it dry completely, then apply a finish coat and feather the edges. Deep repairs often require three thin coats rather than one thick coat, thin coats dry faster and crack less.
After sanding any patch, wipe the area with a dry microfiber cloth or a tack cloth to remove dust. Every patch must be primed before painting, unprimed spackle absorbs paint unevenly and leaves visible flat spots that glare under overhead lighting.
Clean, Sand, and Caulk for a Smooth Surface
Even walls that look clean are covered with dust, grease, and grime. Paint does not adhere well to dirty walls, and contaminants can cause bubbling, peeling, or uneven sheen. Cleaning is a nonnegotiable step in professional prep.
Follow this sequence for the cleanest possible surface:
- Wash the walls thoroughly. Mix a solution of trisodium phosphate (TSP) or a mild soap like dish detergent with warm water. Use a large sponge or microfiber cloth, working from the top of the wall downward. Pay special attention to areas around light switches, door frames, and corners, these collect the most oil and dirt from hands. Rinse with clean water and a fresh sponge to remove any soap residue.
- Let the walls dry completely. Drying usually takes two to four hours depending on humidity and ventilation. Point a fan at the walls to speed the process. Do not skip this waiting period, painting over damp walls traps moisture and leads to peeling.
- Sand the walls lightly. Use 120 to 150-grit sandpaper on a sanding pole or sanding block. Work in broad, even strokes. The goal is not to remove paint but to knock down any minor bumps, scuffs. Or raised fibers and give the surface enough tooth for the new paint to grip. Vacuum the floor and baseboards after sanding, then wipe walls with a tack cloth to capture every speck of dust.
- Caulk gaps between trim and walls. Run a bead of paintable latex caulk along the seam where baseboards, crown molding, door casings, and window trim meet the wall. Smooth the bead with a wet finger or a caulk-smoothing tool. Caulking eliminates the dark shadow line between trim and wall and gives the room a crisp, finished look that is one of the hallmarks of professional paint work.
Tape Like a Pro for Crisp Paint Lines
Painter’s tape is your best friend during a paint project, but only when it is applied correctly. Taping is not complicated, but it does require patience and attention to detail.
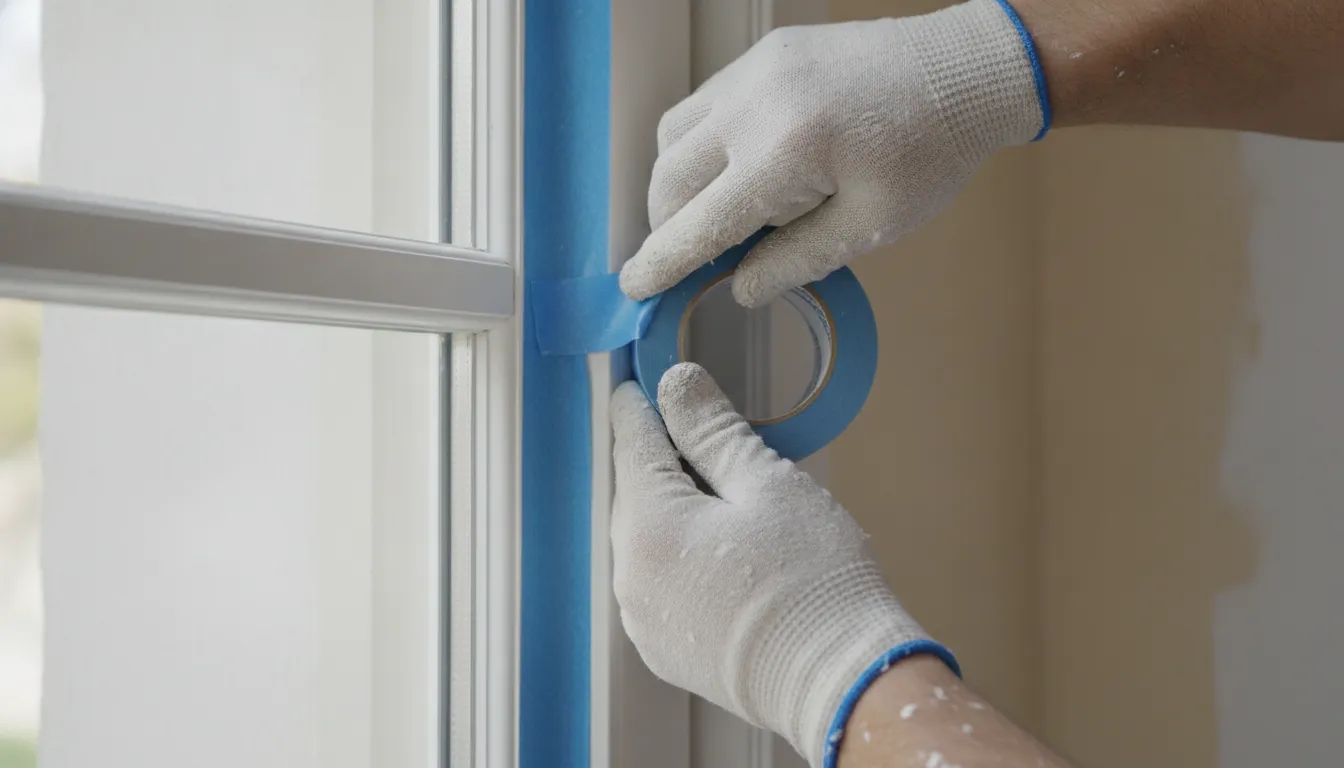
Start by selecting a quality blue painter’s tape designed for clean removal, avoid basic masking tape. Which can leave adhesive residue or pull off fresh paint when you remove it. Apply the tape in 12 to 18-inch strips rather than running one continuous piece across the entire wall. Short strips stretch less and maintain better adhesion. Overlap each strip by a half-inch or so to prevent paint from seeping through the gaps.
Press the tape firmly into place using a putty knife or a plastic seam roller. Run the tool along the edge of the tape where it meets the trim or ceiling, this seals the edge and prevents paint bleed. Skipping this step is the most common reason for crooked paint lines and feathery edges.
Tape the edges of baseboards, door frames, window trim, and the ceiling line where the wall meets the ceiling. If you are using two different paint colors on an accent wall, tape the transition line as well. Remove the tape while the paint is still slightly wet. Waiting until the paint fully dries risks pulling chips of paint off the wall when the tape comes up. As a rule of thumb, pull the tape as soon as you finish cutting in the next section of wall.
For a complete overview of what the full range of painting services in Boise includes, explore the services Paint Boise offers for both residential and commercial properties. Learning how to tape properly in each scenario will save hours of touch-up work.
Prime Before You Paint, and Know Why
Primer is not an optional extra step. It serves several critical functions that paint alone cannot handle. Skipping primer is the fastest way to end up with a patchy, uneven finish that requires extra coats of expensive paint to correct.
You need primer in these situations:
Patched areas. Every spackle or joint compound patch must be spot-primed. Unprimed patches absorb the topcoat differently than the surrounding wall, creating visible dull spots that a second coat of paint does not always fix.
Stains and water damage. Use a stain-blocking primer (often shellac-based or oil-based) over water stains, smoke residue, crayon marks, or ink. Standard latex primer may not block these stains completely, and they can bleed through even two coats of top paint.
Dark-to-light color changes. If you are painting a dark wall a light color. A coat of white or tinted primer reduces the number of topcoats from four or five down to two. Tinted primer (ask the paint store to tint it close to your final color) is particularly effective for major color transitions.
Bare drywall or wood. Unpainted surfaces need primer to seal the material and create a uniform base. Bare drywall soaks up paint like a sponge without primer, and bare wood can bleed tannins through the topcoat.
After priming, lightly sand with 220-grit sandpaper and wipe away the dust before applying the first coat of paint. This extra step produces a glass-smooth surface that makes the finish coat look like a factory job.
One more pro tip for sequencing: paint the ceiling first, then the trim and doors, then the walls. This top-down order ensures that any drips or splatter from the ceiling fall onto unpainted surfaces and get covered by the later coats. It also means you can cut in along the ceiling line without worrying about messing up a finished wall.
If you are planning a full interior refresh, this Boise home prep checklist covers every step from room clearing to final inspection. And this interior painting cost guide helps you budget for your project.
Ready to Skip the Prep? Paint Boise Handles It All
Preparing a room for painting is hard work. Between moving furniture, patching holes, sanding, caulking, taping, and priming, the prep work can take longer than the painting itself. If the process sounds exhausting, you do not have to do it alone.
Paint Boise brings over 40 years of professional painting experience to every project in Boise and the Treasure Valley. Their crews handle every step of the preparation process, from protecting your floors and furniture to patching every hole and taping every trim line. They use premium Sherwin Williams paints and include free color consultation with every estimate. Best of all, Paint Boise requires no deposit, and you pay only when you are completely satisfied with the result. Every project is backed by a 5-year warranty that exceeds the industry standard.
For more details on why homeowners trust this team, read how to choose the best house painters in Boise. And if you are curious about paint sheens, this complete paint finish guide helps you pick the right look for every room.
Call (208) 254-6615 or schedule a free estimate online. Let the professionals handle the prep so you can enjoy the finished result without lifting a roller.
Frequently Asked Questions
How long does it take to prepare a room for painting?
For an average 12×12 bedroom, expect to spend two to four hours on preparation. This includes clearing furniture, removing hardware, patching holes, cleaning walls, sanding, caulking, and taping. Larger rooms or rooms with extensive damage can take a full day. Professional painters complete the same prep faster because they work in teams and have commercial-grade tools.
Do I need to wash walls before painting?
Yes. Washing walls removes grease, dust, and grime that prevent paint from adhering properly. Use TSP or mild dish soap with warm water, rinse with clean water, and let the walls dry completely before painting. Skip this step and you risk poor adhesion, bubbling, and an uneven finish.
Do I need to remove outlet covers when painting?
Absolutely. Painting around outlet covers produces sloppy edges and leaves paint on the covers themselves. Remove every switch plate and outlet cover with a screwdriver, tape the screws to the plates, and set them aside. Reinstall them after the paint is fully dry for a clean, professional finish.
Can I paint over wallpaper?
Painting over wallpaper is risky and rarely recommended. The moisture in the paint can loosen the wallpaper adhesive, causing bubbles and peeling. The seams between wallpaper strips often show through paint as raised lines. If you want to paint a wallpapered room, remove the wallpaper first, clean and repair the walls, then prime before painting.
What kind of drop cloth should I use?
Canvas drop cloths are the best choice for floors. They are heavy enough to stay in place, absorb minor spills instead of letting them run, and do not create a slipping hazard. Plastic drop cloths are acceptable for covering furniture but should not be used on floors where you will be walking.
Do I need to prime after patching holes?
Yes. Every patched area must be spot-primed before painting. Unprimed spackle or joint compound absorbs paint differently than the surrounding wall, leaving a visible flat spot. A coat of primer seals the patch and ensures the finish coat dries evenly across the entire wall.