
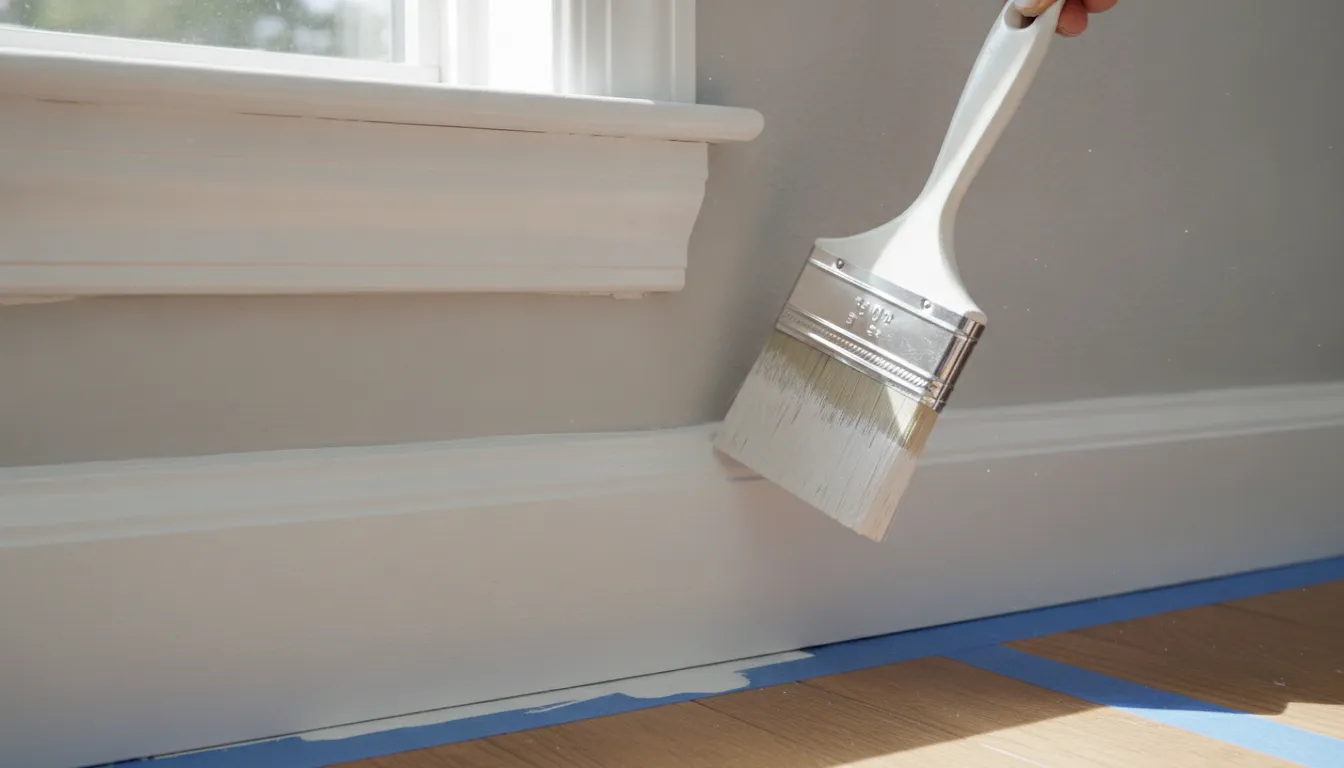
Dirty, scuffed trim makes an entire room look worn out and neglected. Adding a fresh coat of paint to these high-traffic wooden accents can instantly make your home look clean, sharp, and premium.
Successful painting trim and baseboards requires a systematic approach to preparation, repairing, and brush technique to get professional results. The entire project starts with proper cleaning, patching, and sanding to ensure a smooth surface for paint to stick. You also need to apply high-quality caulk along joints and use a premium semi-gloss or satin paint from trusted brands like Sherwin Williams or Benjamin Moore. According to official historical building guidance from the National Park Service, proper prep work is the most critical stage for any interior wood painting project. With the right technique, you can complete this home upgrade yourself or hire experts to get a flawless finish.
Do you want to know how to get these sleek results on your own woodwork? Before you start cleaning or taping, you must learn about Gather the Right Tools and Materials.
Painting Trim And Baseboards: Gather the Right Tools and Materials
Before you begin painting trim and baseboards, you must gather the proper tools. Having the right supplies on hand ensures clean lines and a durable finish. Professional painters rely on high-grade materials to achieve a smooth look that lasts for years. Quality tools save you time. They also protect your floors from messy drips.
Brushes and Painter’s Tape
An angled sash brush is a vital tool for painting trim and baseboards. A 1.5-inch to 2.5-inch brush width is recommended for precise control. For water-based acrylic paints, choose a nylon and polyester blend brush. These synthetic bristles hold their shape well and spread paint evenly. Natural bristle brushes should only be used for oil-based paints, as water makes them swell and lose their edge. The angled sash design has a slanted trim that helps you paint clean lines along the wall-trim junction and reach deep into tight corners. To protect your walls and floors, use FrogTape rather than standard blue painter’s tape. FrogTape has a special powder that reacts with paint. This barrier blocks paint bleed and keeps your lines crisp.
Paint and Primer Selection
Your choice of paint and primer directly affects the final result. For trim and baseboards, choose a self-leveling water-based alkyd or acrylic paint. Products like Sherwin Williams ProClassic or Benjamin Moore Advance are ideal choices. These premium trim paints dry slowly enough to let brush marks flow out, leaving a hard finish similar to traditional oil paint. You must also determine your primer needs. For bare wood or raw pine, you must apply a high-hide wood primer to block wood knots from bleeding through. If your trim is already painted and in good shape, you do not need a full coat of primer. Simply scuff the old surface to help the new paint stick.
Sanding, Prep, and Safety Gear
Achieving a smooth coat requires proper surface prep. You will need 120-grit to 150-grit sandpaper or a medium-grit sanding block to scuff the old gloss. Sanding creates tiny ridges in the old surface, which is a key step to ensure proper paint adhesion. You will also need acrylic latex caulk to fill gaps between the wood and the wall, as well as lightweight spackle to patch nail holes. Grab a clean bucket, some mild soap, and a rag to wipe away dust and oils. This thorough cleaning process is highly recommended by government preservation briefs. Finally, protect your workspace. Lay down heavy canvas drop cloths instead of thin plastic, which can slide around and cause slips.
Clean, Patch, and Sand for a Smooth Start
Before you apply any paint, you must prepare the surface. Skipping prep work leads to peeling paint, visible bumps, and an uneven finish. Taking the time to properly clean, patch, and sand creates a durable base that helps your paint stick and last for years.
Step 1: Clean Away Dust and Oils
Wooden doors, molding, and trim collect dust, grease, and pet hair over time. You must clean these surfaces thoroughly before painting to remove all dirt and oils, as guided by the National Park Service Preservation Standards. You can use a mix of half a cup of white vinegar per gallon of warm water, or use a trisodium phosphate (TSP) substitute. Wipe the trim with a damp sponge and let it dry completely. Proper cleaning ensures that your new coat of paint bonds tightly to the old surface instead of sitting on top of grime.
Step 2: Patch Nail Holes and Dents
Once the wood is clean, inspect it for damage. Use a high-quality spackle to fill in nail holes, dents, and deep wood grain. Scoop a small amount of spackle onto a putty knife and press it firmly into each hole. Leave a very slight mound of spackle over the hole, as it will shrink as it dries. Let the spackle cure completely according to the package directions, which usually takes about one to two hours. This step is essential for proper prep work for painting to make sure the final surface looks flat and uniform.
Step 3: Sand the Surface Smooth
Sanding is the final step before the paint goes on. Use a fine-grit sanding block, such as 120-grit or 150-grit, to sand down the dry spackle patches until they are level with the wood. Next, lightly sand the entire surface of the trim. This scuff sanding removes the shine from the old paint, which helps the new paint stick. Do not sand too hard or you might gouge the wood. When you finish, wipe away all the sanding dust with a clean tack cloth or a damp microfiber towel. Your wood is now clean, smooth, and ready for your brush.
- Mix your cleaner: Blend half a cup of vinegar per gallon of water, or mix a TSP substitute to wash the wood.
- Scrub the trim: Wipe down all baseboards and moldings to remove dirt, skin oils, and grease, then let them dry.
- Apply spackle: Press spackle into nail holes and deep dents with a putty knife and let it dry for one to two hours.
- Sand the patches: Use a 120-grit or 150-grit sanding block to level the patches and scuff-sand the entire surface.
- Wipe away dust: Clean the trim with a dry tack cloth to remove all fine sanding dust before painting trim and baseboards.
Caulk Like a Pro for Seamless Joints
Applying caulk is a key step when you are painting trim and baseboards. Caulking seals the small gaps between the wood molding and your walls. This simple step stops dust from building up and makes the final paint job look complete. Adding a neat line of caulk before you paint helps create a clean and crisp boundary that makes the room look polished.
Why Use Acrylic Latex Caulk?
For your indoor trim, choose an acrylic latex caulk. This type of caulk is easy to clean with plain water and dries quickly. Most options are paintable in about two hours. Using this material allows you to seal gaps easily without a mess. It fills joints and creates a flat base that holds your paint well over time.
How to Apply Caulk in Five Simple Steps
A clean bead of caulk seals joints between walls and wood trim. Gaps between baseboards and walls can make even a fresh coat of paint look messy. Follow these steps to apply caulk like a professional painter before you finish proper prep work for painting on your home.
- Cut the nozzle at an angle. Cut the tip of the caulk tube at a 45-degree angle. Keep the opening small so you can control the flow.
- Load and test the gun. Place the tube into the caulk gun. Press the trigger to start the flow, and test it on a piece of scrap cardboard first.
- Apply a steady bead. Hold the gun at a 45-degree angle to the gap. Pull the gun steadily along the seam while you apply light pressure.
- Smooth the joint. Wet your finger with water or use a damp caulk tool. Wipe along the wet bead in one motion to remove excess caulk and smooth the line.
- Let the caulk dry. Allow the caulk to dry completely before you paint. Read the package directions, but most brands need at least two hours to dry.
Avoid This Common Flooring Mistake
Only apply caulk to the top gap where the wood trim meets the wall. Never put caulk in the gap between the baseboard and the floor. According to the United States National Park Service guidelines on interior paint prep, wood and flooring materials need space to expand and contract with humidity (NPS.gov). Caulking this bottom gap can crack or trap moisture, which ruins the finish.
Master the Brush: Application Techniques for a Flawless Finish
Having the best paint does not matter if your brush work is sloppy. How you hold, load, and move your brush determines whether your trim looks smooth or streaky. Proper brush control is the secret to a professional look when painting trim and baseboards.
How to Load and Control Your Brush
Do not dip your whole brush into the paint can. Only submerge the bottom third of the bristles. Dip the brush in, then tap both sides gently against the inside of the can or pail. Tapping removes excess paint without scraping off the loaded core. Scraping the bristles against the rim makes them dry and stiff, which leads to ugly brush marks. When painting trim and baseboards, let the brush hold a full pocket of paint so it flows onto the wood in one clean, even pass.
The Right Steps for Smooth Paint Flow
To get a crisp finish on your woodwork, follow this step-by-step application process:
- Protect your floors with tape: Press painter’s tape firmly along the edge of your floor where it meets the wood trim to catch any accidental drips.
- Load the tip correctly: Dip the angled brush only one-third of the depth of its bristles into the paint, and tap off any excess on the side of your container.
- Lead with the chisel edge: Use the sharp, angled tip of your brush to cut in clean lines along the wall joints, letting the bristles bend slightly as you move.
- Paint with the wood grain: Long, steady strokes in the direction of the natural wood grain help make any remaining brush marks invisible.
- Apply thin coats: Put down two thin, even coats of paint rather than one thick layer to prevent drips, runs, and saggy spots.
- Clean up overlap lines: Paint your trim first before you paint the walls, as recommended by the National Park Service. Rolling the walls second lets you cover up any trim overlap for clean, straight edges.
Avoid These Common Painting Mistakes
Too much paint on your brush causes heavy drips and sagging paint. On the other hand, a dry brush leaves thin streaks and spots. Do not press the brush too hard against the wood, as this forces the bristles to fan out and leaves deep tracks in the paint. Finally, never apply thick layers to speed up the work. Thick coats take too long to dry and will run down your baseboards before they set.
Choose the Best Paint Sheen for Trim and Baseboards
When you are choosing the right paint sheen for trim, you must balance how it looks with how well it holds up. Trim and baseboards get kicked, scuffed, and bumped by vacuum cleaners. Selecting the correct paint finish ensures your hard work lasts for years without peeling or wearing away.
Why Sheen Matters for Molding
The shine level of your paint changes how light bounces off the wood. High shine makes details pop, but it also shows every dent and scratch. Low shine hides wood flaws, but it is much harder to wipe clean. According to historical painting guidelines from the National Park Service, high-gloss or semi-gloss paints are the standard choices for interior wood trim. These sheens form a hard shell that resists moisture, dirt, and daily wear.
Comparing Sheens for Painting Trim and Baseboards
Most homeowners choose semi-gloss when durable paint finishes and sheens are the top priority. It provides a clean, bright look that is easy to wash with a damp cloth. Satin is a great choice if you prefer a softer look with less shine. High-gloss gives a sleek, modern finish, but your prep work must be perfect to hide wood defects. Avoid flat or matte paints on trim, as they scuff easily and cannot be scrubbed without ruining the paint layer.
| Paint Sheen | Shine Level | Durability | Ease of Cleaning | Flaw Visibility |
|---|---|---|---|---|
| Flat or Matte | None | Very Low | Very Difficult | Low |
| Satin | Low to Medium | Medium | Moderate | Medium |
| Semi-Gloss | Medium to High | High | Easy | High |
| High-Gloss | Very High | Very High | Very Easy | Very High |
Selecting Your Best Match
For most rooms, semi-gloss is the safest bet for painting trim and baseboards. It strikes the perfect balance of tough protection and neat style. If you want a more subtle, warm look in low-traffic areas like dining rooms, satin is a lovely option. Always match the sheen across all the trim in your home to keep a uniform feel from room to room.
When to Hire a Professional vs. DIY Your Trim and Baseboard Painting
Deciding between a weekend project and hiring a team can be tough. For small touch-ups or a single room, painting trim and baseboards is a manageable task. If you have steady hands, a lot of patience, and a few free days, a do-it-yourself approach can save money. However, painting wood trim is highly precise work. Any shaky brushstrokes, paint drips, or uneven coverage will show clearly under normal room lighting. For large, multi-room projects or homes with intricate, historic molding, the job can quickly become overwhelming.
When to Paint Your Own Trim
Taking the DIY route works best when you want to update just one room or handle minor scuffs. You will need to buy the right tools, like high-quality painter’s tape, a sanding block, and a small angled sash brush. It is a good choice if you enjoy slow, detailed work and have the time to let paint coats dry properly. According to historic preservation guidelines from the National Park Service, proper surface prep is the most critical stage for any indoor painting project. If you are willing to spend hours cleaning, patching, and sanding before you ever open a paint can, you can achieve a good result in a small space.
The Benefits of Professional House Painters
For whole-house projects or ornate trim, hiring professional house painters in Boise is the safest choice. Professional teams have the tools and experience to deliver a flawless, smooth finish with zero drips. They can complete in days what might take a homeowner several weekends of hard work. Professionals also know how to prep challenging surfaces, such as high-gloss wood or stained trim, so the new paint bonds perfectly and lasts for years without peeling.
The Paint Boise Advantage
If you decide to hire a contractor, our team at Paint Boise makes the process simple and risk-free. We bring over 40 years of local experience to every home in the Treasure Valley. To give you peace of mind, we back our work with a full 5-year warranty. We also do not require any upfront deposit, which means you only pay when you are completely satisfied with our work. Our skilled crews use premium materials from trusted brands like Sherwin Williams and Benjamin Moore to ensure your woodwork stays beautiful. When you choose our interior painting services in Boise, you also get a free color consultation to help you find the perfect shade for your home. Call us today at (208) 254-6615 to talk about your project and get a free quote.
Frequently Asked Questions
Should you paint the trim or the walls first?
Most professional painters recommend painting the trim first. This order makes your work much easier because you can overlap the trim paint onto the wall surface slightly. Once the trim dries, you can tape it off and paint the walls to get perfectly clean lines. According to the National Park Service, this sequence helps ensure clean edges and proper coverage on your molding.
What paint sheen is best for trim and baseboards?
Semi-gloss and satin are the top choices for painting trim and baseboards. These sheens are highly durable and resist scuffs, making them easy to clean. Semi-gloss is the most popular because it reflects light beautifully and highlights details. A National Park Service brief notes that higher sheens are highly recommended for interior wood trim due to their washability and moisture resistance.
Do you need to use a primer on baseboards?
You need to use a primer if you have bare wood or if you are changing paint colors drastically. A primer helps the topcoat stick to the surface and blocks wood stains from bleeding through. If your trim has existing paint in good shape, a simple light sanding is usually enough. For the best result, use a high-quality primer to build a strong foundation for your paint.
How do you paint baseboards on carpet without a mess?
To paint baseboards next to carpet, press wide painter’s tape along the carpet edge and tuck it slightly under the baseboards with a putty knife. This creates a protective shield over the carpet fibers. You can also use a wide metal paint shield or cardboard to hold the carpet down as you paint. Move the shield along as you work to keep paint off your flooring.
Ready to paint your trim and baseboards the right way?
Putting off your trim painting project only allows minor wood damage, scuffs, and joint gaps to worsen over time. A professional finish requires hours of meticulous sanding, taping, and caulking before you even open a can of paint. Our team uses premium materials and a proven process to give you beautiful results without the stress. By letting experienced pros handle the tedious prep work and brush application today. You can save your weekends and enjoy crisp, clean lines that protect your home value for years to come. We make the entire process simple with our professional interior painting services, backed by a 5-year warranty and a pay-when-satisfied guarantee.
Ready to update your interior space? Call Paint Boise at (208) 254-6615 to schedule a free consultation for your next project.