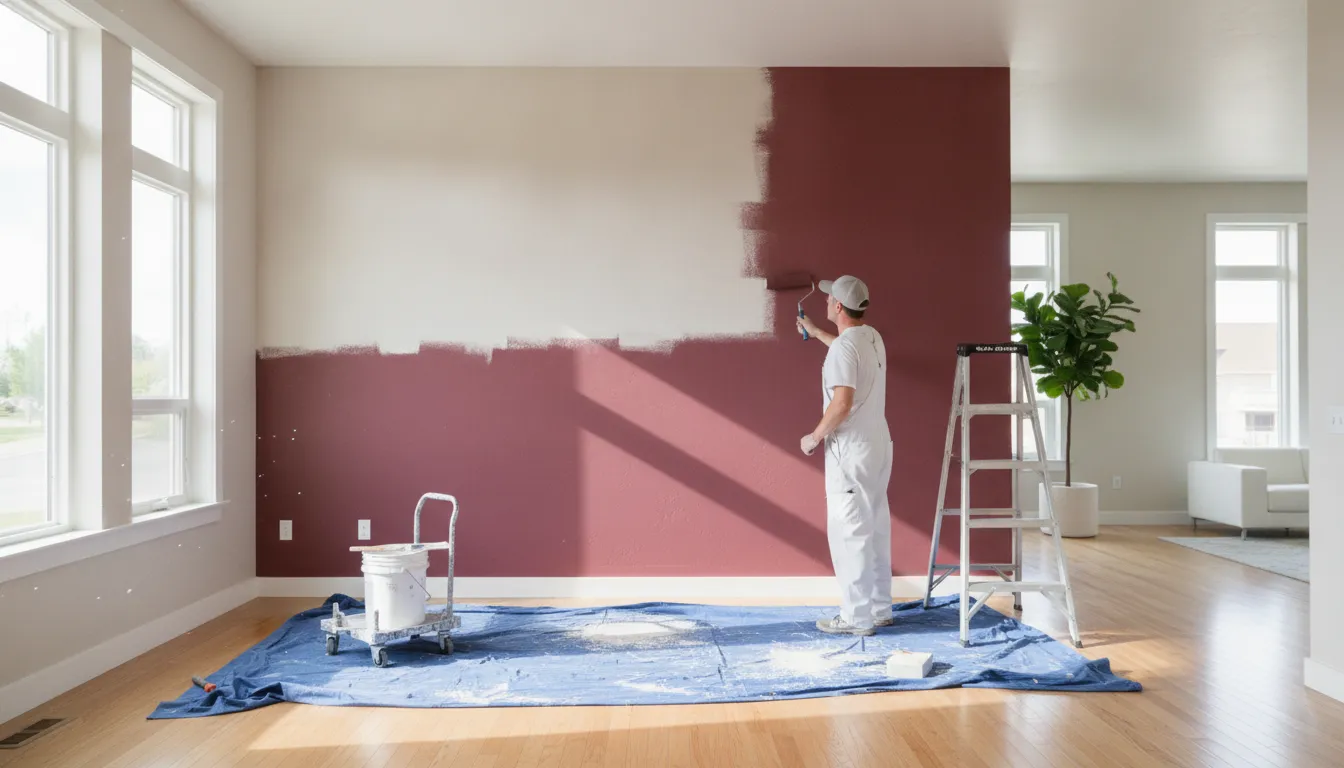
Buying a house in Boise often means inheriting dark, dated accent walls from the previous owner. You do not have to live with these gloomy rooms, but painting over them takes a clear plan.
Proper painting over dark walls is a multi-step interior painting process that depends entirely on thorough surface prep and selecting the correct primer for your home. To block deep tones and prevent the old color from showing through, you must clean, sand, and prime the wall before you apply any new paint. According to research from the Utah State University Extension, primers are needed to create a flat surface and ensure a strong bond with your new topcoats. Using a high-hide primer tinted close to your final paint color hides the dark base, cuts down the topcoats you need, and ensures a smooth finish. Our team at Paint Boise uses a standard six-step process to make sure your home gets the best coverage and a beautiful look.
If you want to cover deep red, dark blue, or heavy gray walls, you might wonder why you cannot just paint over them. Learning Why Painting Over Dark Walls Requires Special Preparation is the first step to a beautiful room. The path begins with
Why Painting Over Dark Walls Requires Special Preparation
People often want to change deep wall colors to lighter shades. But painting over dark walls is not as simple as putting new paint over the old coat. Dark paint has dense pigments that absorb light. If you do not prepare the walls first, the dark color will bleed through your new light paint. To get a clean look, follow proper surface preparation for painting.
The science of paint coverage
Why do light paints struggle to hide dark walls? The answer lies in how paint pigments work. Dark paints contain heavy pigments. These absorb almost all visible light. Light paints, on the other hand, rely on pigments that reflect light. If you put light paint over a dark red wall, the dark base absorbs the light. This makes the new color look muddy or dull. You will not get the true, bright color you wanted.
To fix this, you must change how the wall reflects light. A report from the Utah State University Extension shows that primers make a flat, even surface. This coat makes a strong bond between the old wall and your new paint. This bond also helps the topcoat go on smoothly without dry patches. Without this bond, your new paint will not stick well. It may peel or flake off over time.
The risk of bleed-through
If you try to skip prep work, you will run into issues. Many people think they can just add more coats. But cutting corners on prep work leads to a bad result. You may end up with an uneven coat and dark spots on your walls. The old color can bleed through. You will see dark patches under your new light paint.
This mistake also forces you to buy and apply extra paint. Experts at Crown Paints point out that bad prep work means you must use more topcoats to hide the old color. You will waste time and money. Using a good primer is the best way to block the dark color. This step, as noted by KILZ, cuts the number of coats you need. This blocks the old pigment. You will save money on paint cans. Taking your time during prep helps you get a smooth and clean wall.
Surface Preparation: The Foundation of a Flawless Finish
We believe that proper surface preparation for painting is the key to a great result. Dark paint hides some flaws but shows others when hit by light. If you skip the prep work, your new, lighter color will highlight every bump. Our team at Paint Boise has spent years painting over difficult wall surfaces across the Treasure Valley.
Cleaning and Sanding the Surface
Before you open a paint can, you must clean your walls. Dirt, dust, and grease will stop your primer from sticking. According to a study on home care by Utah State University Extension, clearing grease and foreign items is a key first step. You can use mild soap and warm water to wash the walls, or a special degreaser for tough spots.
Once the walls are dry, you should sand them. Research shows that dark-colored walls need deep prep work. You may need to scrape and sand the surface before you apply your primer. A light sanding removes the glossy sheen from the old coat. This process creates a mechanical bond so the new primer adheres well to the old surface. Use a fine-grit sanding sponge and wipe away the dust when done.
Repairing Holes and Cracks
Next, look for small holes, cracks, or dents in your drywall. Dark walls often hide these marks, but a new light color will make them stand out. You should fill each gap with a high-quality spackle. Use a putty knife to press the filler into the holes and scrape the surface flat.
Let the patch dry fully before you do anything else. Once the filler is dry, sand the area until it is smooth and even with the wall. This simple step creates the right base for a clean, flat finish on any wall. Skipping this step can lead to rough spots where the new paint looks rough.
Masking and Protecting Your Space
The last step of prep work is to protect the areas you do not want to paint. This is key when painting over dark walls with light colors. Any dark paint that bleeds onto your trim will be very hard to clean or cover later. You should use premium painter’s tape to cover the edges of your baseboards, trim, and door frames.
Press the tape down firmly with your fingers or a plastic tool to seal the edge. This prevents paint from bleeding under the tape. You should also lay down drop cloths to protect your floors and furniture from spills. Taking these steps ensures clean lines and a neat workspace, so you can focus on adding your primer and paint layers.
Choosing the Right Primer for Dark Wall Coverage
When you plan on painting over dark walls, you must not skip the priming stage. Using a high-grade primer is the best way to block the old color from showing through. By blocking the dark shade, you can reduce the number of topcoats you need to apply. For any home project, using the right primer is a key part of proper surface preparation for painting.
Oil-based versus latex primers
Primers come in both oil-base and latex forms, and you should select the one that best suits your walls. The table below shows the key differences.
| Feature | Latex (Water-Based) Primer | Oil-Based Primer |
|---|---|---|
| Drying time | Fast (1-2 hours) | Slow (6-24 hours) |
| Bleed-through blocking | Good for light stains | Excellent for heavy stains |
| Best surface | Drywall, plaster | Bare wood, glossy old paint |
| Odor | Low | Strong (need ventilation) |
| Cleanup | Soap and water | Paint thinner or mineral spirits |
| Wood grain issue | May raise wood grain on raw wood | Does not raise wood grain |
Most indoor walls in Boise homes are made of drywall. For these walls, a high-grade latex primer is often the best choice. It is easy to clean up with water and stays flexible over time. If your walls have old oil paint, you may need an oil-based primer to help the new layer stick.
The power of high-hide and stain-blocking formulas
When you change dark walls to light, standard primers might not have enough blocking power. This is where high-hide products are useful. High-hide primers are designed to neutralize deep tones well.
These products have more solid parts to block dark shades. Brands like KILZ and Zinsser BIN are great for this task. They also block tough stains from water, smoke, or pens that might show through your new paint.
Using a stain-blocking primer ensures that old marks do not ruin your new light walls. It acts as a shield between the old wall and your fresh topcoat. If you skip this, old stains can seep through many coats of new paint.
Benefits of tinting your primer
Another helpful tip is to tint your primer closer to your final topcoat shade. Tinting your primer helps neutralize dark wall colors faster. For example, if you paint a dark red wall with light gray, you can tint the primer to a soft gray. This step makes it much easier for the light topcoat to cover the wall.
By matching the primer shade to your final topcoat, you will need fewer coats of the finish paint to get full coverage. This simple step saves you hours of labor and cuts down on paint costs.
Choosing the right primer can be tricky when you deal with high-contrast color shifts. Our team at Paint Boise offers a free color consultation to help you choose the best primer and paint for your home. We make sure you get a strong, smooth finish without any of the stress.
Selecting the Best Paint and Tools for the Job
Premium paint brands for better coverage
To get a great result when painting over dark walls, you must use top-tier paint. Studies show that high-quality finish paints provide better coverage, which helps when covering dark colors. A good primer is still the base, but high-grade paint makes a huge difference.
Premium brands like Sherwin Williams and Benjamin Moore have better resins and oils. These parts help the paint stick well and hide the old shade. Good paint saves you time because you will need fewer coats.
Choosing paint sheens
The shine of your paint affects both look and wear. For most rooms, eggshell or satin paint works best on walls. They have a soft shine that hides wall flaws but still lets you wipe away dirt. Trim and doors need a tougher paint with more shine.
Semi-gloss is the standard choice for trim because it stands up to bumps and is very easy to clean. If you need help, our team at Paint Boise can help you in choosing the right paint finish for your space.
Brushes and roller naps
The tools you use can make or break your paint job. When painting over dark walls, the quality of your roller and brush affects the final appearance. Cheap tools can leave lint and streaks on the surface.
You should buy high-quality brushes and rollers to get an even coat of paint. A firm brush is best for sharp lines along your trim. High-quality tape also keeps paint from running onto other spots.
Choosing the right roller nap is also vital. The nap is the thickness of the fiber on the roller cover. Using a roller with the correct nap length is key when rolling primer over a dark surface to get even coverage.
For smooth drywall, use a thin three-eighths-inch nap. If you have textured walls, use a thicker half-inch nap. This thicker size pushes the paint into all the tiny gaps on the wall. The right nap holds enough paint to cover the dark shade with ease.
Step-by-Step: How to Paint Over Dark Walls
Essential Preparations First
Good prep when preparing your home for an interior paint project is key to a great look. This is true when you are painting over dark walls with light paint. Dark tones bleed through light shades if you skip steps. Planning your work makes the job simple and clean.
At Paint Boise, we use a six-step process for every painting job. This standard path helps us get a smooth finish on every wall we paint. When we cover dark tones, we do not take shortcuts. Skipping prep or using cheap tools will always lead to bad coverage. It can also cause the paint to peel or bubble.
You should check the wall for any peeling paint before you start. If the old paint is not stable, you must scrape and sand it first. Priming over loose paint will not work because the base is weak. Taking time to fix these spots now prevents major problems later. This ensures your new paint sticks for a long time.
The Step-by-Step Guide
Using these steps will help you get a great look. Take your time. Let each coat dry fully before moving to the next step.
- First, clean and prep the surface. Wash the walls with warm water and mild soap to remove grease, dirt, and dust. Paint will not stick to dirty walls. Let the walls dry all the way before you do any other work.
- Next, patch holes and sand smooth. Use a good wall filler to patch any small cracks or holes. Once the filler is dry, you must sand to create a smooth surface. This step helps the primer bond well to the old paint.
- Third, apply tinted primer to the wall. You should mask edges well with tape to keep lines sharp when painting over dark colors. Use a primer tinted close to your final shade. This blocks the dark tone and cuts the topcoats you need.
- Fourth, let the primer cure fully. You should wait for the primer coat to dry all the way before you apply any finish paint. Read the label on the paint can to check the dry time. This ensures a strong, even base.
- Fifth, apply the first topcoat of paint. Keep in mind that a few thin coats yield a smoother finish than one thick, rough coat. Use a roller with the correct nap to get an even coat. Let this first coat dry all the way.
- Sixth, inspect the wall and apply a second coat if needed. Check the surface for dark spots. Apply the next coat in the same thin, even way. Most dark walls will need two topcoats.
- Last, touch up the edges and trim. Pull the tape off with care while the paint is still damp. This keeps the edges from peeling and leaves you with sharp lines. Check your work under good light to find any missed spots.
Cost Considerations for Painting Over Dark Walls
Refreshing your home by painting over dark walls is a great project. But you must plan your budget before you buy paint. The total price depends on key factors like room size and paint quality.
Key cost factors for wall painting
Room size is the main factor that drives your cost. Larger rooms need more paint and more hours of labor. When you cover a dark wall, you must also think about the number of paint layers you need. More layers mean you must buy more gallons of paint and spend more time on the job.
Paint quality also plays a major role in your final budget. An academic paint study shows that high-quality finish paints offer better coverage. This coverage is crucial when you cover deep tones. Premium brands like Sherwin Williams cost more per gallon, but they hide dark paint in fewer coats.
Why skipping primer increases total expense
Some people try to save money by skipping the primer. This choice almost always backfires. An industry guide from Crown Paints notes that cutting corners on prep leads to an uneven finish. You may end up with a wall that has spots where the old dark color still shows through.
Without primer, you will need extra topcoats of costly paint. Tinting your primer to a shade near your topcoat helps hide dark colors faster. Professional painters know that multiple thin coats are best. But starting with primer is the cheapest path.
Choosing between DIY and professional services
Doing the work yourself saves on labor but costs a lot of time. You must buy brushes, rollers, tape, and drop cloths. If you make a mistake, you might have to buy even more paint to fix the walls. You also have to do all the prep work, which takes hours of hard sanding and cleaning.
Hiring a pro saves time and ensures a clean look. For homes in Boise, Meridian, Eagle, Nampa, or Caldwell, Paint Boise offers a stress-free option. We give free estimates and include premium paints in our quotes. Our team offers a five-year warranty.
We also use a no-deposit model so you only pay when you are fully satisfied. Call us at (208) 254-6615 for a free quote. You can also view our residential painting services online.
Frequently Asked Questions
Can you paint over dark colors without primer?
While you can skip primer by using extra coats, using a primer is the best path. It blocks old dark colors from bleeding through the new paint. Based on a Utah State study, primers are key for a strong paint bond. Skipping primer means you will need more topcoats and risk a patchy finish.
Should I tint my primer before painting over dark walls?
Yes, tinting your primer is highly helpful. Adding a gray tint or a shade close to your new paint helps hide dark tones much faster. A post by KILZ notes that a tinted primer blocks deep paint colors easily. This simple step cuts the number of final paint coats you must buy and apply.
How many coats of paint do I need to cover dark walls?
Most times, you will need one coat of high-quality primer and two coats of topcoat paint. This standard setup ensures the new light color looks clean and even. Advice from Glidden shows that several thin coats are much better than one thick coat. Using thin coats helps you avoid runs and drips for a smooth wall.
Is it hard to paint over dark walls?
It is not hard if you plan ahead and do not rush. The most key part is the prep stage. You must clean, sand, and prime the surface first. Based on a Utah State study, you must scrape and sand peeling paint before you apply primer. Taking time to prepare the walls makes the job simple and yields great results.
Ready to Paint Over Your Dark Interior Walls?
Leaving deep, dark paint on your walls can make your home feel gloomy and small. Trying to cover those heavy tones yourself often leads to patchy spots, uneven colors, and endless extra coats of paint. A poorly prepared DIY job can waste your precious weekends and still leave you with visible streaks or paint bleed-through. Setting up a professional painting job today ensures that you can avoid these struggles and start enjoying your bright rooms much sooner. Our local Boise crew uses a proven, standardized process to handle the heavy labor and deliver a beautiful, lasting finish quickly.
Ready to refresh your home with a beautiful new paint color? Call (208) 254-6615 today to get a free quote.