That dream kitchen remodel can feel totally out of reach, with a price tag that makes you want to just give up. But you don’t need a full tear-out to get a fresh, modern look. If your cabinet layout works but the finish feels dated or worn, you’re in the perfect spot for a smart update. Professional kitchen cabinet doors refinishing can completely change your space for a fraction of the cost. It delivers a huge visual impact without the dust and disruption of a total renovation. This guide will walk you through the entire process.
Key Takeaways
- Your final result is only as good as your prep work: Thoroughly cleaning, sanding, and priming every surface is non-negotiable for a durable finish that won’t chip or peel. This foundational step is the most important part of the entire project.
- Use the right materials and allow for proper curing time: Invest in a quality bonding primer and paint made specifically for cabinets, not leftover wall paint. Remember that paint needs days, or even weeks, to fully cure and harden, so patience is essential for a resilient finish.
- Technique is key to a smooth, factory-like look: Work in a clean space, apply several thin coats, and lay doors flat while painting to prevent drips. If the process feels too demanding, hiring a professional is a smart investment to guarantee a flawless result without the DIY guesswork.
What Exactly Is Cabinet Refinishing?
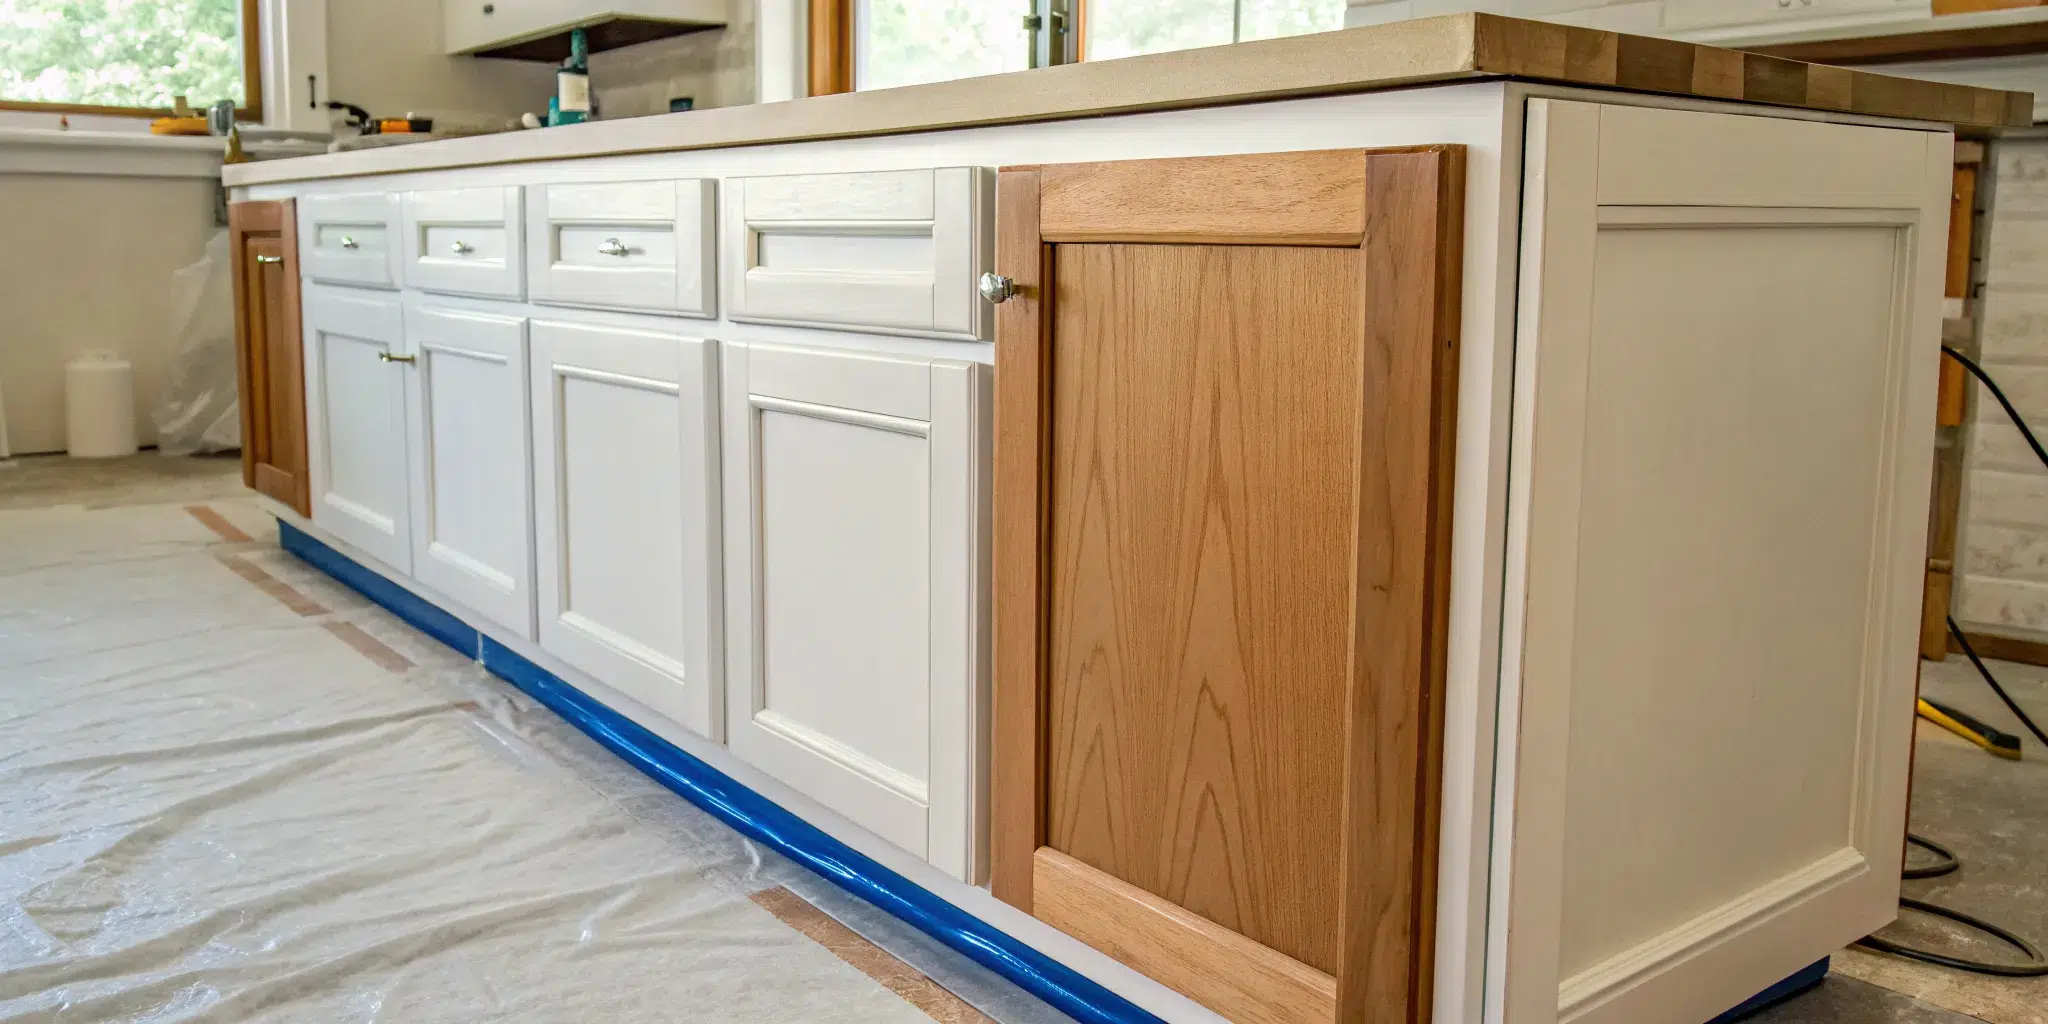
Cabinet refinishing is the process of giving your existing kitchen cabinets a complete makeover without ripping them out. Think of it as a powerful refresh that changes their look and feel entirely. Instead of replacing everything, you work with what you’ve got, which is a fantastic way to update your kitchen on a budget. The process involves removing the cabinet doors and hardware, thoroughly cleaning every surface to get rid of grease and grime, and then sanding everything down to create a smooth base for the new finish.
Once the prep work is done, a primer is applied to ensure the paint or stain adheres properly and looks even. Finally, several coats of high-quality paint or stain are applied to achieve the desired color and durability. It’s a detailed project, but the result is a kitchen that looks brand new. While it’s a popular DIY project, many homeowners choose to work with professional cabinet painters to guarantee a flawless, long-lasting finish. A professional touch ensures the job is done right, saving you from potential frustration and costly mistakes. It’s about reviving your current cabinets and making them the highlight of your kitchen once again.
Refinishing vs. Replacing: Which Is Right for You?
It’s easy to get the terms mixed up, but knowing the difference between refinishing, refacing, and replacing will help you decide what’s right for your kitchen. Refinishing, which we’re focusing on here, means keeping your current cabinet doors and boxes and simply changing their color or finish with paint or stain. It’s the most budget-friendly option for a cosmetic update.
Refacing is a step up. You keep the cabinet boxes but replace all the doors and drawer fronts with new ones. This is a great choice if you want a completely different style (like going from a traditional raised panel to a modern flat front) but your cabinet structure is still in good shape. Replacing is the most involved option: it means a full tear-out of your old cabinets and installing brand-new ones.
Comparing Costs and Savings
When you start looking at kitchen updates, the numbers can be a little shocking. A full kitchen remodel often runs well into the thousands, sometimes even tens of thousands of dollars, which can feel completely overwhelming. But refinishing your cabinets offers that fresh, updated look for a fraction of the price. Generally, a professional refinishing project can cost significantly less, The cost to paint cabinets varies by project size, but refinishing is a seriously cost-effective way to get a major transformation without completely draining your savings. If your budget is a primary concern, choosing to refinish your cabinets is one of the smartest financial decisions you can make for a home update.
Beyond the dollar savings, refinishing also saves you from the headache of a full-scale renovation. If your cabinet boxes are in good shape and you’re happy with your kitchen’s layout, there’s no need for a dusty, disruptive tear-out. You get to keep the functional parts of your kitchen while giving it a complete visual overhaul. This is why so many homeowners choose refinishing for a big impact without the big mess. To make the investment even more manageable, some professional painters provide payment flexibility. For example, we offer financing options to help you get the kitchen of your dreams now and pay over time, making a professional finish even more accessible.
Signs It’s Time to Refinish Your Cabinets
Deciding to refinish your cabinets often comes down to two things: their condition and your desire for a change. If your cabinets are structurally sound but look dated, worn, or faded, they are perfect candidates for refinishing. Look for cosmetic issues like scratches, peeling paint, or a finish that’s lost its luster. If you’re tired of the old wood grain or color but the layout of your kitchen works for you, refinishing is an incredibly effective and cost-efficient solution.
This project can dramatically improve the look of your kitchen without the cost and disruption of a full remodel. However, if your cabinets have serious issues like warped doors, water damage, or broken frames, replacement might be the better route. For most homes, a quality refinishing job is all that’s needed to breathe new life into the space. We stand by our work with a service guarantee because we know what a difference a professional finish makes.
Get Ready: Your Tools and Materials Checklist
Before you even think about touching a cabinet door, let’s talk about prep. Getting all your supplies in one place before you start is one of the best things you can do to make this project feel manageable and fun. A well-organized project is a smooth project, and it all begins with having the right tools, the perfect paint, and a workspace that’s set up for success. Think of it as your mission control. Taking the time to prepare your space and gather your gear will save you from making frantic trips to the hardware store mid-project and help you achieve that flawless, professional-looking finish you’re dreaming of. Let’s get everything you’ll need lined up and ready to go.
The Essential Tools You’ll Need
Having the right tools on hand makes all the difference between a frustrating task and a satisfying one. You don’t need a professional workshop, but a few key items are non-negotiable for getting the job done right. Start by gathering a screw gun for removing doors and hardware, a pencil and measuring tape for accuracy, and clamps to hold pieces steady. You’ll also want a level to ensure everything is perfectly aligned when you put it back together. For the refinishing itself, a good sander is essential for creating a smooth surface, and quality paintbrushes will help you apply your finish evenly. Think of this as your project starter pack; with these items, you’re well on your way.
How to Choose the Perfect Paint or Stain
This is where you get to define your kitchen’s new style. The biggest choice you’ll make is between paint and stain. Painting completely covers the wood grain, giving you a solid, modern color and a fresh new look. It’s perfect if you want to make a dramatic change from dark wood to a light, airy white, for example. Staining, on the other hand, enhances the natural beauty of the wood grain. It’s a great option if you love the character of your cabinets but just want to refresh or change the tone. If you’re unsure which products will give you the most durable and beautiful results, consulting with professional cabinet painters can provide clarity and confidence in your choice.
Paint Types: Enamel vs. Latex
When you get to the paint aisle, you’ll see two main categories: enamel and latex. Traditionally, enamel paints were oil-based and loved by pros for their rock-hard, durable finish that stands up to the chaos of a busy kitchen. They level out beautifully, leaving a smooth, brush-stroke-free surface. The downside is the strong smell and longer drying time. Latex, or water-based paint, is much more user-friendly. It dries faster, has a lower odor, and cleans up easily with soap and water. However, as some experts point out, standard latex paint may not be tough enough for high-traffic cabinets. Luckily, modern paint technology has given us the best of both worlds: water-based enamel paints that offer the durability of oil-based formulas with the easy cleanup of latex.
Choosing the Right Sheen: From Matte to High-Gloss
Paint sheen is about more than just looks; it’s about durability and cleanability. A high-gloss finish is the toughest and easiest to wipe down, but it will show every fingerprint and tiny imperfection in the wood. On the other end, a matte finish looks incredibly chic and modern but is the hardest to clean, as its porous surface can trap dirt. For kitchen cabinets, most people find their perfect match right in the middle. A satin or semi-gloss finish is often the best choice. It offers great durability, is easy to clean, and has a lovely, subtle shine that isn’t too reflective. This is the go-to sheen for a finish that looks professional and holds up to daily life. For a complete walkthrough of the entire process from start to finish, check out our complete kitchen cabinet painting guide.
Alternative Options: Gel Stains and Furniture Restorers
If solid paint feels too drastic, you have other great options. Gel stain is a fantastic choice if you want to significantly change your cabinet color—say, from a light oak to a rich espresso—but still want the natural wood grain to show through. It’s thick and sits on top of the wood, making it more forgiving than traditional stain. If your cabinets are just a little tired but don’t need a full color change, a furniture restorer might be all you need. These wipe-on products can revive a dull finish and hide minor scratches with minimal effort. They won’t change the color, but they can make your cabinets look much better with very little work.
Always Test Products in a Hidden Spot
This is the golden rule of any refinishing project: always test your product first. Before you commit to painting an entire kitchen, apply your chosen paint or stain to a discreet area, like the back of a cabinet door or a drawer front. This simple step lets you see how the color looks in your kitchen’s unique lighting and how it applies over your existing finish. As one DIYer on Reddit wisely advises, testing first lets you see “how it looks and if you like working with it.” It’s your chance to catch any issues before they become a huge headache. This small bit of patience can save you from a result you don’t love, ensuring your hard work pays off beautifully.
How to Set Up a Safe and Efficient Workspace
Creating a dedicated and safe workspace is a crucial step. You’ll want to protect your kitchen from dust and paint, so cover your countertops and floors with drop cloths. Use painter’s tape to create clean lines where the cabinet boxes meet the walls or backsplash. Good ventilation is also incredibly important, especially when you’re sanding or working with primers and paints that have strong fumes. Open windows and use fans to keep the air circulating. Finally, don’t forget your safety gear. A pair of safety glasses and a dust mask are essential for protecting yourself throughout the project. Proper setup is a key part of any great interior painting job, and it’s just as important here.
How to Prep Your Cabinets for a Flawless Finish
Ask any professional painter, and they’ll tell you the secret to a flawless finish isn’t in the final coat of paint, it’s in the preparation. This is the most time-consuming part of the project, but every minute you spend here will pay off in the end. Rushing through these steps is the quickest way to a finish that peels, chips, or just looks messy. If you want results that look professional, you have to prep like a professional. Our team of expert cabinet painters dedicates most of their time to this phase, ensuring the final product is durable and beautiful.
First, Identify Your Cabinet Material
Before you can jump into the fun part of choosing colors, you need to play detective for a minute. Figuring out what your cabinets are made of is the single most important first step because it determines your entire game plan. Solid wood cabinets are the most versatile; you can sand them down and either paint or re-stain them to your heart’s content. If you have a wood veneer—a thin layer of real wood over a core material—you can still refinish them, but you have to be incredibly gentle with sanding to avoid damaging that thin top layer. For laminate or particle board cabinets, painting is your best bet. These materials don’t take well to sanding, so a good bonding primer and a quality paint are your keys to a fresh new look. Knowing your cabinet materials from the start saves you from headaches and costly mistakes down the road.
First, Remove All Doors and Hardware
First things first, you need a blank slate. Carefully remove all cabinet doors and drawer fronts from their frames. Next, take off all the hardware, including hinges, knobs, and pulls. This is a crucial step, so don’t be tempted to just tape over them. To avoid a frustrating puzzle when it’s time to put everything back together, create a simple labeling system. Use painter’s tape to number each door and write the corresponding number inside the cabinet frame. Place the hardware for each door in a separate labeled bag. This small bit of organization will save you a major headache later.
Create a Detailed Labeling System
We’ve touched on labeling, but this step is so important it deserves its own spotlight. A detailed system is your best defense against the frustrating puzzle of figuring out which door goes where during reassembly. Use painter’s tape to create a simple code for each door (like U1 for the first upper, L2 for the second lower) and write the same code in a discreet spot inside the cabinet, such as where the hinge will be reinstalled. This ensures every door returns to its original home, which is crucial because cabinets can settle uniquely over time. For the hardware, place the hinges and screws from each door into a small, labeled bag and tape it inside the corresponding cabinet box. This methodical approach is a trade secret and a key step our own cabinet painters never skip to guarantee a perfect reinstallation.
How to Properly Clean and Degrease Your Cabinets
Your kitchen cabinets have seen it all, from splattered spaghetti sauce to greasy fingerprints. Paint simply won’t stick to a dirty or oily surface, so a thorough cleaning is non-negotiable. You’ll need a good degreasing cleaner for this job. Many pros use a trisodium phosphate (TSP) substitute, which you can find at most hardware stores. Mix the cleaner according to the directions and use a sponge or rag to scrub down every surface you plan to paint, including the cabinet boxes, doors, and drawer fronts. Once you’re done, wipe everything down with a clean, damp cloth to remove any residue and let it dry completely.
Use a Toothbrush for Detailed Grooves and Corners
For cabinets with any kind of decorative trim, raised panels, or grooves, a sponge just won’t cut it. This is where an old toothbrush becomes your secret weapon. After scrubbing the main surfaces, dip the toothbrush in your degreasing solution and use it to get into all those nooks and crannies where years of grease and dust have settled. It might feel a bit tedious, but this step is what ensures your primer and paint will adhere evenly across the entire door, preventing future peeling in those detailed spots. This level of meticulous prep is exactly what our professional cabinet painters focus on; it’s the small details that create a truly durable and beautiful result.
Safety First: A Warning About Lead Paint
Before you even think about sanding, it’s crucial to consider the age of your home. If your house was built before 1978, there’s a chance your cabinets could have been painted with lead-based paint. Sanding this paint releases toxic dust into the air, which is extremely hazardous to you and your family if inhaled. Always wear a mask, but if you suspect lead paint, the first step is to test for it. You can find lead testing kits at most hardware stores. If the test comes back positive, the safest course of action is to stop the project and call in professionals who are certified to handle lead paint abatement. Your health is not worth the risk, and a professional team is equipped to manage these situations with the proper care and expertise.
Sanding 101: Creating a Smooth Surface
Once your cabinets are clean and dry, it’s time to sand. The goal here isn’t to strip the old finish down to the bare wood. Instead, you’re just trying to scuff up the surface a bit. This light abrasion gives the new primer something to grip onto, ensuring a strong bond and a long-lasting finish. Use a medium-grit sandpaper, somewhere in the 120- to 220-grit range, and lightly sand all surfaces. Pay attention to how it feels; you’re looking for a smooth, even texture. When you’re finished, be sure to remove every speck of dust with a vacuum and a tack cloth.
Using the Right Sandpaper Grits for Each Step
Walking down the sandpaper aisle can feel a bit overwhelming, but you only need a couple of different types for this project. Start with a medium-grit sandpaper, around 120- to 150-grit. Your goal isn’t to strip the old finish completely, but to scuff it up. This creates a slightly rough texture, or “tooth,” that gives the primer a perfect surface to grip onto, ensuring a strong bond that won’t peel later. This initial sanding is what sets the stage for a durable, long-lasting result.
After your primer has fully dried, you’ll do another very light sanding. This time, switch to a fine-grit sandpaper, like 220-grit. This step isn’t about removing material; it’s about smoothing out any minor imperfections or dust nibs in the primer coat. It’s the secret to achieving that silky-smooth, factory-like finish. Before you even think about painting, you must remove all the dust. Use a vacuum with a brush attachment, then wipe every surface with a tack cloth. Any leftover dust will get trapped in your paint, and all your hard work will be for nothing. It’s a step our professional cabinet painters never skip for a flawless result.
How to Fill Imperfections for a Seamless Look
Now is your chance to play detective and hunt for any imperfections. Carefully inspect your doors and frames for any dings, dents, deep scratches, or old hardware holes you want to hide. Use a high-quality, paintable wood filler and a flexible putty knife to fill these spots. Apply a small amount, pressing it firmly into the imperfection. It’s better to slightly overfill it. Once the filler is completely dry, sand it smooth so it’s perfectly flush with the surrounding surface. This step is what separates a good DIY job from a great one, creating that seamless, like-new appearance.
Your Step-by-Step Guide to Refinishing Cabinet Doors
You’ve done the hard work of prepping your cabinets, and now it’s time for the most satisfying part of the project: the transformation. This is where you’ll see your vision come to life, coat by coat. The key to a flawless finish is patience and attention to detail during these final steps. Rushing the process now can undo all your careful preparation.
While this guide walks you through a DIY approach, it’s worth noting that professional cabinet painters have perfected this process to achieve a durable, factory-like finish every time. Their expertise ensures every layer is applied perfectly for maximum longevity. If you follow these steps carefully, you can achieve a beautiful result you’ll be proud of. The process breaks down into three key stages: priming, painting or staining, and sealing with a protective topcoat. Each step builds on the last to create a finish that not only looks great but also stands up to daily use.
Priming: The Foundation for a Durable Finish
Don’t be tempted to skip the primer. This step is absolutely essential for a professional-looking and long-lasting finish. A high-quality primer does two important jobs: it seals the porous wood surface and creates a uniform base that your paint can grip onto. This ensures better adhesion, prevents stains or wood tannins from bleeding through, and helps you get a true, even color.
Apply a thin, even coat of primer to all your prepared surfaces. Focus on smooth application, avoiding drips or thick spots. Let the primer dry completely according to the product’s instructions, which can take a few hours. Once it’s dry, you can lightly sand it with fine-grit sandpaper for an ultra-smooth foundation before you start painting.
When to Use a Wood Conditioner
If you’re staining instead of painting, there’s an extra step you might need to consider: applying a wood conditioner. Think of it as a pre-stain treatment that helps the wood absorb the stain evenly. Softwoods like pine, birch, and maple are notorious for looking blotchy after staining because their grain density varies. A wood conditioner works by partially sealing the most porous areas, preventing the stain from soaking in too deeply in some spots and not enough in others. This step is a trade secret that many professional cabinet painters use to achieve a flawless, uniform finish, especially with lighter stains. It gives you much better control over the final color and ensures the beautiful wood grain is enhanced, not hidden by splotches.
How to Apply Paint or Stain for a Professional Look
Now for the main event. Whether you’re using paint or stain, the goal is to apply thin, even coats. For paint, plan on applying at least two coats of a durable cabinet-grade paint, like an acrylic alkyd enamel. This type of paint is designed to level out smoothly and cure to a hard, durable finish. Be sure to let the first coat dry completely before applying the second. This is where patience really pays off, as rushing can lead to a tacky, uneven surface.
If you’re staining, you can find products that combine stain and polyurethane into one step, which both colors and protects the wood simultaneously. This can be a great time-saver while still giving you a beautiful, rich finish.
Seal the Deal: Applying a Protective Topcoat
The final step is to apply a protective topcoat. This clear coat is your cabinet’s armor, shielding the paint or stain from chipping, fading, and daily wear and tear. It creates a strong, washable surface that’s perfect for a high-traffic area like the kitchen. A good topcoat makes your cabinets easier to clean and helps them look new for years to come.
Apply one or two thin coats of a clear, non-yellowing polyurethane or polycrylic finish, allowing each coat to dry thoroughly. This final layer is what separates a good DIY job from a great one, giving your cabinets the durability you’d expect from professional interior painting work.
Pro Tips for a Flawless, Factory-Like Finish
You’ve put in the hard work of prepping, and now it’s time for the most rewarding part: seeing your vision come to life. The application stage is where patience and technique really pay off. Achieving that flawless, durable finish that looks like it came straight from a factory is totally possible. It just requires focusing on a few key details that professionals never skip. From choosing the right tools to giving your cabinets enough time to cure, these steps will help you get a result you can be proud of for years to come.
Sprayer, Brush, or Roller: Which Is Best?
The tool you choose will have a big impact on your final finish. For a super smooth, factory-like look, a paint sprayer is the top choice. It delivers a fine, even mist of paint that eliminates the risk of brush strokes. However, sprayers come with a learning curve and require extensive masking to protect surrounding areas from overspray. If you’re new to this, a combination of a brush and roller is a fantastic, more user-friendly option. Use a small, high-density foam roller for the large, flat surfaces of your cabinet doors and a high-quality angled brush for the detailed trim and corners. This method gives you great control and can produce a beautiful, nearly flawless finish.
Mastering the “Brush and Roll” Method
If a paint sprayer feels a bit too intimidating, the “brush and roll” method is your new best friend. This technique is incredibly user-friendly and gives you fantastic results. It’s all about using the right tool for the right job. You’ll want a small, high-density foam roller to glide over the large, flat surfaces of your cabinet doors, which helps you avoid leaving behind any unwanted texture. For all the detailed trim, corners, and crevices, a high-quality angled brush will give you the precision and control you need. This combination is a go-to for both DIYers and pros because it’s efficient and delivers a beautiful, smooth finish.
With your tools in hand, remember that your technique is what will create that smooth, factory-like look. The key is to work in a clean, dust-free space and apply several thin coats of paint rather than one thick one. Always lay your doors flat while painting and drying to prevent any frustrating drips from forming. This method ensures an even application and minimizes imperfections. If the thought of managing all these details feels overwhelming, don’t hesitate to call in the experts. Hiring professional cabinet painters is a smart investment to guarantee a flawless result without the stress and guesswork.
How to Get Smooth, Even Coats Every Time
The secret to a durable, professional-looking paint job isn’t one thick coat; it’s several thin, even coats. It can be tempting to load up your brush or roller to get the job done faster, but this often leads to drips, runs, and an uneven texture. Instead, apply a thin coat of paint, focusing on long, steady strokes. The paint should cover well without being gloppy. Let each coat dry completely according to the manufacturer’s instructions. For an extra-smooth surface, lightly sand with fine-grit sandpaper (220-grit or higher) between each coat, wiping away the dust with a tack cloth before applying the next one. This is how our expert cabinet painters achieve that signature smooth finish.
How to Create a Dust-Free Painting Environment
Dust is the enemy of a perfect paint finish. Even the tiniest speck can create a noticeable blemish in your final topcoat. Before you start painting, it’s so important to create a clean, dust-free environment. If possible, work in a garage or a spare room where you can control the airflow and limit foot traffic. Vacuum the entire area thoroughly, including the ceiling and walls, and then wipe down all surfaces with a damp cloth. Avoid painting on a windy day if you’re near an open door or window. Taking the time to set up a clean workspace ensures that nothing will settle on your wet paint, leaving you with a pristine, smooth surface.
Patience Is Key: Proper Drying and Curing Times
Patience is key, especially when it comes to drying and curing. Paint might feel dry to the touch in a few hours, but it isn’t fully hardened or “cured” for much longer, sometimes taking several days or even weeks. Not letting the paint cure long enough can lead to smudges, scratches, or dings when you re-install the hardware and doors. Always follow the paint can’s instructions for cure times. This waiting period is essential for the paint to harden into a durable, long-lasting shell. A proper cure is what gives your cabinets the resilience to stand up to daily kitchen life, a result we stand behind with our service guarantee.
Cabinet Refinishing Mistakes (And How to Avoid Them)
Refinishing your kitchen cabinets is a rewarding project, but a few common missteps can turn your dream kitchen into a DIY disaster. Knowing what to watch out for is half the battle. Let’s walk through the most frequent mistakes so you can get a beautiful, durable finish that you’ll be proud of for years to come.
Why You Can’t Afford to Skip Prep
I get it, you’re excited to start painting. But jumping ahead without proper prep is the number one reason cabinet projects fail. Think of it this way: you can’t build a strong house on a weak foundation. Dirt, grease, and grime create a barrier that prevents paint from sticking properly, which leads to peeling and chipping. Taking the time to thoroughly clean, sand, and prime every surface is non-negotiable. A truly professional finish, like the ones we create with our expert interior painting services, always starts with meticulous preparation. It’s the most important step for a finish that lasts.
How Using the Wrong Products Can Ruin Your Finish
Please don’t reach for that leftover wall paint. While it might seem like a good way to save money, standard interior paint isn’t designed to withstand the daily wear and tear that kitchen cabinets endure. It will quickly show scuffs, stains, and fingerprints. You need products specifically formulated for cabinetry, which are much more durable. This includes a high-quality bonding primer and a tough topcoat. Our team of professional cabinet painters relies on specific products that create a hard, factory-like finish because we know that using the right materials is essential for a beautiful and long-lasting result.
The Problem with Rushing the Process
Patience is a virtue, especially when it comes to painting. It’s crucial to let each coat of primer and paint dry completely according to the manufacturer’s instructions. But there’s another step that’s often overlooked: curing. Paint might feel dry to the touch in a few hours, but it can take days or even weeks to fully harden, or cure. If you start using your cabinets before the paint has cured, the finish is still soft and can easily get dented, scratched, or damaged. Resisting the urge to speed things up will pay off with a much more resilient finish.
The Risk of Reassembling Before Cabinets Are Cured
After all your hard work, you’ll be eager to put your kitchen back together. However, reattaching handles, knobs, and hinges or rehanging the doors before the paint has fully cured is a recipe for frustration. A simple slip of a screwdriver can gouge your brand-new finish, and the pressure from hardware can leave permanent indentations in the soft paint. Give your cabinets plenty of time to cure completely before you start reassembling them. This final waiting period protects your work and ensures you won’t have to do any last-minute touch-ups. It’s a key part of the professional process we stand by in our service guarantee.
So, How Long Will This Project Actually Take?
Let’s be realistic: refinishing your kitchen cabinets is not a simple weekend project. While the transformation is absolutely worth it, the process requires patience and a clear understanding of the timeline. Rushing through the steps is the fastest way to get a finish you’ll regret. The total time from start to finish depends on the size of your kitchen, the condition of your cabinets, and the products you choose. But a good rule of thumb is to block out at least a full week, and possibly more, to allow for proper prep and drying between coats. This isn’t a race, and treating it like one will only lead to frustration and a finish that doesn’t last.
Think of this project in phases rather than hours. You’ll have days dedicated to preparation, days for painting, and then the often-overlooked but crucial waiting period for the paint to fully harden. Planning for this extended timeline from the beginning helps manage expectations and prevents you from cutting corners. It’s the difference between a durable, beautiful finish and one that chips the first time you close a cabinet door too hard. If that sounds like more time than you have, or if you want to guarantee a flawless result without disrupting your life for weeks, remember that professional cabinet painters have the tools and experience to complete the job efficiently and correctly. They handle the entire process, from meticulous prep to the final cure, giving you a new kitchen look without the DIY stress.
Breaking Down the Timeline: From Prep to Cure
So, what does a week-long (or longer) project look like? Let’s break it down. Expect to spend one to two full days on prep work alone. This includes removing all the doors and hardware, thoroughly cleaning every surface, sanding, and making any necessary repairs. Once prepped, applying the primer will take a few hours, followed by a manufacturer-recommended dry time. Then comes the paint. You’ll need at least two coats, with several hours of drying time between each one. All in all, the hands-on work might take you three to five days, but the project itself will stretch over a longer period to accommodate all the necessary waiting.
Common Delays and How to Plan for Them
Several common missteps can turn your week-long project into a month-long headache. The biggest culprit is improper prep. If you don’t clean the cabinets thoroughly to remove grease and grime, your primer and paint won’t stick, forcing you to start over. Another time-sink is applying paint too thickly to try and finish faster. This leads to drips, an uneven texture, and an incredibly long drying period. Using the wrong products, like house paint not designed for high-traffic cabinetry, can also cause frustrating delays and poor results. Each of these mistakes requires you to backtrack, sand everything down, and repeat steps, adding significant time and effort to your project.
Drying vs. Curing: Why the Difference Matters
This is one of the most important concepts to grasp for a lasting finish. Paint dries to the touch relatively quickly, sometimes in just an hour. This happens as the water or solvents evaporate from the surface. However, paint cures over a much longer period, from several days to a few weeks. Curing is the chemical process where the paint hardens completely and develops its final durability. Your cabinet doors might feel dry, but they can still get damaged if they haven’t fully cured. Reattaching hardware or hanging the doors too soon can easily lead to smudges, dents, or scratches in the soft finish, undoing all your hard work.
Hit a Snag? How to Fix Common DIY Issues
Even the most carefully planned DIY project can hit a few bumps. When you’re midway through refinishing your cabinets, it’s easy to feel discouraged if things aren’t looking picture-perfect. But don’t toss your paintbrush just yet. Most of these issues are common hurdles that, with a little guidance, you can absolutely overcome. From pesky drips and uneven color to doors that just won’t hang straight, we’ve seen it all and know how to fix it.
Think of these challenges as part of the process. Learning how to fix an uneven coat or ensure your color is consistent is what separates a good DIY job from a great one. It’s about knowing the tricks of the trade that turn a frustrating mistake into a minor setback. Below, we’ll walk through some of the most frequent problems you might face and give you clear, actionable steps to solve them. We want you to feel confident tackling this project. And remember, if a challenge starts to feel more like a roadblock, our team of professional cabinet painters is always here to help get your project across the finish line with a flawless, durable finish.
How to Fix Drips, Runs, and Uneven Coats
One of the most common frustrations in cabinet refinishing is ending up with drips, bubbles, or an uneven finish. This often happens when too much paint is applied at once or when you try to paint doors while they’re still hanging. The key to a smooth, professional look is patience and technique. Always apply paint in thin, even coats, allowing each one to dry completely before adding the next. It’s far better to apply three thin coats than one thick, goopy one.
To prevent drips, remove the doors and lay them flat on a work surface. This uses gravity to your advantage, helping the paint self-level. If you do spot a drip after the paint has dried, don’t worry. You can fix it by lightly sanding the area until it’s smooth, wiping away the dust, and then applying another thin coat of paint.
Tips for Achieving Consistent Color Across All Doors
Have you ever finished painting a room only to notice that one wall looks slightly different from the others? The same thing can happen with cabinets. To ensure your color is perfectly consistent across every door and frame, mix all of your paint for the project in a single large bucket. This technique, called “boxing,” eliminates the minor variations that can occur between different cans of paint.
As you work, try to maintain a “wet edge.” This means you should always brush or roll from a dry area into the section you just painted. This technique helps blend each stroke seamlessly, preventing lap marks where sections overlap. Applying the same number of primer and paint coats to every surface is also crucial for achieving a uniform finish, a standard practice in any expert interior painting project.
How to Reinstall and Align Doors for a Perfect Fit
You’ve done the hard work of prepping, sanding, and painting. Now it’s time to put everything back together, but which door goes where? This is where a little prep work at the beginning saves you a major headache at the end. Before you even remove the first screw, create a simple labeling system. Use a piece of painter’s tape to number each cabinet door and the inside of its corresponding cabinet box.
Place all the hinges and screws from each door into a small, labeled plastic bag. This simple organizational step makes reassembly a breeze. You’ll know exactly which door, hinges, and screws belong together, ensuring everything aligns perfectly. It might feel tedious at the start, but you’ll be grateful you did it when your doors hang straight and close smoothly.
How to Adapt Your Technique for Different Woods
Not all cabinets are created equal, and the material they’re made from will dictate your refinishing process. Before you start, it’s important to identify what you’re working with. If your cabinets are solid wood, like oak or maple, they are great candidates for either staining or painting. Keep in mind that woods with a deep grain, like oak, may require a grain filler if you want a completely smooth painted surface.
If your cabinets are made of laminate, thermofoil, or particle board, you won’t be able to stain them. For these materials, your best option is paint. The key is to use a high-quality bonding primer designed to adhere to slick, non-porous surfaces. You’ll also need to be gentle when sanding to avoid damaging the thin top layer. Understanding your material is the first step to a successful finish.
How to Maintain Your Newly Refinished Cabinets
You’ve put in the work, and your kitchen cabinets look fantastic. Now, let’s talk about how to keep them that way. A little bit of routine care will protect your beautiful new finish and ensure your hard work pays off for years to come. Think of it as the final, ongoing step of your refinishing project. Proper maintenance prevents the buildup of kitchen grime and addresses minor wear and tear before it becomes a bigger issue. It’s much easier to spend a few minutes each week on upkeep than to start another refinishing project sooner than you’d like.
These simple habits will preserve the fresh, clean look of your cabinets and keep your kitchen feeling bright and welcoming. Maintaining a high-quality finish is key to the longevity of your cabinets. Whether you’ve done the work yourself or hired professionals, the goal is a durable surface that stands up to daily life. A professional cabinet painting job focuses on creating a finish that is as resilient as it is beautiful, and even the best work benefits from consistent care. By following a few simple guidelines, you can protect your investment and enjoy your refreshed kitchen for a long, long time.
The Right Way to Clean Your Refinished Cabinets
The best way to keep your newly refinished cabinets looking pristine is with gentle, regular cleaning. Kitchens are busy places, and a thin layer of grease and dust can settle on surfaces without you even noticing. To prevent this buildup, simply wipe down your cabinets once a week. Use a soft cloth dampened with a mild solution of soap and warm water. After wiping away any grime, go over the surface with a second clean, dry cloth to remove any moisture. Avoid using abrasive scrubbers or harsh chemical cleaners, as these can strip away the protective topcoat and dull your beautiful finish.
Fixing Scratches and Nicks: A Touch-Up Guide
No matter how careful you are, small nicks and chips can happen. The key is to fix them quickly before they get worse. This is where a touch-up kit comes in handy. If you saved a small amount of the paint or stain you used for the project, you’re already ahead of the game. For any minor dings, just apply a tiny amount of paint or stain with a small artist’s brush, feathering the edges to blend it in. This simple fix keeps moisture out and prevents the damage from spreading. Taking care of these little imperfections as they appear is a core part of long-term maintenance and ensures your cabinets always look their best.
Know Your Limits: When to Call a Professional
There’s a special kind of satisfaction that comes from completing a project with your own two hands. But let’s be honest, some projects are more complex than they appear on a weekend TV show. While tackling your kitchen cabinets yourself can seem like a great way to save money, it can sometimes lead to frustration and a finish that doesn’t quite meet your expectations. If you find yourself feeling overwhelmed, questioning if you can get that perfectly smooth, durable finish, or simply running out of time, it might be time to call for backup.
Recognizing when a project is beyond your current skill set or time availability is a strength, not a weakness. A professional painter brings experience, specialized equipment, and an eye for detail that can be the difference between a kitchen you like and a kitchen you love. They handle the tedious prep work and tricky application, saving you from potential mishaps and ensuring the final product is something you’ll be proud of for years. Our goal is to help you get the kitchen of your dreams, whether you do it yourself or decide you need a helping hand from our team.
Signs It’s Time to Call in a Pro
Sometimes the biggest challenge of a DIY project is knowing when to tag in a professional. If you’re standing in your kitchen and any of these situations feel familiar, it might be a sign to call for help. A major red flag is extensive prep work. If your cabinets have significant damage, deep grain that needs filling, or a stubborn old finish that won’t budge, the preparation alone can be a massive undertaking.
Another key sign is a lack of proper tools and space. Achieving a factory-like finish often requires a paint sprayer and a dedicated, dust-free area for drying, which most homeowners don’t have on hand. Common DIY mistakes, like not cleaning the surfaces properly or using the wrong primer, can ruin the final result. If you’re feeling unsure about the right products for your specific cabinet material, it’s wise to consult with expert cabinet painters who can guarantee a beautiful and long-lasting finish.
Breaking Down the Costs: DIY vs. Professional Refinishing
When you’re weighing your options, the cost is always a major factor. The initial price tag of a DIY project is tempting, but it’s important to consider the total value. Professional cabinet refinishing is a smart investment that can significantly update your kitchen’s look for a fraction of the cost of a full replacement. Plus, a high-quality finish can add real value to your home, with many projects recouping 70% to 80% of their cost at resale.
Mistakes made during a DIY attempt can be expensive to fix, potentially costing more than hiring a professional from the start. When you work with a team like ours, you’re not just paying for paint. You’re paying for expertise, efficiency, and peace of mind. We stand behind our work with a service guarantee, ensuring the job is done right. We also offer flexible financing options to help make your dream kitchen an affordable reality without the stress of a project gone wrong.
Related Articles
- Cabinet Painters Boise, Idaho | Cabinet Painting Services
- Painting an Old House: What You Need to Know
Frequently Asked Questions
How long will my kitchen be out of commission for this project? It’s best to plan for your kitchen to be disrupted for at least a full week. The hands-on work of cleaning, sanding, and painting might take a few days, but the real time is in the waiting. You need to allow for proper drying time between each coat of primer and paint. More importantly, the final finish needs several days to cure and harden properly before you can reattach the doors and hardware.
What is the single most important step for getting a durable finish? Without a doubt, it’s the preparation. A flawless, long-lasting finish is built on a perfectly clean and prepped surface. Taking the time to thoroughly degrease, sand, and prime your cabinets is what ensures the paint will stick properly and resist chipping. Rushing this phase is the most common reason DIY projects fail, so give it the time and attention it deserves.
Can I paint over any type of cabinet, even if it’s not solid wood? Yes, you can paint most cabinet materials, but your approach will need to change. For materials like laminate or thermofoil, you can’t stain them, so paint is your only option. The key is using a high-adhesion bonding primer specifically designed for slick surfaces. This creates a grippy foundation for your paint to stick to, which is essential for a finish that won’t peel away.
Will a painted finish really hold up in a busy kitchen? Absolutely, as long as you use the right products and process. Standard wall paint won’t cut it. You need to use a durable, high-quality cabinet-grade paint, often called an acrylic alkyd enamel, which is designed to cure into a hard, scrubbable shell. When combined with proper prep and a protective topcoat, a painted finish can easily withstand the daily wear and tear of a busy kitchen for years.
How do I decide if I should do this myself or hire a professional? Consider your time, your tools, and your desired outcome. If you have a week or more to dedicate to the project, enjoy detail-oriented work, and have a good space to do it in, DIY can be very rewarding. However, if you lack the time, don’t have tools like a paint sprayer for a factory-smooth finish, or feel unsure about getting the prep work just right, calling a professional is a smart choice. It guarantees a durable, flawless result without the stress and potential for costly mistakes.
Professional Refinishing Cost Estimates
When you decide to hire a professional, you’re investing in a guaranteed result. A high-quality, professional cabinet refinishing job typically costs between $1,500 and $5,000. This price range reflects the size of your kitchen and the condition of your cabinets, but it consistently covers the meticulous prep work and expert painting needed for a durable, factory-like finish. While it might seem like a significant expense, it’s a fraction of the cost of a full cabinet replacement. This investment not only transforms the look of your kitchen but also provides a long-lasting solution that is difficult to achieve on your own. Our team of professional cabinet painters specializes in delivering this kind of transformative result, ensuring your kitchen looks brand new.
DIY Project Material Costs
If you’re leaning toward the DIY route, your primary expense will be the materials. Even for a small kitchen, you can expect to spend a few hundred dollars just on supplies. This includes a quality bonding primer, durable cabinet-grade paint, sandpaper in various grits, high-quality brushes and rollers, a good degreasing cleaner, painter’s tape, and drop cloths. While this initial cost is much lower than hiring a professional, it’s important to remember that it doesn’t account for your time, which is a significant investment in itself. It also doesn’t include the cost of specialized tools, like a paint sprayer, that are often needed for a truly flawless finish.
Budgeting for Hidden Costs and New Hardware
Whether you’re going the DIY route or hiring a pro, don’t forget to budget for the finishing touches. New hardware is like the jewelry for your cabinets and can make a huge impact on the final look. Knobs, pulls, and hinges can range from a few dollars to over $35 each, and those costs can add up quickly, especially in a larger kitchen. It’s a good idea to set aside a separate part of your budget for these items. This is also the time to account for any other hidden costs, like needing to buy extra paint for touch-ups or renting specific tools to get the job done right.
The Professional Advantage: Timeline and Materials
One of the biggest benefits of hiring a professional team is efficiency. While a DIY project can easily stretch over several weeks, a professional crew can often complete the job in just three to five days for a small to medium-sized kitchen. This is because they have a streamlined process and a dedicated team focused solely on your project. Professionals also have access to commercial-grade materials and equipment, like high-powered sprayers that create an incredibly smooth finish that’s nearly impossible to replicate with a brush and roller. Our team at Boise Commercial & Residential Painting uses proven techniques and top-tier products to ensure your cabinets are not only beautiful but also durable enough to withstand daily use. You can learn more about our commitment to quality by reading our customer reviews.
How to Get an Accurate Quote from a Pro
When you’re ready to explore professional options, the best first step is to get a detailed, in-person estimate. Be wary of any company that gives you a quote over the phone without seeing your kitchen. An experienced painter will want to inspect your cabinets to assess their condition, material, and size, and discuss your vision with you. They should provide a written estimate that clearly outlines the scope of work, the materials they will use, and the total cost. Remember, the cheapest quote isn’t always the best value. Look for a company with a strong reputation for quality and clear communication. We make this process simple by offering a free, no-obligation quote to help you understand the investment required for your project.