
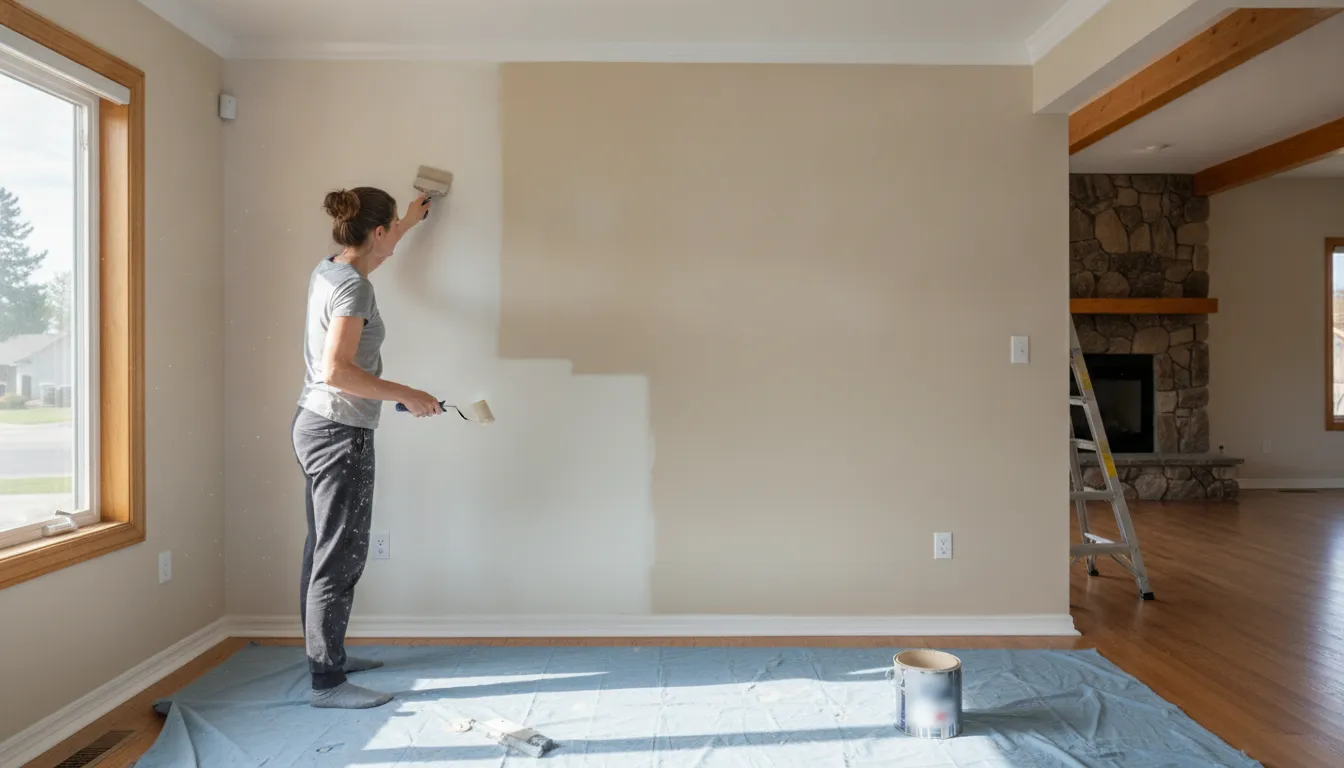
A good room-painting project is won before the first roller pass. Protect the floor and furniture, inspect the walls in strong light, repair and clean the surface, then work in a consistent order from ceiling to trim to walls. Give each coat the recoat time listed on the paint label, and keep ventilation in mind because temperature, humidity, and airflow affect drying.
Need help painting your Boise room? Get a free estimate from Paint Boise.
To understand how to paint a room, follow one complete sequence: gather the right supplies, prepare the room and walls, and apply paint in manageable sections. Allow proper drying, then remove tape, clean your tools, and inspect for touch-ups. That process matters more than rushing through any single step.
Before choosing a brush or opening a can. Take a few minutes to assemble the tools and protective materials that keep the work controlled, clean, and easier to finish.
What Do You Need to Paint a Room?
A smooth room-painting project starts with the right supplies grouped by job. You do not need every specialty tool on the shelf, but skipping protection or surface-preparation materials often creates more work later.
Protection and setup supplies
Begin with durable drop cloths or plastic sheeting for floors and furniture. Painter’s tape helps protect baseboards, trim, and hardware when a clean edge is needed. Use lightweight plastic or a temporary barrier to limit dust and keep the work area contained, especially if other people will be moving through the Boise home. Remove switch and outlet plates rather than painting around them, and keep a screwdriver nearby for that task. A stable ladder or step ladder is safer than stretching from furniture.
Prep and repair tools
For small wall defects, gather spackle or nail-hole filler, a putty knife, fine-grit sandpaper, and a sanding block. These tools help flatten nail pops, shallow cracks, and minor holes before paint goes on. A clean bucket, sponge, mild cleaning solution, and microfiber cloth can remove dust or light grease. Let the surface dry fully after cleaning. If you find active moisture damage, significant drywall damage, or loose material, address the cause before covering it with paint. Paint Boise’s drywall repair guide covers common wall repairs in more detail.
Application tools and materials
| Project stage | Useful tools | Why they matter |
|---|---|---|
| Protect | Drop cloths, tape, plastic | Contain splashes and protect finished surfaces. |
| Prepare | Putty knife, patching compound, sanding paper, cloths | Repair defects and remove dust or residue. |
| Apply | Angled brush, roller, tray, extension pole | Handle edges, broad walls, and safe reach. |
| Finish | Rags, water, sealed containers, labels | Clean tools and preserve paint for touch-ups. |
Most interior rooms require paint, a paint-can opener, a sturdy stir stick. An angled sash brush for corners and trim, and a roller with the appropriate nap for the wall texture. A roller tray and a handheld paint pail make it easier to work in manageable sections. An extension pole can improve reach while keeping your feet on the floor, but use a properly positioned ladder for areas that require it. Choose interior paint for the surface and room conditions. Water-based latex or acrylic paint is commonly used for interior walls, while trim and doors may call for a different sheen.
Cleanup and safety supplies
Keep extra rags, paper towels, a trash bag, and clean water available before opening the can. Plan ventilation, and follow the product label for cleanup and drying guidance. If the home was built before 1978, pause before sanding or scraping old coatings. The EPA advises treating them as potentially lead-based unless testing shows otherwise, so lead-safe professional help may be appropriate.
How Should You Prepare a Room Before Painting?
Good preparation is what separates a clean, durable result from paint that highlights every dent, smudge, and uneven edge. Work methodically, and do not rush past a surface problem just because the wall looks acceptable from across the room.
- Clear the room and protect what stays. Remove as much furniture as possible, then cover remaining pieces and the floor with durable drop cloths or plastic sheeting. Take down curtains, rods, wall decor, and switch or outlet covers. Keep electrical plates and small hardware together so they return to the right locations. Open a window or use exhaust ventilation when practical, and use a properly positioned ladder rather than reaching from an unstable surface.
- Inspect every surface under strong light. Look for loose or peeling paint, nail pops, cracks, holes, stains, glossy areas, and signs of moisture. A new coat will not correct the cause of a leak or recurring dampness. Resolve that underlying problem before repairing and painting. If the home was built before 1978, treat old paint as a potential lead hazard until it has been professionally assessed. Avoid disturbing suspect material without the appropriate lead-safe guidance.
- Repair and smooth the defects. Remove loose material, fill holes and cracks with a suitable patching compound, and let repairs dry fully. Sand patched areas until they are flush with the surrounding wall, feathering the edges so they do not show through the finish. For a broader overview, see this guide on repairing drywall before painting. Use low-dust practices when sanding, especially in an occupied home, and clean the dust from nearby surfaces afterward.
- Clean away dust, grease, and residue. Wipe or wash the walls as the surface and room require, paying extra attention to kitchens, hallways, and areas around switches and door handles. Grease and dirt can interfere with adhesion. Do not paint over mold or active moisture damage. Address the source, clean affected hard surfaces appropriately, and allow everything to dry completely.
- Decide whether primer is warranted. Primer deserves consideration over fresh patches, stains, porous drywall, glossy surfaces, dramatic color changes, or areas with uncertain adhesion. It can help create a more uniform base, but it is not automatically required for every repaint. Choose a product that matches the surface and follow its label for application and drying guidance. This primer guide explains when to use paint primer in more detail.
Before opening the paint, run your hand lightly over the wall and inspect it again from several angles. The surface should be clean, dry, sound, and free of loose dust. Taking an extra hour to correct preparation issues is usually easier than trying to hide them after the first coat.
What Is the Correct Order to Paint a Room?
Once the room is protected and the surfaces are ready, the order of application keeps fresh paint off finished areas. The most reliable sequence for learning how to paint a room is ceiling first, trim and doors next, and walls last. That approach lets you work from the highest surface downward and makes it easier to cover small drips or brush marks as you go.
1. Paint the ceiling first
Start with the ceiling before moving to the walls. Use a stable ladder or extension pole, and keep the room ventilated while you work. Apply paint in manageable sections, overlapping each pass while the previous one is still workable. Avoid overloading the roller, since excess paint can spatter or run onto walls that have already been finished.
2. Finish the trim and doors
After the ceiling has dried according to the product label, paint the door slabs, casings, baseboards, and other trim. An angled brush gives you control near corners and edges. Work carefully around hinges, hardware, outlets, and fixtures, removing or protecting anything that should not receive paint. Satin or semi-gloss finishes are commonly recommended for trim and doors, but the product should match the surface and the finish you want.

3. Cut in, then roll the walls
Paint the walls last. Begin by cutting in with a brush along the ceiling line, corners, trim, and around fixed features. Then load the roller and fill that same manageable section before moving on. Keeping the cut-in edge wet helps the brushed and rolled areas blend instead of leaving a visible border. Roll with consistent pressure and avoid repeatedly working paint that has started to set.
Continue around the room in sections rather than cutting in every edge at once. This keeps the working edge open and gives you a more even finish. Follow the label for recoat guidance, and allow the room conditions, coating thickness, ventilation, and surface to determine when another coat is appropriate. If the ceiling is high, repairs are extensive, or you cannot maintain a consistent wet edge, professional interior painting can make the sequence safer and more predictable.
How Do You Roll Walls Without Lap Marks?
Lap marks usually appear when one section of paint begins drying before the next section blends into it. The goal is to keep a wet edge, work in manageable areas, and maintain the same technique from one wall section to the next. This matters as much as choosing the right paint when learning how to paint a room.
Start by filling the roller evenly. Pour paint into the tray, roll through the deep well, then move over the ridged slope several times to distribute the paint and remove excess. The cover should be loaded, not dripping. An overloaded roller creates splatter and heavy edges, while a nearly dry roller forces you to press harder and can leave uneven coverage.
Cut in around corners, trim, outlets, and ceiling lines before rolling the adjacent section. Keep the cut-in paint workable while you bring the roller into it. Do not cut in the entire room and leave it to dry before rolling. Instead, complete one manageable area at a time so the brushwork and roller texture can merge.

Use overlapping passes and consistent pressure
Work in a section that you can comfortably reach without stretching. Apply the roller in a loose W or overlapping pattern, then smooth the area with light, parallel passes. Overlap each new pass slightly into the previous one while the paint is still wet. Keep your pressure steady. Pressing harder at the end of a pass can squeeze paint from the roller and create visible bands. Especially near corners and the top or bottom of the wall.
Reload the roller before it becomes dry, but do not keep rolling an area after the paint has begun to set. Excessive back-rolling can disturb the finish and make texture inconsistent. If a section needs another coat, follow the product label rather than guessing at a recoat schedule.
Handle transitions carefully
At inside corners, roll as close as practical without forcing the cover into the adjoining wall. Blend the edge with a brush while it is fresh. At doors, windows, and baseboards, keep the roller parallel to the trim and avoid building a ridge against it. If you must stop, finish at a natural break such as a corner or full wall boundary, not in the middle of an open wall.
How Long Does It Take to Paint a Room in Boise?
There is no single answer because the clock starts before the first roller pass. A small room with sound, clean walls may move quickly, while a larger room with repairs, trim, or furniture that must be protected takes longer. Paint Boise categorizes a simple single-room repaint as approximately one to two days, but preparation, drying, room size, and project scope can change that estimate. Expert interior painting follows the same principle: the finish matters more than forcing every project into a one-day promise.
What changes the schedule?
- Room size and detail: More wall area means more cutting in, rolling, edging, and cleanup. Windows, doors, built-ins, high walls, and detailed trim add careful brushwork.
- Repairs: Nail pops, cracks, holes, stains, or peeling paint need to be corrected before coating. Filler, primer, or patched areas may need to dry before sanding and painting. If moisture caused the damage, correct that underlying issue first instead of sealing it beneath new paint.
- Number of coats: The color change, surface condition, and product can determine whether one coat is sufficient or additional coverage is needed. Each coat requires the manufacturer’s recommended recoat window.
- Room conditions: Ventilation, temperature, humidity, coating thickness, and the surface itself all affect drying. Boise’s indoor conditions can vary by season, so keep air moving safely and follow the label for the specific product.
Is one day realistic?
It can be. But it is not a universal promise. “Dry” does not always mean “ready for another coat,” and “recoat-ready” does not mean the finish has fully cured. Avoid placing furniture against a freshly painted wall or washing it until the coating has had the cure time specified by the product guidance. Plan extra time when repairs are extensive, ventilation is limited, humidity is high, or the room needs multiple coats. A realistic schedule leaves room for drying, inspection, touch-ups, and cleanup rather than treating them as optional.
What Should You Do After the Last Coat?
Cleanup is part of the finish, not an afterthought. Start by removing painter’s tape carefully while the final coat is set but before the edge becomes difficult to separate. Pull the tape back slowly at a low angle. If paint has bridged onto the tape, score that edge lightly with a sharp utility knife rather than tearing the fresh finish.
Clean brushes, rollers, trays, and other tools according to the paint manufacturer’s directions. Water-based latex or acrylic paint generally calls for water and thorough rinsing, while other products may require a compatible cleaning solvent. Do not pour leftover paint or solvent down a drain. Keep ventilation going while you clean, and follow the product label for disposal guidance.
Wait until the painted surfaces are dry before reinstalling outlet and switch plates. Tightening hardware against soft paint can leave marks, pull at the edges, or trap moisture. When the room is accessible again, inspect the walls, trim, and corners in daylight. Natural light can reveal thin coverage, roller texture, small drips, or spots missed under artificial lighting.
Save usable leftover paint in a tightly sealed container. Label it with the room, color, finish, and date, then store it where temperature swings will not damage the coating. A small amount is useful for future touch-ups. Before applying one, clean the area and feather the new paint into the surrounding surface. For a documented professional process, including cleanup and a final walkthrough with touch-ups, review house painting services from Paint Boise.
Ready to plan your room-painting project? Request a free estimate from Paint Boise.
Frequently Asked Questions
What should you paint first in a room?
Complete room protection and wall repairs first. Then paint the ceiling, followed by trim and doors, and finish with the walls. On each wall section, cut in around edges before rolling the open surface while the paint remains workable.
Can you paint a room in one day?
Sometimes, but a one-day schedule depends on the room size, surface condition, number of coats, ventilation, and the product’s recoat instructions. Do not rush the next coat. Follow the label and allow the paint to dry under the actual conditions in the room.
Can one person paint a room successfully?
Yes, one person can handle a typical room by working in manageable sections and keeping supplies organized. Plan extra time for moving furniture, repairing walls, cutting in, cleanup, and waiting between coats. A second person can make setup and moving larger items easier, but careful sequencing matters more than speed.
Do you need to tape everything before painting?
No. Tape is useful for protecting clean, straight boundaries, but a steady angled brush can produce controlled edges around some trim and fixtures. If you use tape, press the edge firmly, avoid letting paint build up against it. And remove it carefully according to the paint’s condition so you do not lift fresh coating.
When should you hire a professional painter?
Consider professional help for major drywall damage, high or difficult-to-reach areas, uncertain surfaces, or suspected lead paint. For homes built before 1978. The EPA advises treating existing paint as lead-containing unless an inspection shows otherwise and hiring a lead-safe certified contractor for work involving lead-based paint: EPA lead-safe renovation guidance.
Ready to Get Started on Your Room?
A professional estimate can help you plan the right approach when repairs, tall walls, or a consistent finish make the project more involved. For a Boise room-painting or interior painting project, request a free estimate from Paint Boise. You can also call (208) 254-6615 to talk through the space and your goals.