Scuffed walls and old colors are common reasons for empty units in Treasure Valley apartments. Fresh paint gives a rental home a clean feel that gets new leases signed fast. A clear plan keeps your repair team on track and on budget.
An apartment turnover painting checklist helps property managers move new tenants into fresh units without missing small things. This tool lists every step from the first walk through to the final touch up. You should look for wall damage, peeling paint, and scuff marks that need a fix before you start. The standard turnover process includes checking all walls, ceilings, doors, and trim for wear. Using a set list makes it easy to schedule crews and buy paint ahead of time. This saves you from making extra trips to the store or dealing with slow work. A good list also helps you track costs and record unit health for security deposits. Following these steps ensures your rentals look great and stay ready for the next lease.
Managing many unit updates at once is hard without a plan. Our Apartment turnover painting checklist: start with the inspection shows you how to find problem areas before the crew arrives. This early check lets you spot hidden issues like water stains or mold before they cost too much. The process starts with
Apartment turnover painting checklist: start with the inspection
The first step in any professional apartment painting services plan is a full walk through. You should do this right after a tenant moves out and takes their things. This check lets you see just what work the unit needs to be ready for the next person. It helps you set a clear budget and a schedule for your team. You want to find every scuff, hole, and stain on the walls or ceilings. A clear plan keeps your empty unit time short and your costs low.
Tracking the move-out state
Start by taking photos of every room in the unit. You need a full record of the wall state before any prep work starts. Good photos help you choose if a tenant should pay for damage. They also show your team where they need to spend the most time. You should look at the walls, ceilings, and all doors. Check the trim and baseboards for chips or marks too. Note any spots with deep holes or large stains that might need extra help to fix.
If your unit was built before 1978, you must check for lead paint. The Environmental Protection Agency has strict rules for these older homes. Lead paint can be a health risk if it chips, peels, or cracks. You must follow safe work habits to protect your staff and all future tenants. If you find old paint that is failing, you might need a trained lead pro to help you. Tracking these risks early stops delays and keeps your unit safe.
Grading wall and surface wear
Not every unit needs a full repaint after each tenant. You can save money by grading the wear on the walls and wood trim. You should group the damage into three main levels:
- Level one: Light scuffing that a magic eraser can often fix.
- Level two: Minor marks that need touch-ups in high-traffic spots.
- Level three: Heavy damage, like large holes or many stains.
If most walls have level three wear, a full repaint is often the best choice for a fresh look. Look closely at the kitchen and bathroom walls too. These rooms often have the most wear from steam and grease. These things can make paint peel or fade faster than in other rooms. You should also check behind where beds and sofas once sat. Tenants often leave marks when they push heavy things against the walls. Finding these spots early helps you buy the right amount of paint and tools for the job.
Matching paint color and sheen
Getting a perfect match is vital for a clean and pro look. You need to know the exact color and sheen used in the unit. If you do not have the first paint cans, you can take a small chip to a paint store. They can scan the chip to find the right mix for you. Flat paint is common on ceilings, but most apartment walls use eggshell or satin finishes. These sheens are easier for tenants to clean and they resist wet air well.
Matching the sheen is just as important as matching the color. If you use a shiny paint for a touch-up on a flat wall, the spot will stand out. This looks messy and can make the unit feel cheap. Always test a small spot and let it dry before you paint the whole room. This makes sure the finish looks smooth and fresh for the next tenant. Steady results help you keep the property value high here in the Treasure Valley.
Should you touch up or repaint the entire apartment?
Choosing between a touch-up and a full repaint is a key part of your unit turnover painting checklist. Every day a unit sits empty, you lose money. But if the walls look bad, you might struggle to find a new tenant. You must balance the speed of the job with the quality of the finish to keep your Treasure Valley homes in top shape.
When to choose touch-up painting
Touch-up painting works best when the current paint is still in a good state. If the walls only have a few small scuffs or nail holes, a quick fix is often the best choice. This path saves you both time and money. It lets your crew finish the unit fast so you can get a new lease signed.
But touch-ups can be tricky. Paint colors fade over time due to sunlight and air. If you use a fresh can of paint on an old wall, the new spot might look bright. This can make the room look patchy or dirty. To avoid this, only use touch-ups if you have the old paint and the walls are less than two years old. For larger units, our expert apartment painting services can help you match colors well.
Benefits of a full repaint
A full repaint gives the entire unit a fresh start. It removes all smells and hides every stain from the past tenant. This makes the home feel new again. While it costs more at first, a clean look can help you ask for a higher rent price. It also shows tenants that you take great care of the building.
If the walls have many deep marks, big stains, or large holes, a full repaint is the only way to get a smooth look. It also makes future turnovers easier. When you use the same color and brand across all units, your team will always know just what paint to buy. You can also see more tips on painting project setup to make the job go faster.
| Factor | Touch-up Painting | Full Repaint |
|---|---|---|
| Work Speed | Fastest | Moderate |
| Project Cost | Lower | Higher |
| Look and Quality | Can look patchy | Looks new and smooth |
| Tenant Appeal | Standard | Very High |
| Wall State | Best for small scuffs | Best for many marks |
Running older units safely
If you run older homes in Boise, you must think about safety. Most homes built before 1978 have some form of lead-based paint. When this paint chips or cracks, it can create a health risk for your tenants. U.S. laws from the EPA require that workers use safe habits when they move old paint. This is why hiring pros is a smart move for your team.
Moving lead paint can create dust that is hard to see but easy to breathe in. If your unit turnover needs sanding or scraping old walls, you need a crew that knows the rules. Using a team trained in lead-safe work helps keep your property legal and your tenants safe. This protects your business and keeps your property value high over time.
Coordinate repairs, prep, and painting in the right order
Handling an apartment turnover needs a tight plan. You must time your trades well to avoid late starts. There is a clear **apartment turnover painting checklist** that helps you stay on track. This guide shows how to order repairs, prep work, and painting for the best finish.
Fixing damage before the first coat
Before you pick up a brush, you must fix the walls. Drywall fixes create dust. You should finish these fixes before you start any cleaning. If the building is old, safety is a key thing. The EPA says most homes built before 1978 have lead paint. You must use safe work habits to handle these areas. Working with professional apartment painting services makes sure that your team follows these rules. They can find and fix issues like peeling paint or deep cracks in the wood.
Once the repairs are done, you can move to cleaning. Paint will not stick to grease or dust. You should wipe down the walls and trim with a damp cloth. If the kitchen is greasy, use a mild soap to cut through the film. This step is vital for a finish that lasts. It also makes the next steps much simpler for the crew.
- Start with a full walk-through to find every hole or crack. You should check the walls, ceilings, and trim for any signs of wear or damage.
- Make all needed repairs to the drywall and wood walls first. Sand these areas smooth once the patch is dry to create an even base for the paint.
- Clean the walls to remove dust, grease, and grime. A clean wall helps the new coat of paint bond well and stay smooth.
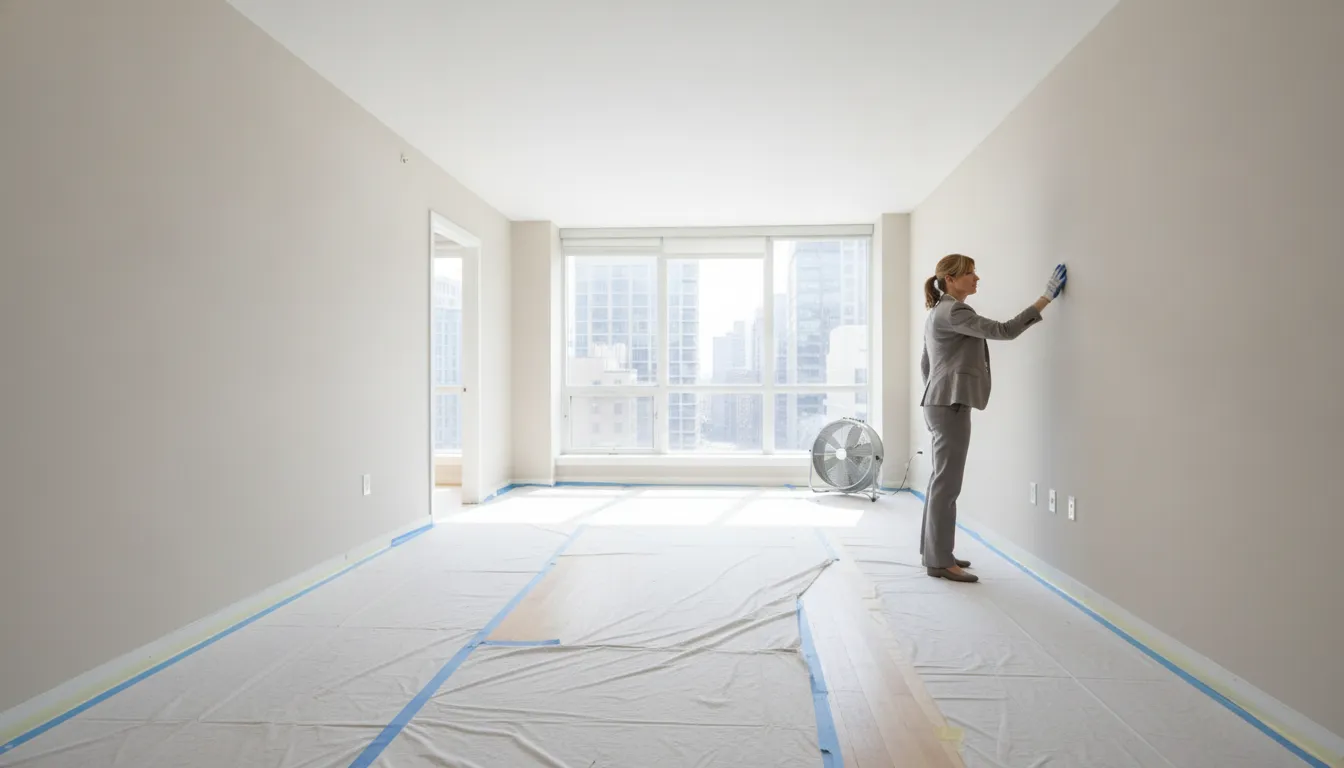
- Mask off the floors, windows, and light fixtures. Use strong tape and plastic to keep the paint only where you want it to go.
- Paint the ceilings first, then move to the walls and trim. This order keeps drips from spoiling the work you have now done.
- Take down the tape and clean the floors once the paint is dry. Check the unit one last time to make sure every corner looks sharp and clean.
Guarding floors and fixtures
Good prep work is the key to a clean job. You should cover every part of the room that you do not want to paint. This includes floors, ceiling fans, and outlet covers. Taking the time for painting project preparation saves you from big messes later. It is much faster to move a drop cloth than it is to scrub paint off a carpet.
You should also check the light switches and outlet covers. Make sure they are secure and free of damage. If they are old or cracked, replace them before the new tenant moves in. This step makes the unit feel new. It shows that you care about the small things.
Final steps for a new tenant
Final floor care should be the very last thing you do. Whether you have carpet or vinyl, wait until the paint is fully dry. This keeps dust from floor cleaning away from fresh paint. You might need a tool to deep clean the carpets. For hard floors, a simple mop and dry will work best. The unit is now ready for the next tenant.
How long should turnover painting take?
Most apartment turnover painting projects take one to three days to finish. The exact time depends on the size of the unit and the amount of wall damage. A small studio might only need one day, while a big three-bedroom unit could take longer. Proper painting project preparation can help speed up the work and keep your schedule on track.
Factors that change the timeline
A few things impact how fast a crew can work. The state of the walls is often the biggest factor. Deep holes or scuffs from furniture need extra repair time before the first coat of paint. Professional teams must also check for lead-based paint in any building built before 1978. These older sites need safe work steps that can add time to the job, as noted by the EPA.
Airflow and humidity also matter. In the Treasure Valley, dry air usually helps paint dry fast. But if the air is damp, you might need extra hours between coats. Using fans can help dry floors and walls more quickly, which lets crews finish their work sooner. This allows your team to move on to cleaning or floor repairs without waiting too long.
Efficient team communication
Clear handoffs between your staff and the painters will save you time. Make sure the unit is clear of trash and old furniture before the painters arrive. This simple step prevents delays and lets the crew start work right away. When you use professional apartment painting services, every team member knows what to do and when to do it. This keeps the unit from sitting empty for too many days.
You should also check the work as soon as it is done. Looking at the walls, doors, and woodwork right away helps find minor issues before the new tenant moves in. Fast checks ensure the unit is ready to rent and help you keep high property standards in Boise. Good timing and clear plans are the best ways to get your units back on the market fast.
Copyable apartment turnover painting checklist
A fast turnover is the key to keeping your rental income steady. Using a clear apartment turnover painting checklist helps your team work faster. It also ensures you do not miss small spots that could bother a new tenant. Our team uses these steps to get units ready for rent in Boise and the Treasure Valley area.
Initial walk and wall check
Start with a full walk through the unit to find every area that needs work. Look at the walls, ceilings, doors, and all woodwork to see if the paint is peeling or dirty. You should also check that all doors and windows work well before you start to paint. For older Boise homes, keep in mind that units built before 1978 may have lead-based paint which needs special safety care.
Mark deep holes or cracks that need extra patch work. Check the kitchen and bathroom for water damage near the sinks or tubs. If you see peeling paint on cabinets, plan to sand them down for a smooth finish. You can also check our painting project preparation guide for more tips on starting a job right.
During the walk, test all light switches and outlets to make sure they are safe. A good check includes verifying that all cabinets open and close without snagging. This is the time to list every item that needs a fix before the new tenant moves in. Taking clear notes now will save you a lot of time once the painting starts.
Surface prep and repair
Good prep work makes a big difference in how long the paint lasts. Remove all outlet covers and light switch plates so you do not get paint on them. Wash the walls with a mild soap to get rid of grease or dust. Sand any rough spots and patch holes from old nails or tenant wall art. This step helps the new coat of paint stick well to the wall surface.
Tape off the trim, baseboards, and ceilings if you are only using one color. Cover the floors and any furniture with clean drop cloths. Use a high quality primer on fresh patches so the final color looks even. If the prep work feels too big for your crew, you may want to look into hiring commercial painters to speed up the work.
Make sure the room has fresh air while you work. Open the windows if the weather is nice to help the prep materials dry fast. Check that the room is bright enough to see small cracks or uneven spots in the drywall. Spending extra time on these small details will lead to a much better result for the new tenant.
Painting and quality check
When you are ready to paint, start with the edges and corners first. Use a roller for the main wall areas to get a smooth and fast finish. Apply two coats for the best look and to cover old marks or scuffs. For rental units, a neutral color with a satin finish works well because it is easy to clean. Most professional apartment painting services suggest these tough finishes for high traffic rooms.
Once the paint is dry, do a final check with a bright light. Look for thin spots, drips, or rough edges that need a quick fix. Clean up any paint that may have dripped on the floor or trim. Put the outlet covers back on and make sure they are secure and free of damage. This last look ensures the unit is in top shape for the next person who lives there.
Walk through the unit one more time after you clean up your gear. Check that all doors still latch right and that no paint is on the hinges. A clean, fresh unit is the best way to welcome your new tenants. It shows them that you care about their new home and will maintain the property well.
What belongs in the final painting QA walk-through?
The final walk-through is the most key part of your apartment turnover painting checklist. This step makes sure the unit is ready for a new tenant. It also stops costly call-backs once someone moves in. You should walk through every room after the paint is dry to check the work. Bring a bright flashlight to help you see small flaws that regular room light might miss.
Check paint coverage and lighting
Check the walls and ceilings from many ways. Look for “holidays,” which are spots where the paint is too thin or missing. These often happen near corners or along the top of the wall. If you see shadows or the old color peeking through, the crew needs to put on another coat. Top-tier professional apartment painting services will usually catch these spots before you do.
Watch for drips, runs, or “ropiness” in the finish. These marks happen when the painter uses too much paint or moves too slowly. Large drips on the wall are hard to fix once they fully dry. Make sure the texture is smooth across the whole surface. If you find rough spots, have the painters sand them down and touch them up before you sign off on the work.
Check trim, doors, and hardware
Doors and trim need extra care during the walk-through. Open and shut every door in the unit to make sure they swing freely. Paint can often cause doors to stick if they are closed before the finish is dry. You must check that all doors are operational and latch correctly. If paint has filled the strike plate, the latch might not click into place.
Look at the edges where the wall meets the trim. These lines should be sharp and straight. “Bleeding” occurs when paint seeps under the painter’s tape or the brush slips. Also, check the light switch and outlet covers. Ensure they are secure and free of paint spots. If you see paint on the hardware, the crew should clean it off now to keep a professional look.
Review cleanup and safety rules
A good paint job includes a clean workspace. Look for paint spills on the floors or carpets. Check the windows for “overspray” or stray brush marks. The kitchen and bathroom sinks should be clear of paint leftovers as well. If the unit was built before 1978, you must follow special safety rules. The Environmental Protection Agency needs trained ways to handle lead-based paint safely.
Finally, take photos of each room for your notes. This proof shows the unit was in top shape before the new tenant arrived. Use a punch list to track any small fixes that still need to happen. Once you are happy with the results, you can approve the invoice and start the leasing process. A thorough walk-through keeps your property value high and your tenants happy.
Make the next apartment turnover easier
Planning for your next unit turnover starts long before the current tenant moves out. By setting up a clear system now, you can save time and money later. Working with professional apartment painting services helps you keep your apartment turnover painting checklist on track. When every unit uses the same process, your team can work faster and make fewer mistakes.
Use standard colors and sheen
One of the best ways to make turnovers easy is to pick a standard paint color for all your units. If every room in every building uses the same shade, you do not have to guess which paint to buy. This makes touch-ups much easier for your crew.
Keeping a small stock of your standard paint on hand lets you fix small scuffs without a trip to the store. This small step can shave hours off your move-out timeline. Picking these items ahead of time means you always know what to order.
Choosing the right sheen is just as vital as the color. Many managers use a flat finish for ceilings and a satin or egg shell finish for walls. These sheens are easy to clean and hold up well to daily wear.
Using high-quality paint ensures the finish lasts through several rentals. This reduces the need for a full repaint every time someone moves out. These choices keep your units looking fresh for longer.
Keep digital records and photos
Keeping good records of your paint projects is a smart move for any property owner. Store digital photos of each unit after a fresh paint job. These photos serve as a base for future checks.
They help you show exactly what a unit looked like when a tenant moved in. This makes it much easier to decide if wall damage is normal wear or something that needs a repair fee. Clear records protect both you and your tenants.
Your records should also include specific paint codes and the date of the last full coat. If your property was built before 1978, you must also track lead-safe work records. This helps you stay ready for any safety check.
The EPA requires certification for any work that disturbs lead-based paint in these older homes. Keeping these documents in one place ensures you stay in line with safety rules. Digital tools make it simple to share these details with your painting team at any time.
Improve vendor talks
Clear talks with your painting crew keeps projects on track. Give your team a clear list of work for each turnover to help with painting project preparation. This list should show exactly which walls, ceilings, and trim need work.
Using a set template for these tasks prevents mistakes and missed spots. When your painters know exactly what you expect, they can finish the job more quickly. This speed helps you get units back on the market faster.
Building a long-term bond with a local team is also helpful. A crew that knows your buildings will work faster than a new team every time. They will already know your color schemes and favorite sheens.
This level of trust helps you get units ready with less stress. Clear plans and reliable partners turn a stressful turnover into a smooth, routine task.
Frequently Asked Questions
Are property managers required to use lead-safe painters for older buildings?
Yes. According to the EPA, anyone paid to work on pre-1978 homes that moves old paint must be trained in safe work habits. This rule is very important because old lead-based paint can make harmful dust and chips when you sand or scrape it. Using a pro who has this training helps keep your staff and tenants safe from lead health risks.
How can I make paint dry faster to speed up the turnover process?
Good air flow is the best way to help paint dry quickly. You should open windows or use large floor fans to keep air moving while you work. Using a machine to take water out of the air can also help if it is very damp. Fast drying times let you put on a second coat much sooner. This helps you get the unit back on the market in less time.
How do I deal with peeling paint on kitchen or bathroom cabinets?
Peeling paint on cabinets is often a sign of high heat or steam. You must sand the doors down to a smooth surface before you put on new paint. Use a high quality primer made for wood to make the top coat stick well. This fix stops future peeling and keeps your kitchen looking new. Taking care of these small tasks helps you maintain high property values here in Boise.
What type of paint finish is easiest to clean for new tenants?
A satin or eggshell finish is usually the best choice for apartment walls. These finishes are tough and easy to wipe down with a damp cloth if a tenant leaves a mark. Flat paint is hard to clean and can show scuffs much faster. Using a more durable finish can save you money because you may not need to repaint as often. It keeps the unit looking fresh for a longer time.
How far in advance should I plan for a painting turnover?
You should start planning about 60 to 90 days before the lease ends. According to Avail, this is when you should check if your current tenants plan to stay or move out. Knowing this early lets you book a paint crew and buy the tools you need. It helps you keep your vacancy time short so you do not lose rental income.
Ready to speed up your Boise apartment turnover painting?
Every day that a rental unit sits empty is a day you lose rental cash and profit that you can simply never get back again. A slow or poor paint job will push back your move-in date and cost you many hundreds of dollars in lost income each month now. When you set up your next paint job with our expert team now, you save time and get your units back on the market faster.
Ready to get your units rent-ready? Follow this link to request a painting estimate and book your next project in the Treasure Valley today. We help you fill vacancies fast with high-quality work that lasts for years to come.